INSTALLATION
Removal / installation · Vehicles built Jul 2007 – Jul 2009
Versions by build date: Jul 2007 – Jul 2009 Aug 2009 – Oct 2010 from Nov 2010
| 1.
INSTALL NO. 1 ECM BRACKET |
 |
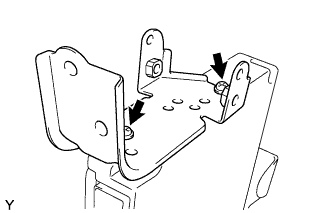
- Install the No. 1 ECM bracket with the 2 screws.
-
Torque:
- 3.0 N*m{
32 kgf*cm
, 28 in.*lbf
}
| 2.
INSTALL NO. 2 ECM BRACKET |
|
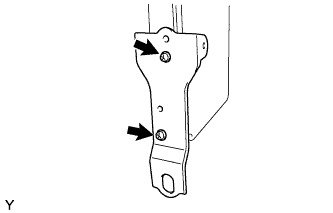
- Install the No. 2 ECM bracket with the 2 screws.
-
Torque:
- 3.0 N*m{
32 kgf*cm
, 28 in.*lbf
}
| 3.
INSTALL ECM |
|
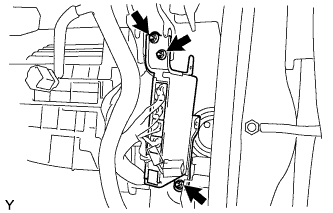
- Install the ECM with the 3 nuts.
-
Torque:
- 8.0 N*m{
82 kgf*cm
, 71 in.*lbf
}
Connect the 5 connectors.
| 4.
INSTALL 4 WHEEL DRIVE CONTROL ECU NO.2 (for Automatic Transmission 4WD) |
|
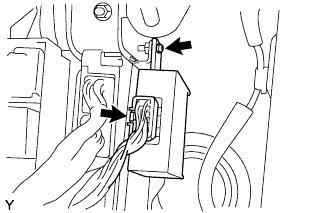
Install the four wheel drive control ECU with the bolt.
-
Torque:
- 8.0 N*m{
82 kgf*cm
, 71 in.*lbf
}
Connect the connector.
| 5.
INSTALL GLOVE COMPARTMENT DOOR ASSEMBLY
|
|
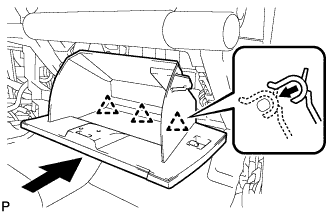
- Install the glove compartment door assembly with the 3 hinges while holding it horizontal.
- Slightly flex the upper part of the glove compartment door assembly, and install the glove compartment door assembly.
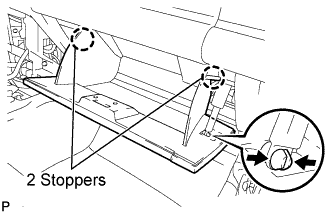
Install the glove compartment door stoppers onto the glove compartment door.
| 6.
CONNECT CABLE TO NEGATIVE BATTERY TERMINAL |
|
-
Torque:
- 3.9 N*m{
40 kgf*cm
, 35 in.*lbf
}