2011-2016 FJ Cruiser · Service Manual BODY

REMOVAL

Removal / installation · Vehicles built Nov 2010 – Jul 2012

Versions by build date: Jul 2007 – Oct 2010 Nov 2010 – Jul 2012 from Aug 2012

HINT:
  1. Use the same procedure for both the RH and LH sides.
  2. The procedure described below is for the LH side.


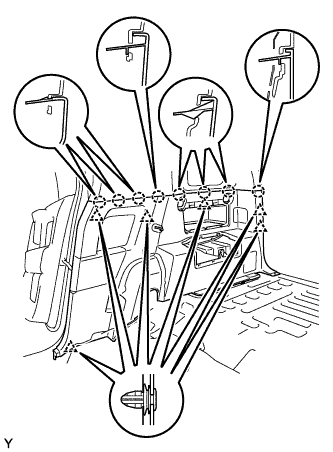
1. REMOVE REAR SEATBACK BOARD CARPET ASSEMBLY RH (for RH Side)

  1. B130749
    Pull the rear seatback lock release button and tilt the rear seatback forward.

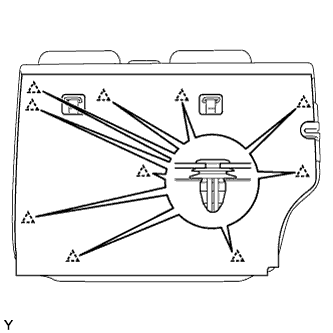
  1. Disengage the 10 clips and remove the rear seatback board carpet.


2. REMOVE REAR SEATBACK ASSEMBLY RH (for RH Side)

  1. B135127
    Pull up the rear seatback.

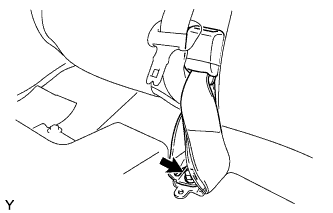
  1. Remove the bolt and the anchor plate of the rear center seat outer belt.

  1. B130750
    Remove the rear seat inner belt from the rear seatback holder.

  1. Pull the rear seatback lock release button and tilt the rear seatback forward.

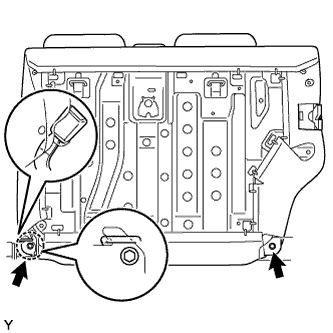
  1. Remove the 2 bolts.

  1. Disengage the hook and remove the rear seatback.


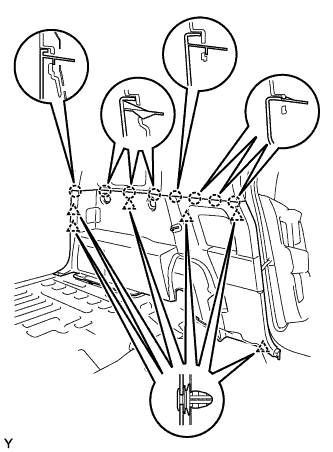
3. REMOVE REAR SEATBACK BOARD CARPET ASSEMBLY LH (for LH Side)

  1. B130720
    Pull the rear seatback lock release button and tilt the rear seatback forward.

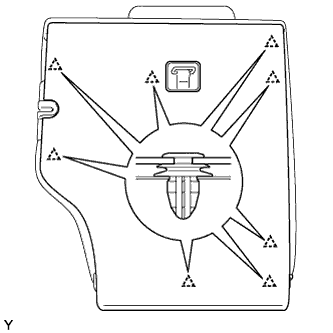
  1. Disengage the 8 clips and remove the rear seatback board carpet.


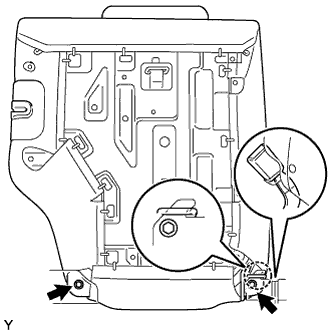
4. REMOVE REAR SEATBACK ASSEMBLY LH (for LH Side)

  1. B130721
    Remove the rear center seat inner belt from the rear seatback holder.

  1. Remove the 2 bolts.

  1. Disengage the hook and remove the rear seatback.


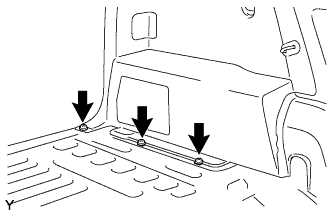
5. REMOVE REAR FLOOR BOARD

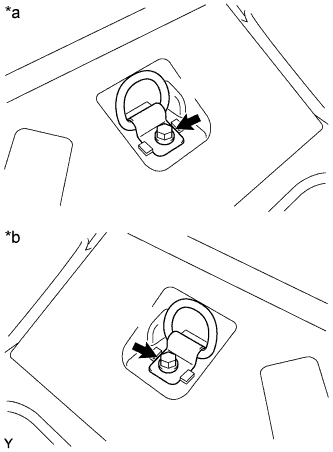
  1. B135073E05
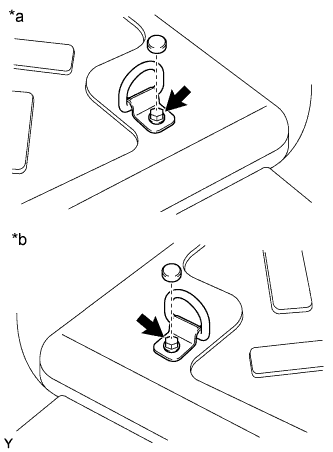
    Remove the bolt and the luggage hold belt striker.
    Text in Illustration 
    *a
    for RH Side
    *b
    for LH Side

    HINT:
    Use the same procedure for both sides.

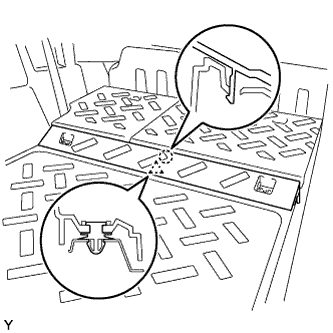
  1. B135075
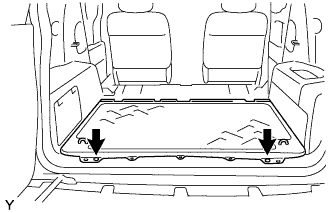
    Disengage the clip and the claw and remove the rear floor board.


6. REMOVE REAR FLOOR MAT SUPPORT PLATE

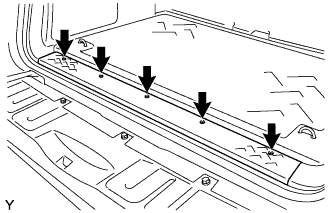
  1. B130592
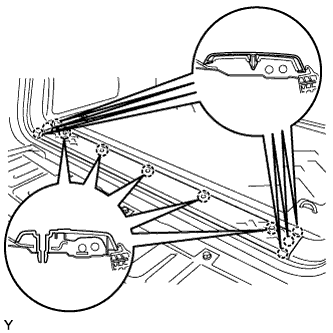
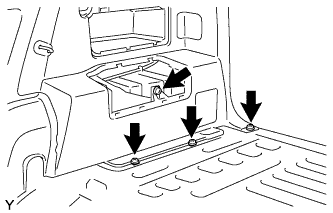
    Remove the 5 screws.

  1. B130593
    Disengage the 11 claws and remove the rear floor mat support plate.


7. REMOVE LUGGAGE HOLD BELT STRIKER ASSEMBLY

HINT:
Use the same procedure for both sides.

  1. B179163E04
    Remove the cap.
    Text in Illustration 
    *a
    for RH Side
    *b
    for LH Side

  1. Remove the bolt and the luggage hold belt striker.


8. REMOVE REAR FLOOR MAT ASSEMBLY

  1. B130594
    Using a clip remover, remove the 2 clips and the rear floor mat.


9. REMOVE FRONT DOOR SCUFF PLATE

HINT:
Use the same procedure as for the RH side.


10. REMOVE REAR DOOR SCUFF PLATE

HINT:
Use the same procedure as for the RH side.


11. REMOVE FRONT DOOR OPENING TRIM WEATHERSTRIP

HINT:
Use the same procedure as for the RH side.


12. REMOVE DECK SIDE GARNISH (w/ Woofer)

  1. B271490
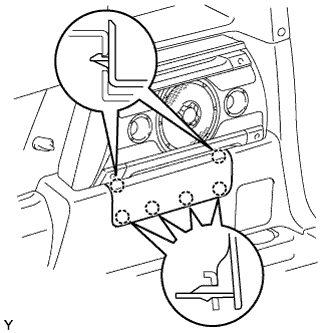
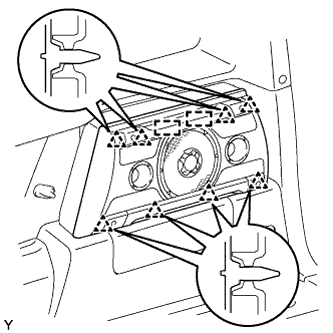
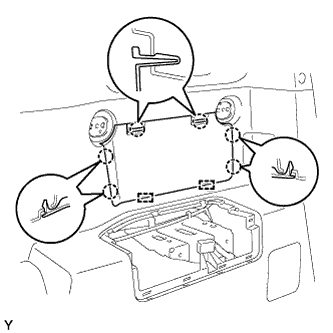
    Disengage the 6 claws and remove the rear deck side garnish.


13. REMOVE SPEAKER MOUNTING COVER (w/ Woofer)

  1. E220885
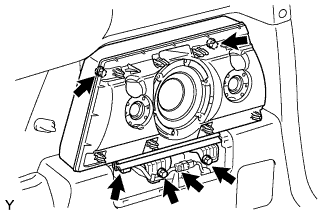
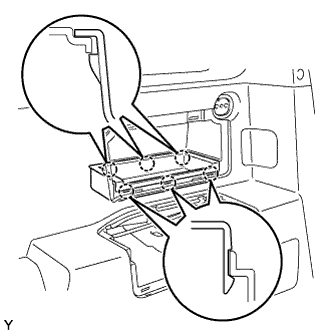
    Disengage the 8 clips and 2 guides and remove the speaker mounting cover.


14. REMOVE AMPLIFIER BOX SPEAKER ASSEMBLY (w/ Woofer)

  1. E220886
    Disconnect the connectors.

  1. Remove the 4 screws and the amplifier box speaker.


15. REMOVE PACKAGE HOLDER NET HOOK

B271495E01

HINT:
Use the same procedure to remove all the package holder net hooks.

Text in Illustration 
*a
for RH Side without Woofer
*b
for LH Side
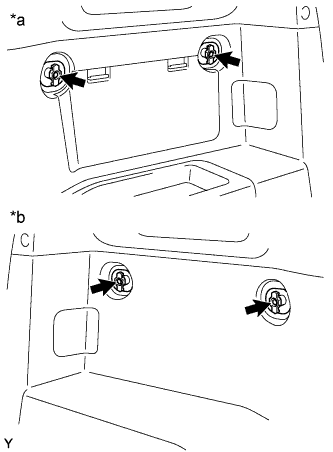
  1. Remove the screw and the package holder net hook.


16. REMOVE QUARTER TRIM POCKET TRAY (w/o Woofer)

  1. B130611
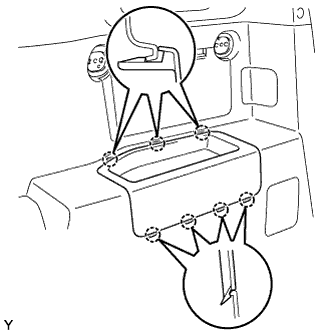
    Disengage the 7 claws and remove the quarter trim pocket tray.


17. REMOVE SIDE TRIM COVER (w/o Woofer)

  1. B267111
    Disengage the 6 claws and the 2 guides and remove the side trim cover.


18. REMOVE QUARTER TRIM POCKET (w/o Woofer)

  1. B130613
    Disengage the 6 claws and remove the quarter trim pocket.


19. REMOVE LAP BELT OUTER ANCHOR COVER

B130614E05

HINT:
Use the same procedure for both sides.

Text in Illustration 
*a
for RH Side
*b
for LH Side
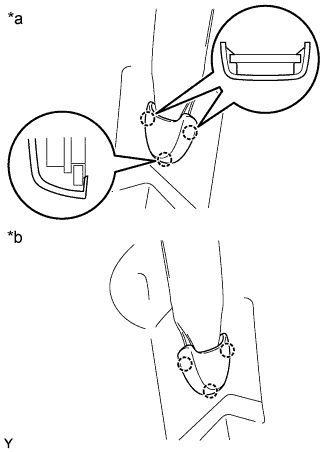
  1. Disengage the 3 claws and remove the lap belt outer anchor cover.


20. REMOVE REAR SEAT OUTER BELT ASSEMBLY

HINT:
Use the same procedure as for the RH side.


21. REMOVE DECK TRIM SIDE PANEL ASSEMBLY RH (for RH Side)

  1. B130616
    Remove the 3 screws and the bolt.

  1. B130617
    Disengage the 6 clips and the 8 claws and remove the deck trim side panel.


22. REMOVE DECK TRIM SIDE PANEL ASSEMBLY LH (for LH Side)

  1. B130618
    Remove the 3 screws.

  1. B130619
    Disengage the 6 clips and the 8 claws and remove the deck trim side panel.


23. REMOVE ROOF SIDE INNER GARNISH

HINT:
Use the same procedure as for the RH side.


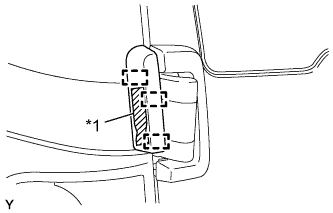
24. REMOVE BACK DOOR HINGE PROTECTOR LH

  1. B266335E01
    Using an infrared light, heat the bake door hinge protector LH.
    Text in Illustration 
    *1
    Double-sided Tape
    Heating Temperature 
    Item
    Temperature
    Vehicle Body
    40 to 60°C (104 to 140°F)

    CAUTION:
    Do not burn yourself on the hot body panel or with the infrared light.

    NOTICE:
    1. Do not heat the vehicle body excessively.
    2. Remove any tape remaining on the back door panel.

  1. Pull out the bake door hinge protector LH with the door closed, and then remove the bake door hinge protector LH while peeling off the double-sided adhesive tape.


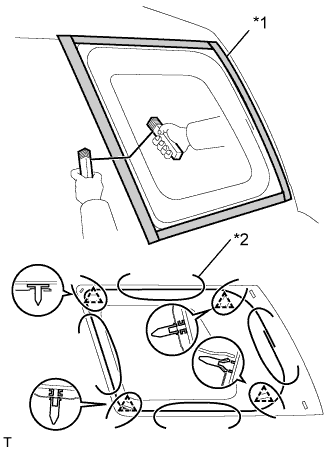
25. REMOVE QUARTER WINDOW GLASS

  1. B139407E02
    Apply protective tape to the outer circumference of the quarter window, as shown in the illustration.
    Text in Illustration 
    *1
    Protective Tape
    *2
    Piano Wire

  1. From the interior, insert piano wires between the vehicle body and quarter window, as shown in the illustration.

  1. Tie objects that can serve as handles (for example, wooden blocks) to all wire ends.

    NOTICE:
    When separating the quarter window from the vehicle, do not damage the vehicle's paintwork or exterior/interior ornaments.

  1. Cut through the adhesive by pulling the piano wire around the quarter window.

← REMOVAL (Jul 2007 – Oct 2010)REMOVAL (from Aug 2012) →