REMOVAL
Removal / installation · Vehicles built Jul 2007 – Oct 2010
Versions by build date: Jul 2007 – Oct 2010 Nov 2010 – Jul 2012 from Aug 2012
- HINT:
- The procedure described below is for the LH side. Use the same procedure for both the RH and LH sides, unless otherwise specified.
| 1.
PRECAUTION |
 |
- CAUTION:
- Read "PRECAUTION" thoroughly before servicing (Click here).
| 2.
DISCONNECT CABLE FROM NEGATIVE BATTERY TERMINAL |
|
- CAUTION:
- Wait for at least 90 seconds after disconnecting the cable to prevent the airbag from working.
| 3.
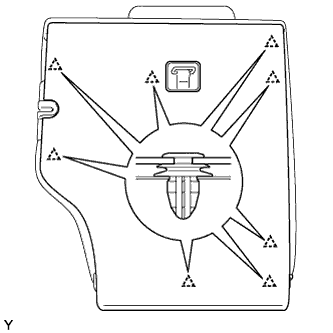
REMOVE REAR SEATBACK BOARD CARPET ASSEMBLY LH
|
|
- Pull the rear seatback lock release button and tilt the rear seatback forward.
Disengage the 8 clips and remove the rear seatback board carpet.
| 4.
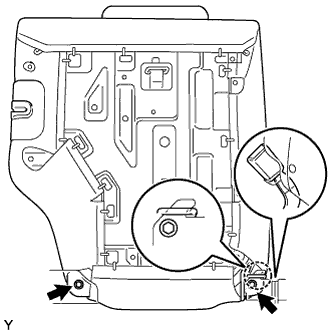
REMOVE REAR SEATBACK ASSEMBLY LH
|
|
- Remove the rear center seat inner belt from the rear seatback holder.
Remove the 2 bolts.
Disengage the hook and remove the rear seatback.
| 5.
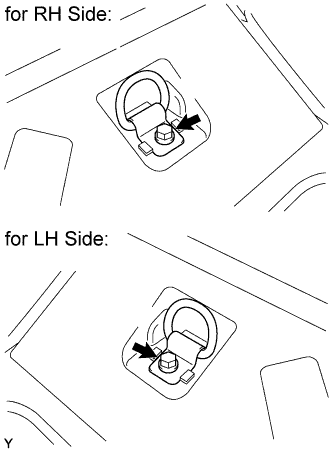
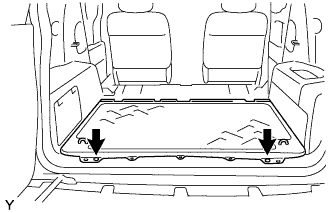
REMOVE REAR FLOOR BOARD
|
|
- Remove the bolt and the luggage hold belt striker.
- HINT:
- Use the same procedure for both sides.
- Disengage the clip and the claw and remove the rear floor board.
| 6.
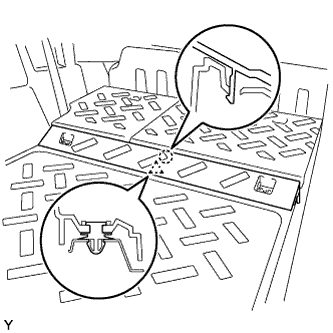
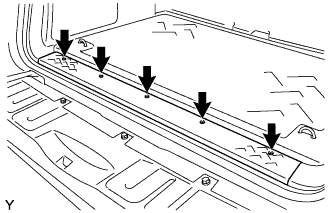
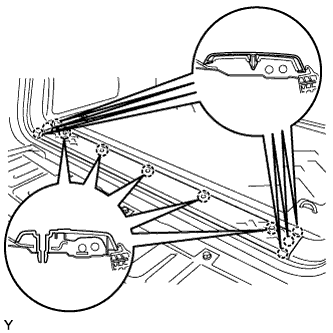
REMOVE REAR FLOOR MAT SUPPORT PLATE
|
|
- Remove the 5 screws.
- Disengage the 11 claws and remove the rear floor mat support plate.
| 7.
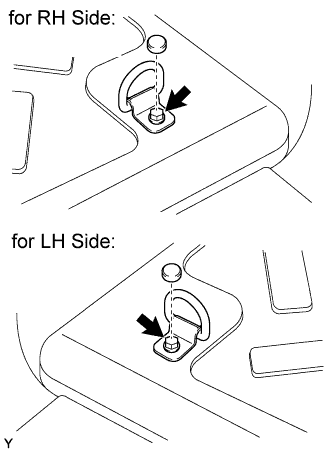
REMOVE LUGGAGE HOLD BELT STRIKER ASSEMBLY
|
|
- HINT:
- Use the same procedure for both sides.
- Remove the cap.
Remove the bolt and the luggage hold belt striker.
| 8.
REMOVE REAR FLOOR MAT ASSEMBLY
|
|
- Using a clip remover, remove the 2 clips and the rear floor mat.
| 9.
REMOVE FRONT DOOR SCUFF PLATE LH
|
|
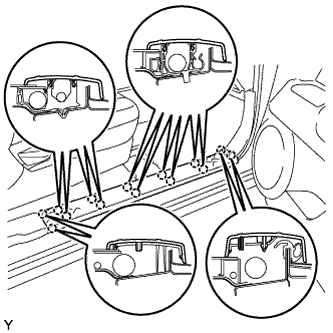
- Disengage the 14 claws and remove the front door scuff plate.
| 10.
REMOVE ACCESS DOOR SCUFF PLATE LH
|
|
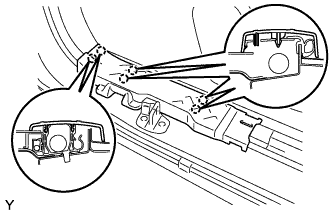
- Disengage the 6 claws and remove the access door scuff plate.
| 11.
REMOVE FRONT DOOR OPENING TRIM WEATHERSTRIP LH |
|
Remove the front door opening trim weatherstrip LH to the extent necessary to remove the deck trim side panel assembly LH (Click here).
| 12.
REMOVE DECK SIDE GARNISH (w/ Woofer) (for RH Side)
|
|
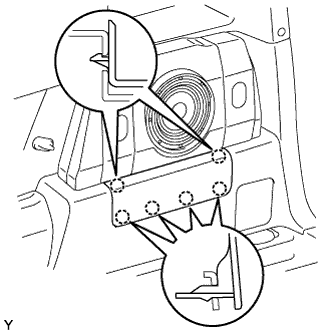
- Disengage the 6 claws and remove the rear deck side garnish.
| 13.
REMOVE SPEAKER MOUNTING COVER (w/ Woofer) (for RH Side)
|
|
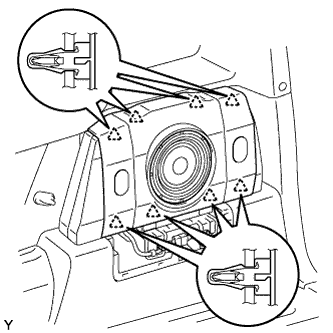
- Disengage the 8 clips and remove the speaker mounting cover.
| 14.
REMOVE AMPLIFIER BOX SPEAKER ASSEMBLY (w/ Woofer) (for RH Side)
|
|
- Disconnect the speaker connector.
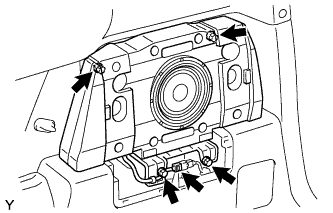
Remove the 4 screws and the amplifier box speaker.
| 15.
REMOVE PACKAGE HOLDER NET HOOK
|
|
- HINT:
- Use the same procedure to remove all the package holder net hooks.
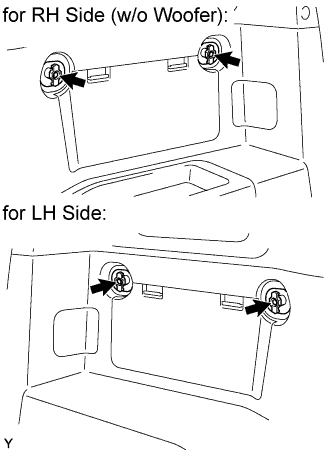
Remove the screw and the package holder net hook.
| 16.
REMOVE QUARTER TRIM POCKET TRAY (w/o Woofer) (for RH Side)
|
|
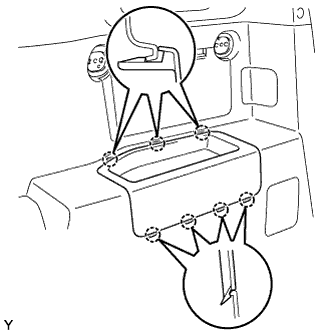
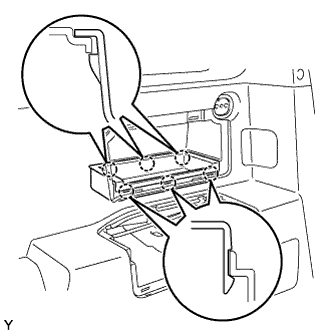
- Disengage the 7 claws and remove the quarter trim pocket tray.
| 17.
REMOVE SIDE TRIM COVER (w/o Woofer) (for RH Side)
|
|
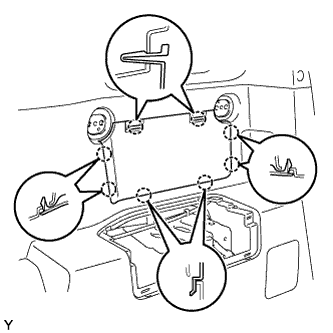
- Disengage the 8 claws and remove the side trim cover.
| 18.
REMOVE QUARTER TRIM POCKET (w/o Woofer) (for RH Side)
|
|
- Disengage the 6 claws and remove the quarter trim pocket.
| 19.
REMOVE LAP BELT OUTER ANCHOR COVER
|
|
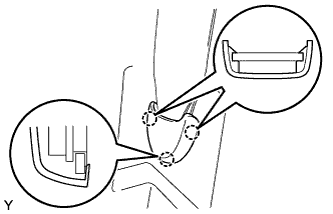
- Disengage the 3 claws and remove the lap belt outer anchor cover.
| 20.
REMOVE REAR SEAT OUTER BELT ASSEMBLY LH
|
|
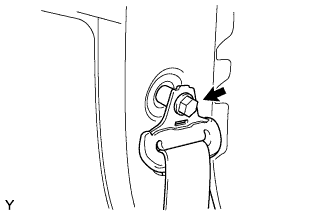
- Remove the bolt and the through anchor.
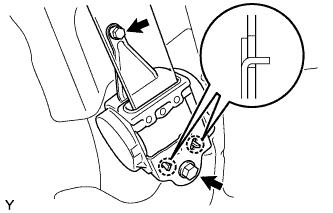
- Remove the 2 bolts, 2 hooks and the retractor.
| 21.
REMOVE DECK TRIM SIDE PANEL ASSEMBLY LH
|
|
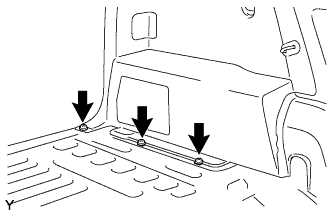
- Remove the 3 screws.
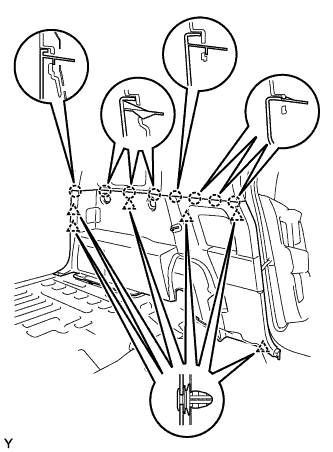
- Disengage the 6 clips and the 8 claws and remove the deck trim side panel.
| 22.
REMOVE DECK TRIM SIDE PANEL ASSEMBLY RH (for RH Side)
|
|
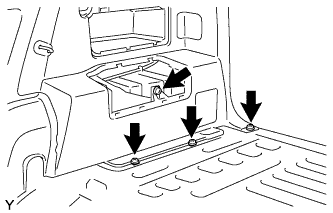
- Remove the 4 screws.
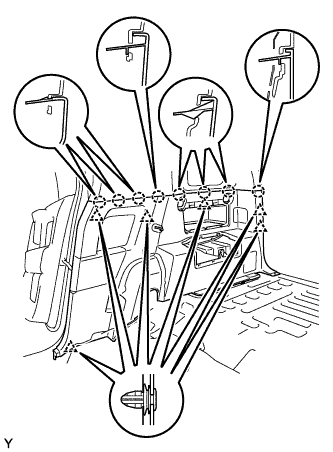
- Disengage the 6 clips and the 8 claws and remove the deck trim side panel.
| 23.
REMOVE REAR AIRBAG SENSOR LH |
|
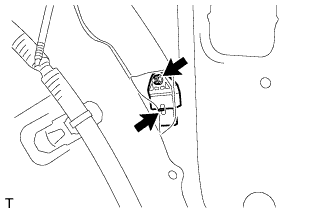
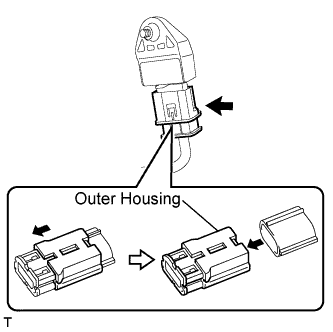
- Remove the nut and the rear airbag sensor LH.
- Disconnect the connector from the rear airbag sensor LH.