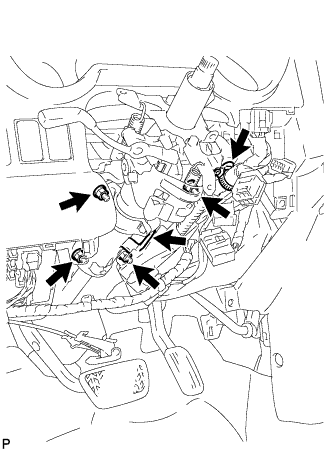
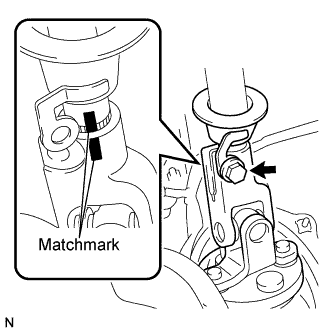
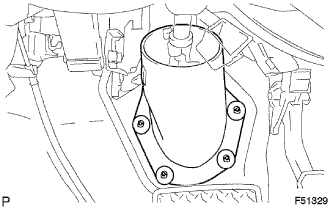
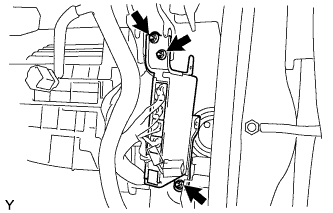
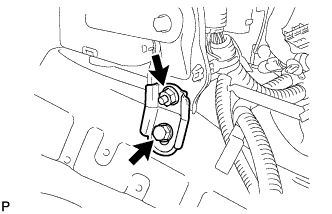
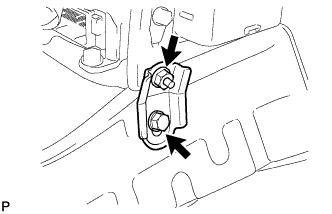
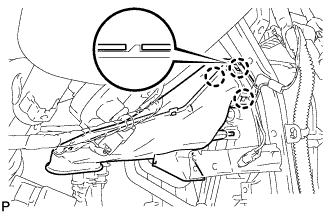
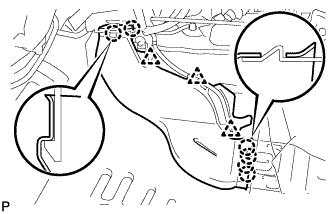
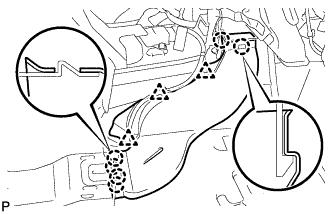
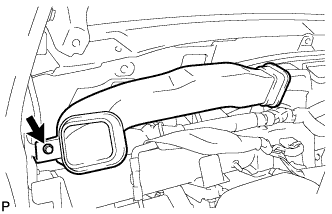
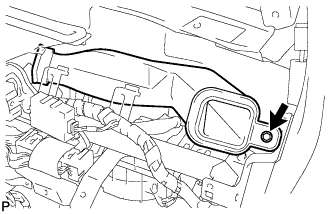
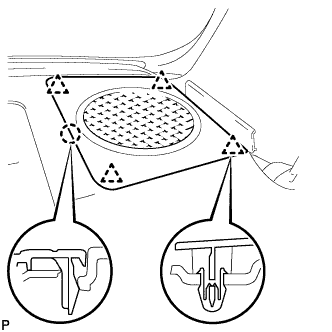
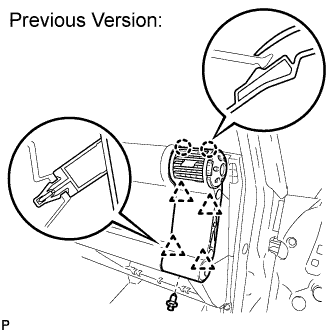
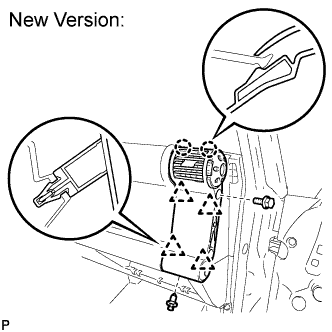
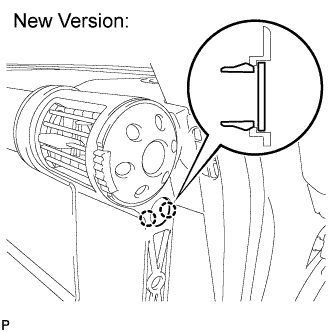
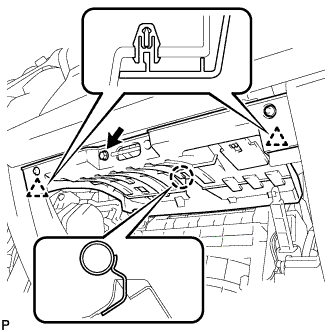
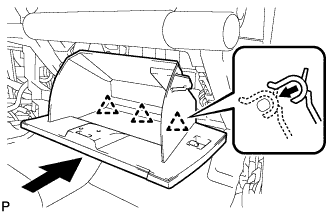
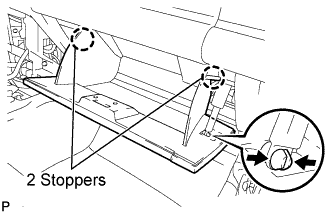
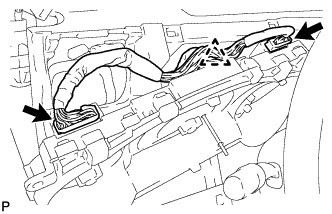
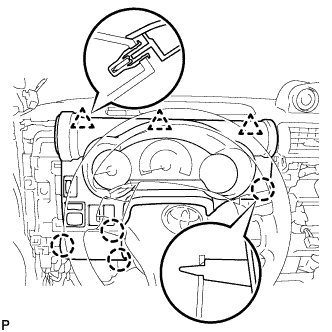
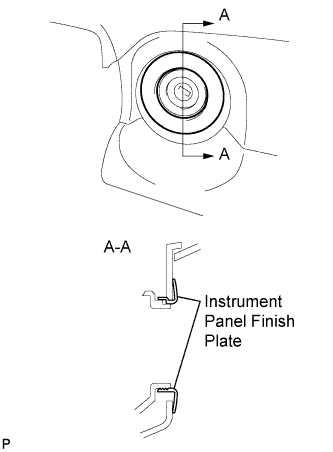
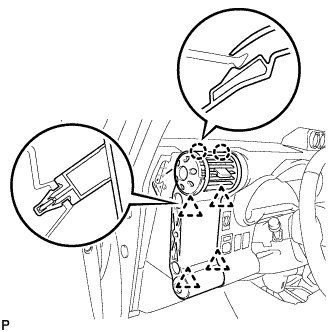
Engage the 4 clips and 2 claws and install the instrument panel register.
35.
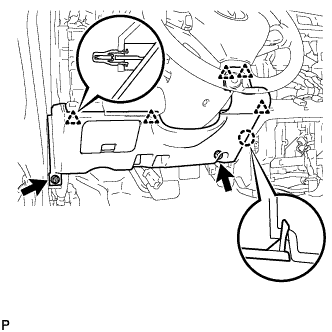
INSTALL INSTRUMENT LOWER COVER SUB-ASSEMBLY
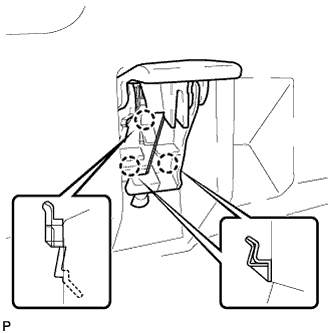
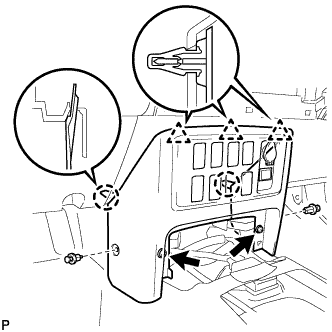
Engage the 3 clips and 2 claws and install the instrument lower cover.
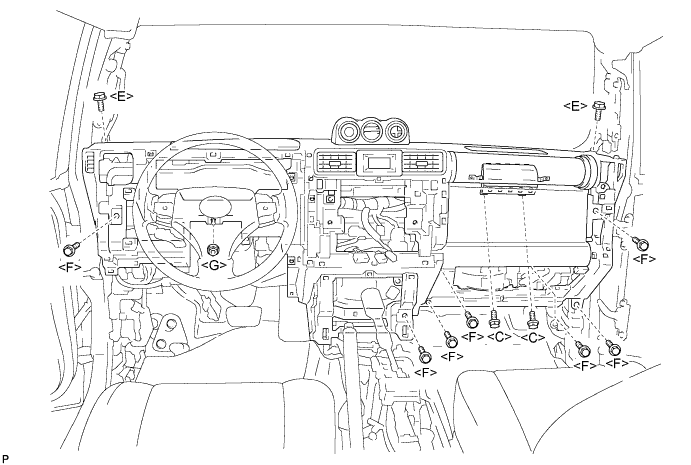
Install the 2 <F> bolts and 2 clips.
36.
INSTALL CONSOLE UPPER PANEL NO. 1 GARNISH
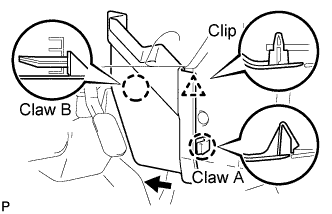
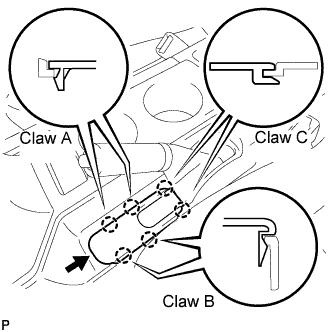
Slide the console upper panel garnish toward the front of the vehicle and engage claw B.
Engage the claw A and clip and install the console upper panel garnish.
37.
INSTALL FRONT CONSOLE BOX
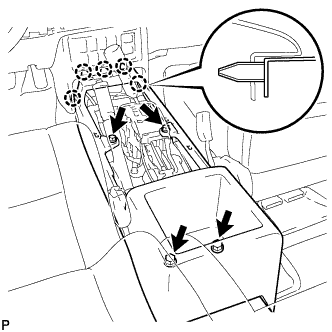
Engage the 5 claws and install the front console box.
Install the 4 <D> screws.
38.
INSTALL BOX BOTTOM MAT
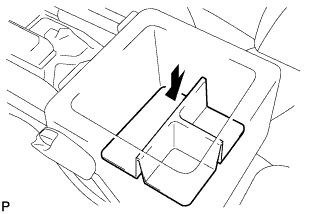
Install the box bottom mat.
39.
INSTALL CONSOLE UPPER REAR PANEL SUB-ASSEMBLY
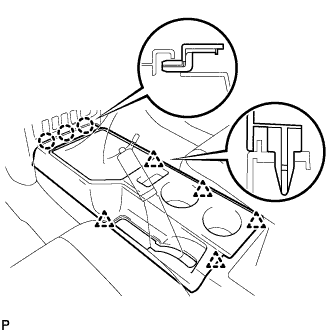
Engage the 3 claws and 5 clips and install the console upper rear panel.
40.
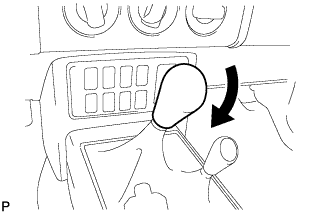
INSTALL SHIFT LEVER KNOB SUB-ASSEMBLY (for Manual Transmission)
Install the shift lever knob.
41.
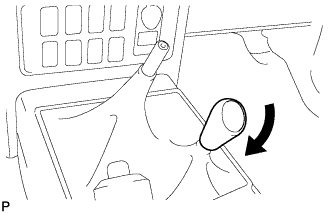
INSTALL SHIFT LEVER KNOB SUB-ASSEMBLY (for 4WD)
Install the shift lever knob.
42.
INSTALL PARKING BRAKE HOLE COVER SUB-ASSEMBLY
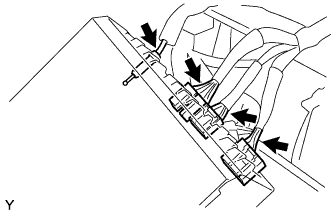
Slide the parking brake hole cover toward the rear of the vehicle and engage the 2 C claws.
Engage the 4 claws and install the parking brake hole cover.
43.
INSTALL RADIO RECEIVER ASSEMBLY
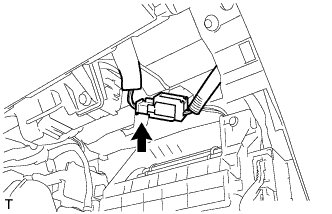
Connect the plug, the head unit connector and the 2 radio connectors.
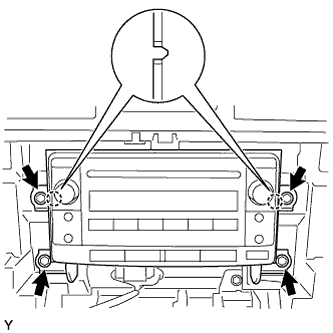
Align the 2 bosses of the radio bracket with the hole in the instrument panel and install the radio receiver with the 4 bolts.
Torque:
2.5 N*m{
25 kgf*cm
, 22 in.*lbf
}
44.
INSTALL INTEGRATION CONTROL AND PANEL ASSEMBLY
Connect the 3 connectors.
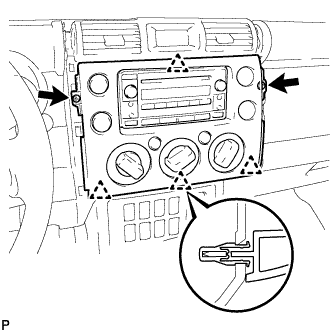
Engage the 4 clips and install the integration control panel assembly.
Install the 2 <H> screws.
45.
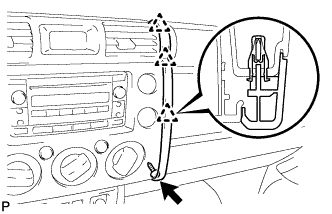
INSTALL INSTRUMENT PANEL GARNISH LH
Engage the 3 clips and install the instrument panel garnish.
Install 2 <H> screws.
46.
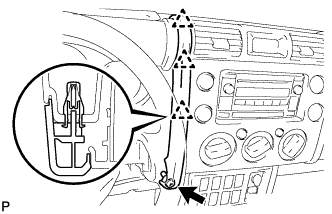
INSTALL INSTRUMENT PANEL GARNISH RH
Engage the 3 clips and install the instrument panel garnish.
Install screw <H>.
47.
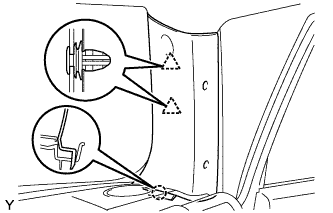
INSTALL FRONT PILLAR GARNISH RH
Engage the claw and the 2 clips and install the front pillar garnish.
48.
INSTALL FRONT PILLAR GARNISH LH
HINT:
Use the same procedure as for the RH side.
49.
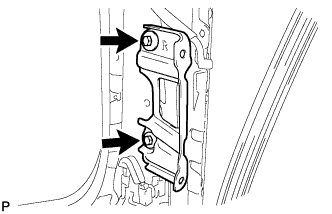
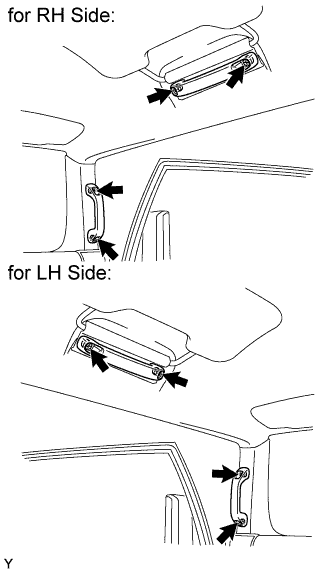
INSTALL ASSIST GRIP ASSEMBLY
HINT:
Use the same procedure to install all the assist grips.
Install the assist grip with the 2 bolts.
Torque:
8.0 N*m{
82 kgf*cm
, 71 in.*lbf
}
50.
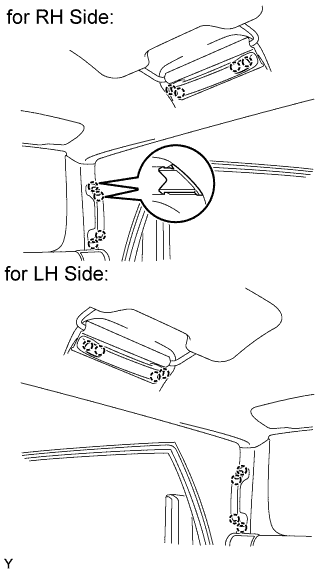
INSTALL ASSIST GRIP PLUG
HINT:
Use the same procedure to install all the assist grip plugs.
Engage the 2 claws and install the assist grip plug.
51.
INSTALL FRONT DOOR OPENING TRIM WEATHERSTRIP LH
Install the front door opening trim weatherstrip.
52.
INSTALL FRONT DOOR OPENING TRIM WEATHERSTRIP RH
Install the front door opening trim weatherstrip.
53.
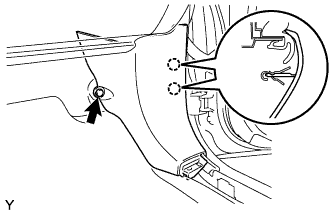
INSTALL COWL SIDE TRIM BOARD RH
Engage the 2 claws and install the cowl side trim board.
Install the clip.
54.
INSTALL COWL SIDE TRIM BOARD LH
HINT:
Use the same procedure as for the RH side.
55.
INSTALL FOOTREST CLIP
HINT:
Use the same procedure for both sides.
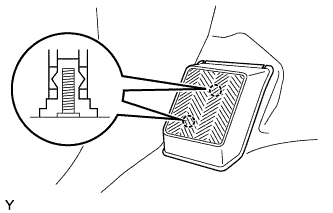
Engage the 2 claws and install the footrest clip.
56.
INSTALL FRONT FLOOR FOOTREST
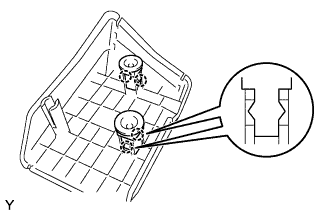
Engage the 2 studs and install the front floor footrest.
57.
INSTALL FRONT DOOR SCUFF PLATE RH
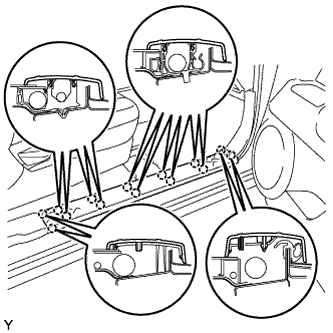
Engage the 14 claws and install the door scuff plate.
58.
INSTALL FRONT DOOR SCUFF PLATE LH
HINT:
Use the same procedure as for the RH side.
59.
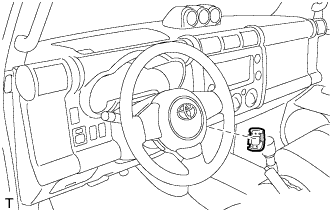
INSTALL COMBINATION SWITCH ASSEMBLY
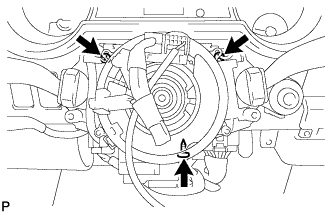
Install the 3 screws.
Connect all connectors to the combination switch assembly.
60.
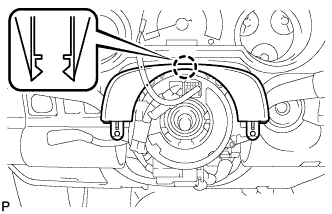
INSTALL UPPER STEERING COLUMN COVER
Engage the claw and install the upper steering column cover.
61.
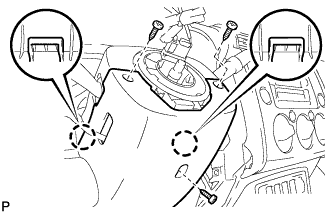
INSTALL LOWER STEERING COLUMN COVER
Engage the 2 claws.
Install the lower steering column cover with the 3 screws.
62.
INSTALL STEERING WHEEL ASSEMBLY
Align the matchmarks on the steering wheel assembly and steering main shaft assembly.
Install the steering wheel assembly set nut.
Torque:
50 N*m{
510 kgf*cm
, 37 ft.*lbf
}
63.
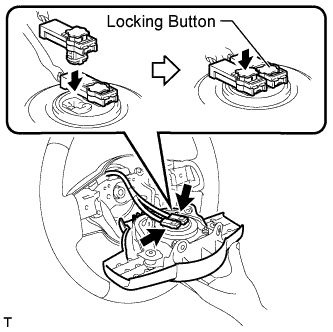
INSTALL STEERING PAD
Support the steering pad with one hand as shown in the illustration.
Connect the 2 connectors to the steering pad.
NOTICE:
When handling the airbag connector, take care not to damage the airbag wire harness.
Connect the horn connector.
Confirm that the circumferencial groove of the "Torx" screw fits in the screw case, and place the steering pad onto the steering wheel assembly.
Using "Torx" socket wrench (T30), tighten the 2 "Torx" screws.
Torque:
8.8 N*m{
90 kgf*cm
, 78 in.*lbf
}
NOTICE:
Tighten the 2 bolts while holding the steering pad to prevent it from moving upward.
64.
INSTALL LOWER NO. 2 STEERING WHEEL COVER
Install steering wheel cover lower No.2.
65.
INSTALL LOWER NO. 3 STEERING WHEEL COVER
Install steering wheel cover lower No.2.
66.
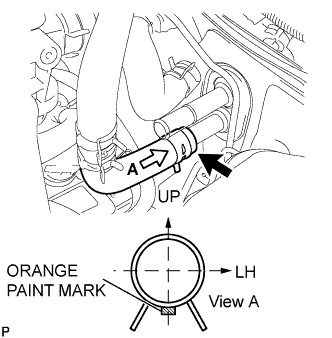
CONNECT HEATER WATER OUTLET HOSE A (FROM HEATER UNIT)
Install the heater water outlet hose onto the heater unit.
NOTICE:
Perform the installation with the hose clip and mark at the correct angle as shown in the illustration.
67.
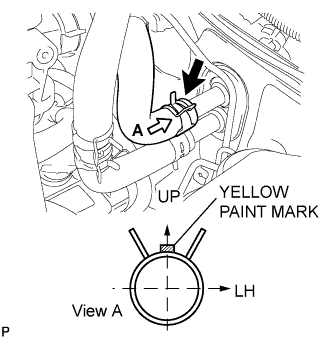
CONNECT HEATER WATER HOSE INLET
Install the heater water inlet hose onto the heater unit.
NOTICE:
Perform the installation with the hose clip and mark at the correct angle as shown in the illustration.
68.
INSTALL COOLER REFRIGERANT LIQUID PIPE A
Remove the vinyl tape from liquid tube A and the connecting portion of the unit.
Apply sufficient compressor oil (ND-OIL8) to a new O-ring and the connecting part of the liquid pipe.
Compressor oil:
ND-OIL8 or the equivalent
Install the O-ring onto the liquid pipe.
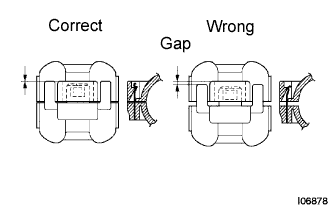
Install the liquid and piping clamp.
HINT:
After connection, check the claw fitting of the piping clamp.
69.
INSTALL COOLER REFRIGERANT SUCTION PIPE A
HINT:
Connection procedure of the suction pipe is the same as for the liquid pipe.
70.
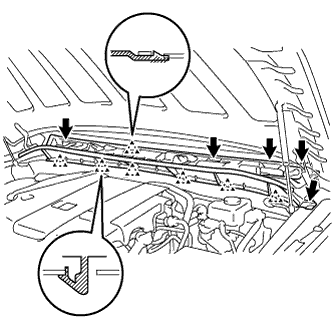
INSTALL COWL TOP VENTILATOR LOUVER LH
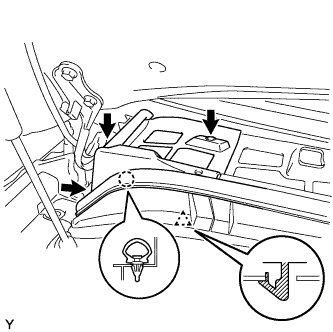
Install the cowl top ventilator louver LH with the 5 clips and engage the 7 claws.
71.
INSTALL COWL TOP VENTILATOR LOUVER RH
Install the cowl top ventilator louver RH with the 3 clips and the claw.
Install the hood to cowl top seal with the clip.
72.
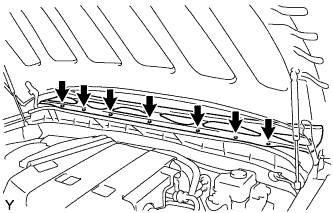
INSTALL COWL TOP VENTILATOR LOUVER ASSEMBLY
Install the cowl top ventilator louver sub-assembly with the 7 clips.
73.
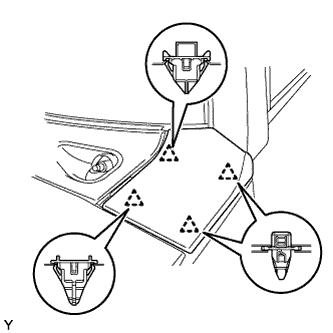
INSTALL FRONT FENDER SIDE PANEL UPPER LH
Install the 4 new clips on the front fender side panel upper LH.
Engage the 4 clips and install the front fender side panel upper LH.
74.
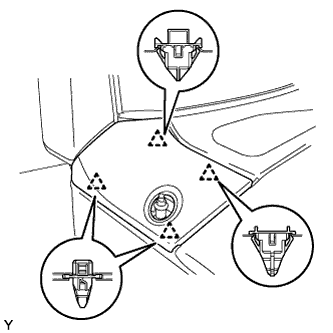
INSTALL FRONT FENDER SIDE PANEL UPPER RH
Install the 4 new clips on the front fender side panel upper RH.
Engage the 4 clips and install the front fender side panel upper RH.
75.
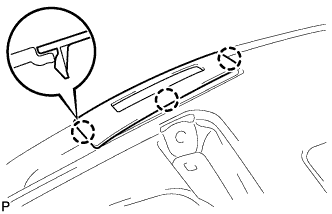
INSTALL ANTENNA ORNAMENT
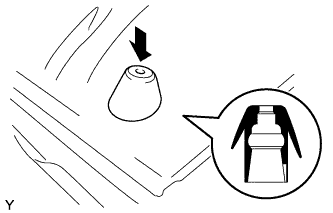
Press in the antenna ornament in the direction shown in the illustration.
76.
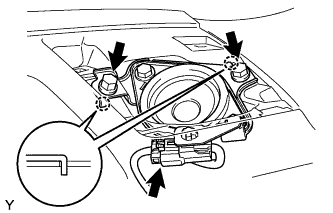
INSTALL ROOF ANTENNA POLE SUB-ASSEMBLY
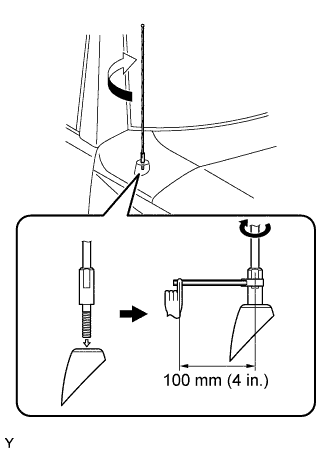
Install the radio antenna pole by turning it in the direction of the arrow shown in the illustration.
Torque:
3.3 N*m{
35 kgf*cm
, 29 in.*lbf
}
NOTICE:
Use a short wrench, tighten with your finger, not your hand.
77.
INSTALL FRONT WIPER ARM AND BLADE ASSEMBLY LH
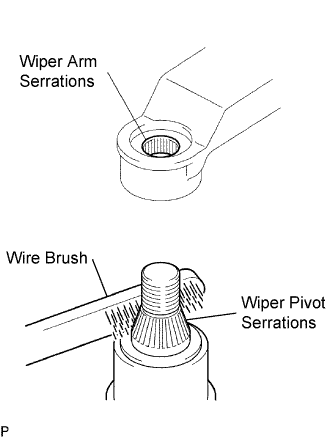
Scrape any metal powder off the serrated part of the wiper arm with a round file or the equivalent (when reinstalling).
Clean the wiper pivot serrations with a wire brush.
Operate the wiper, then stop the windshield wiper motor in the automatic stop position.
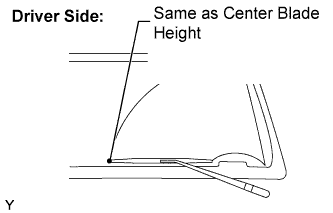
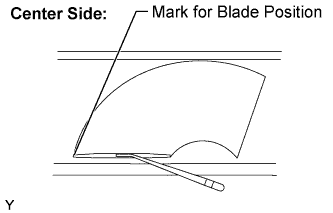
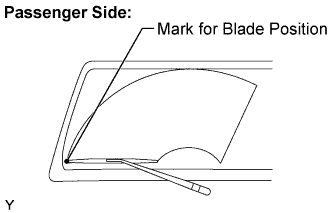
Align the blade tip with the mark on the windshield glass, as shown in the illustration.
Tighten the nut of the front wiper arm.
Torque:
25 N*m{
255 kgf*cm
, 18 ft.*lbf
}
78.
INSTALL FRONT WIPER ARM AND BLADE ASSEMBLY RH (CENTER SIDE)
Scrape any metal powder off the serrated part of the wiper arm with a round file or the equivalent (when reinstalling).
Clean the wiper pivot serrations with a wire brush.
Operate the wiper, then stop the windshield wiper motor in the automatic stop position.
Align the blade tip with the mark on the windshield glass, as shown in the illustration.
Tighten the nut of the front wiper arm.
Torque:
25 N*m{
255 kgf*cm
, 18 ft.*lbf
}
79.
INSTALL FRONT WIPER ARM AND BLADE ASSEMBLY RH
Scrape any metal powder off the serrated part of the wiper arm with a round file or the equivalent (when reinstalling).
Clean the wiper pivot serrations with a wire brush.
Operate the wiper, then stop the windshield wiper motor in the automatic stop position.
Align the blade tip with the mark on the windshield glass, as shown in the illustration.
Tighten the nut of the front wiper arm.
Torque:
25 N*m{
255 kgf*cm
, 18 ft.*lbf
}
80.
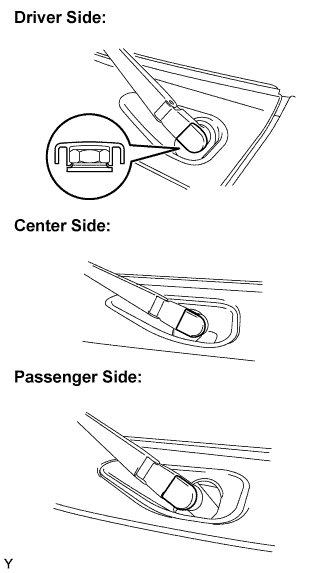
INSTALL WINDSHIELD WIPER ARM COVER
Engage the claw and install the 3 front wiper arm cover.
81.
ADD ENGINE COOLANT
Pour coolant into the radiator until it overflows.
Capacity:
Transmission
Capacity
Manual Transmission
9.4 liters (9.9 Us qts, 8.3 Imp. qts)
Automatic Transmission
9.8 liters (10.4 Us qts, 8.6 Imp. qts)
NOTICE:
Do not substitute plain water for engine coolant.
HINT:
Use of improper coolants may damage the engine cooling system.
Use only TOYOTA SLLC or similar high quality ethylene glycol based non-silicate, non-amine, non-nitrite, and non-borate coolant with long-life hybrid organic acid technology (coolant with long-life hybrid organic acid technology consists of a combination of low phosphates and organic acids).
New TOYOTA vehicles are filled with TOYOTA SLLC (color is pink, premixed ethylene glycol concentration is approximately 50 % and freezing temperature is -35°C (-31°F)). When replacing the coolant, TOYOTA SLLC is recommended.
Check the coolant level inside the radiator by squeezing the inlet and outlet radiator hoses several times by hand. If the coolant level goes down, add coolant.
Install the radiator cap securely.
Slowly pour coolant into the radiator reservoir until it reaches the FULL line.
Warm up the engine until the cooling fan operates.
Set the air conditioning as follows while warming up the engine.
Item
Condition
Fan Speed
Any setting except OFF
Temperature
Toward WARM
Air Conditioning Switch
OFF
Maintain the engine speed at 2,000 to 2,500 rpm and warm up the engine until the cooling fan operates.
NOTICE:
Make sure that the radiator reservoir still has some coolant in it.
Pay attention to the needle of the water temperature meter. Make sure that the needle does not show an abnormally high temperature.
If there is not enough coolant, the engine may burn out or overheat.
Squeeze the inlet and outlet radiator hoses several times by hand while warming up the engine to bleed the air.
CAUTION:
When pressing the radiator hoses:
Wear protective gloves.
Be careful as the radiator hoses are hot.
Keep your hands away from the fan.
Stop the engine and wait until the coolant cools down.
Remove the radiator cap and check the coolant level inside the radiator.
If the coolant level is below the full level, repeat the operation until the coolant level remains at the full level.
Check the coolant level inside the radiator reservoir tank again. If it is below the full level, add coolant.
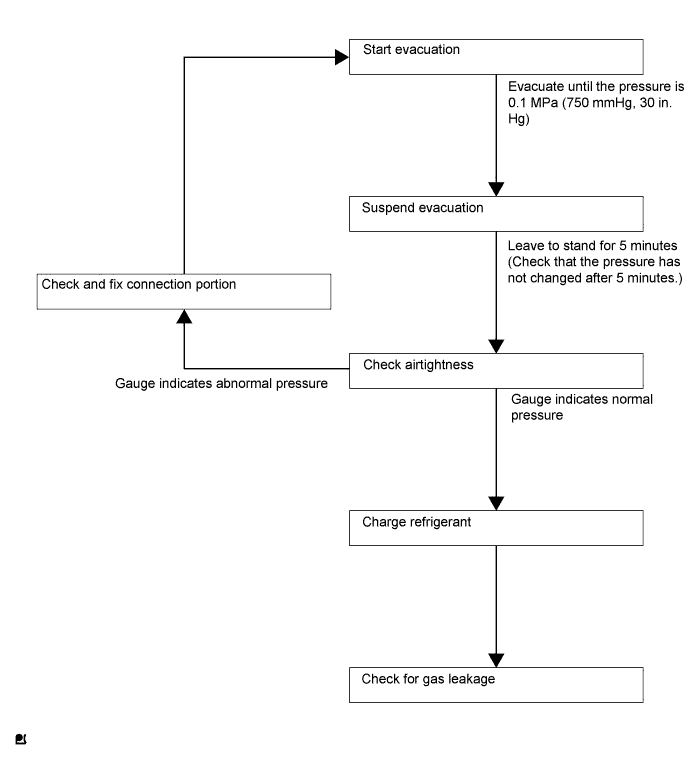
Do not start the engine before charging it with refrigerant as the cooler compressor doesn't work properly without sufficient refrigerant. This could cause the compressor to overheat.
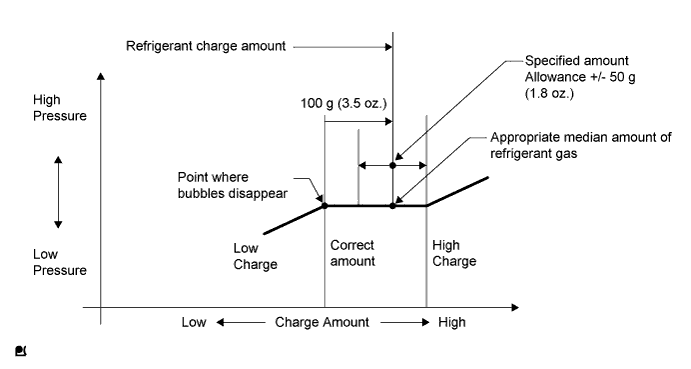
Approximately 100 g (3.5 oz.) of refrigerant may need to be charged after bubbles disappear. The volume of refrigerant should be measured, not checked with the sight glass.
HINT:
The relationship between the refrigerant charge amount and the pressure is as follows.
High Charge Range: If the refrigerant is overcharged, the pressure rises on the high-pressure side. High-pressure cut off frequently occurs. This causes insufficient cooling performance and also insufficient compressor lubrication.
Low Charge Range: A shortage of refrigerant causes insufficient cooling performance and low circulation of refrigerant oil, which shortens the compressor life. Operation with insufficient coolant raises the refrigerant temperature and causes heat deterioration of the rubber seals and hoses. Cracking and subsequent refrigerant leakage may occur.
Install the caps onto the service valves on the refrigerant line.
85.
WARM UP ENGINE
NOTICE:
Warm up the engine at less than 2,000 rpm for 1 minute or more after charging it with refrigerant.
86.
CHECK FOR ENGINE COOLANT LEAK
Fill the radiator with coolant and attach a radiator cap tester.
Pump it to 177 kPa (1.8 kgf/cm2 25.7 psi), then check for leakage.
87.
CHECK FOR REFRIGERANT LEAK
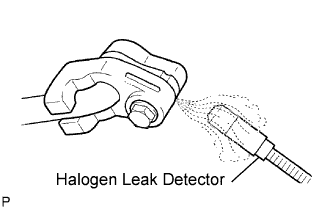
After recharging the refrigerant gas, check for refrigerant gas leakage using a halogen leak detector.
Perform the operation as follows:
Stop the engine.
Secure good ventilation (the halogen leak detector may react to volatile gases other than refrigerant, such as evaporated gasoline or exhaust gas).
Repeat the test 2 or 3 times.
Make sure that some refrigerant remains in the refrigeration system. When the compressor is off: approximately 392 to 588 kPa (4 to 6 kgf*cm2, 57 to 85 psi)
HINT:
It is impossible for the above pressure to be maintained if there is leakage.
Using the halogen leak detector, check the refrigerant line, especially at the connection points, for leakage.
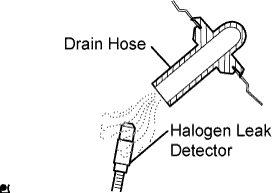
Bring the halogen leak detector close to the drain hose before performing the test.
HINT:
After the blower motor has stopped, leave the cooling unit for at least 15 minutes.
Place the halogen leak detector sensor under the drain hose.
When bringing the halogen leak detector close to the drain hose, make sure that the halogen leak detector does not react to the volatile gases.
If such a reaction is unavoidable, the vehicle must be lifted up.
If no gas leakage is detected from the drain hose, remove the blower motor from the cooling unit. Insert the halogen leak detector sensor into the unit and perform the test.
Disconnect the pressure switch connector and leave it for approximately 20 minutes. Bring the halogen leak detector close to the pressure switch and perform the test.