INSTALLATION
Removal / installation · Vehicles built from Jul 2007
| 1. INSTALL TRANSMISSION VALVE BODY ASSEMBLY |

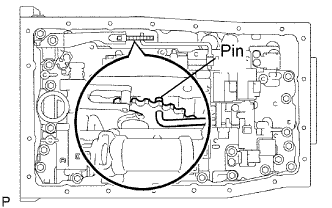  |
Insert the pin of the lever into the hole of the manual valve.
Install 3 new drum seal gaskets onto the transmission case.
Install the 19 bolts.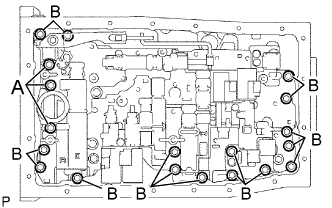
- Torque:
- 11 N*m{ 112 kgf*cm , 8 ft.*lbf }
- HINT:
- Bolt length:
- 36 mm (1.42 in.) for bolt A
- 25 mm (0.98 in.) for bolt B
| 2. CONNECT TRANSMISSION WIRE |
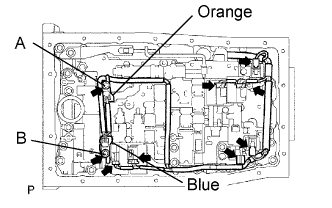 |
Connect the 7 connectors to the solenoid valves.
Install the 2 clamps with the 2 bolts.
- Torque:
- 10 N*m{ 100 kgf*cm , 7 in.*lbf } for bolt A
- 11 N*m{ 112 kgf*cm , 8 ft.*lbf } for bolt B
- Bolt length:
- 12 mm (0.47 in.) for bolt A
- 36 mm (1.42 in.) for bolt B
Connect the ATF temperature sensor.
| 3. INSTALL VALVE BODY OIL STRAINER ASSEMBLY |
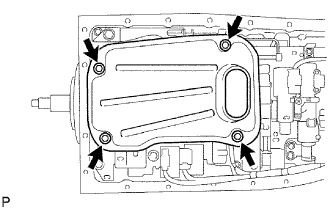 |
Install a new O-ring and the oil strainer with the 4 bolts.
- Torque:
- 10 N*m{ 100 kgf*cm , 7 ft.*lbf }
| 4. INSTALL AUTOMATIC TRANSMISSION OIL PAN SUB-ASSEMBLY |
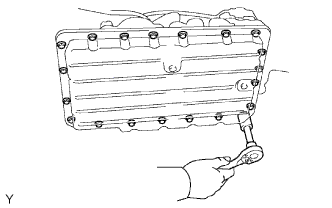 |
- HINT:
- Remove the gasket and be careful not to spill oil on the contacting surfaces of the transmission case and oil pan.
Install a new gasket and the oil pan with the 20 bolts.
- Torque:
- 7.0 N*m{ 71 kgf*cm , 62 in.*lbf }
| 5. CONNECT CABLE TO NEGATIVE BATTERY TERMINAL |
- Torque:
- 3.9 N*m{ 40 kgf*cm , 35 in.*lbf }
| 6. PERFORM INITIALIZATION |
| 7. ADJUST AUTOMATIC TRANSMISSION FLUID |