DISASSEMBLY
Removal / installation · Vehicles built Jul 2007 – Oct 2010
Versions by build date: Jul 2007 – Oct 2010 from Nov 2010
| 1.
FIX POWER STEERING LINK |
 |
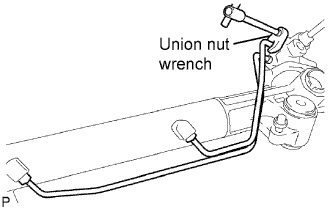
- Using union nut wrench, remove the 2 turn pressure tubes.
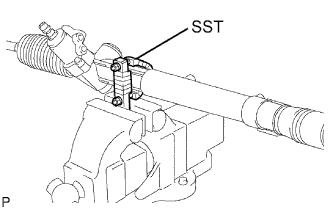
- Using SST, fix the steering link between aluminum plates in a vise, as shown in the illustration.
- SST
- 09612-00012
| 2.
REMOVE TIE ROD END SUB-ASSEMBLY LH |
|
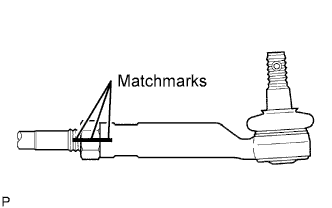
- Place matchmarks on the tie rod end, lock nut and rack end.
Loosen the lock nut and remove the tie rod end and lock nut.
| 3.
REMOVE TIE ROD END SUB-ASSEMBLY RH |
|
- HINT:
- Use the same procedures described for the LH side.
| 4.
REMOVE STEERING RACK BOOT CLAMP LH |
|
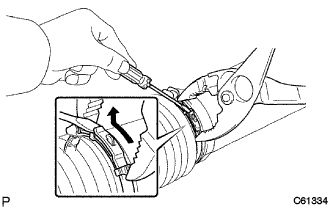
- Using pliers and a screwdriver, loosen the clamp.
- HINT:
- Mark the RH and LH boots.
- NOTICE:
- Be careful not to damage the boot.
| 5.
REMOVE STEERING RACK BOOT CLAMP RH |
|
- HINT:
- Use the same procedures described for the LH side.
| 6.
REMOVE STEERING RACK BOOT CLIP LH |
|
Using pliers, remove the clip.
- NOTICE:
- Be careful not to damage the boot.
| 7.
REMOVE STEERING RACK BOOT CLIP RH |
|
- HINT:
- Use the same procedures described for the LH side.
| 8.
REMOVE STEERING RACK BOOT LH |
|
| 9.
REMOVE STEERING RACK BOOT RH |
|
| 10.
REMOVE STEERING RACK END SUB-ASSEMBLY |
|
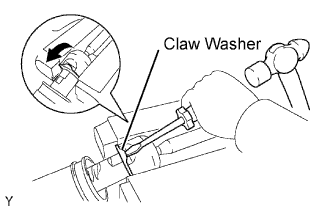
- Using a screwdriver and hammer, stake back the 2 washers (LH and RH sides).
- NOTICE:
- Do not strike the steering rack.
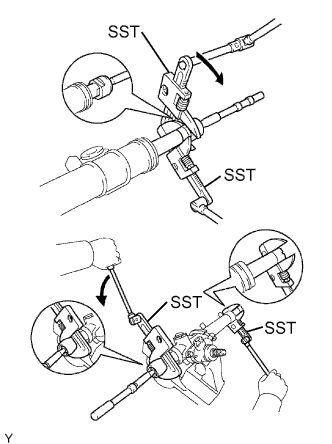
- Using a wrench, hold the steering rack (LH side).
Using SST, remove the steering rack end (LH side) from the power steering rack.
- SST
- 09922-10010
- NOTICE:
- Rotate SST in the direction shown in the illustration.
Using SST, remove the steering rack end (RH side) from the power steering rack.
- SST
- 09922-10010
- NOTICE:
- Rotate SST in the direction shown in the illustration.
Remove the 2 claw washers.
| 11.
REMOVE RACK GUIDE |
|
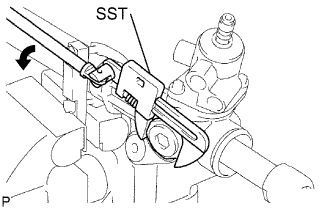
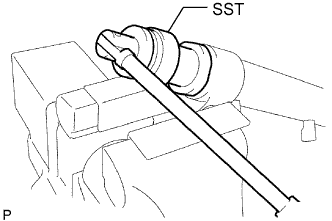
- Using SST, remove the lock nut.
- SST
- 09922-10010
Remove the claw washer.
- NOTICE:
- Rotate SST in the direction shown in the illustration.
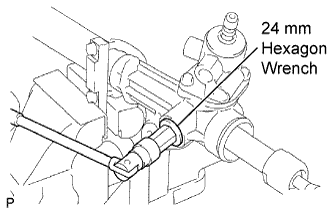
- Using a 24 mm hexagon wrench, remove the rack guide spring cap.
Remove the spring and rack guide.
| 12.
REMOVE POWER STEERING CONTROL VALVE |
|
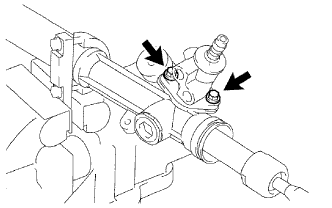
- Remove the 2 bolts.
Pull out the control valve from the rack housing.
| 13.
REMOVE CYLINDER END STOPPER |
|
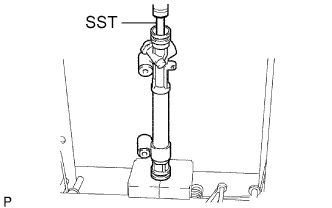
- Using SST, remove the stopper.
- SST
- 09631-20120
| 14.
REMOVE STEERING RACK AND OIL SEAL |
|
- Using SST, press out the steering rack and oil seal.
- SST
- 09950-70010
(09951-07200)
- NOTICE:
- Take care not to drop the steering rack.
Remove the oil seal from the steering rack.
| 15.
INSPECT POWER STEERING RACK |
|
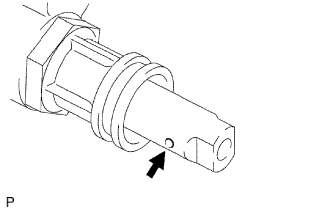
- Insert a wire 20 mm (0.79 in.) into the vent hole of the steering rack and ensure that the vent hole is not clogged with grease.
- NOTICE:
- If the hole is clogged, the pressure inside the boot will change after it is assembled and the steering wheel is turned.
| 16.
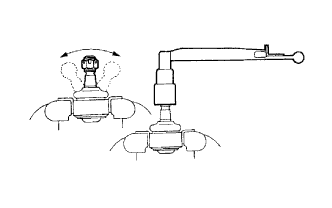
INSPECT TIE ROD END SUB-ASSEMBLY LH |
|
- Flip the ball joint stud back and forth 5 times as shown in the illustration, before installing the nut.
Using a torque wrench, turn the nut continuously at a rate of 2 to 4 seconds per turn and take the torque reading on the 5th turn.
-
Torque:
- (turning):
- 0.29 to 1.96 N*m{
2.96 to 20 kgf*cm
, 2.56 to 17.35 in.*lbf
}
| 17.
INSPECT TIE ROD END SUB-ASSEMBLY RH |
|
- HINT:
- Use the same procedures described for the LH side.
| 18.
REMOVE STEERING RACK PISTON RING |
|
Using a screwdriver, remove the "Teflon" ring and O-ring from the steering rack.
- NOTICE:
- Be careful not to damage the groove of the ring.