INSTALLATION
Removal / installation · Vehicles built Nov 2010 – Oct 2012
Versions by build date: Jul 2007 – Oct 2010 Nov 2010 – Oct 2012 from Nov 2012
| 1.
TEMPORARILY TIGHTEN FRONT SHOCK ABSORBER WITH COIL SPRING |
 |
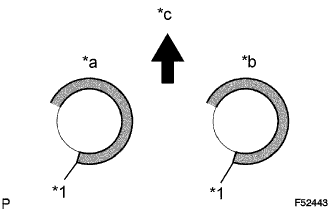
Install the coil spring to the body with the lower end of the coil spring facing the rear side of the vehicle.
Text in Illustration
*1
|
Lower End
|
*a
|
LH Side
|
*b
|
RH Side
|
*c
|
Front of the Vehicle
|
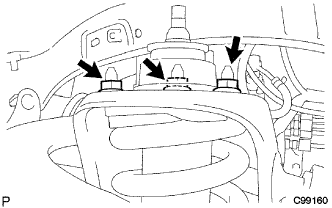
- Install the 3 nuts to the upper side of the front shock absorber with coil spring.
-
Torque:
- 71 N*m{
724 kgf*cm
, 52 ft.*lbf
}
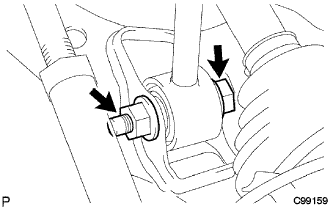
- Temporarily tighten the bolt, nut and washer as shown in the illustration.
| 2.
INSTALL TIE ROD END SUB-ASSEMBLY
|
|
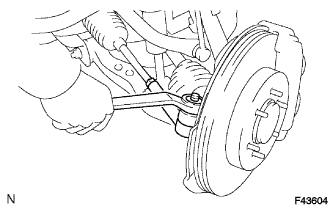
Install the tie rod end onto the steering knuckle.
Install the nut.
-
Torque:
- 91 N*m{
928 kgf*cm
, 67 ft.*lbf
}
Install a new cotter pin.
- NOTICE:
- If the holes in the cotter pin are not aligned, tighten the nut an additional 60°.
| 3.
INSTALL FRONT STABILIZER BAR
|
|
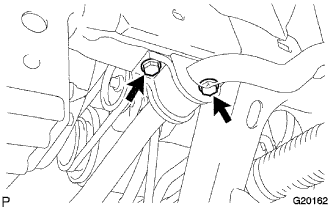
Install the stabilizer bar and 2 stabilizer brackets with the 4 bolts.
-
Torque:
- 49 N*m{
500 kgf*cm
, 36 ft.*lbf
}
| 4.
INSTALL FRONT STABILIZER LINK ASSEMBLY LH |
|
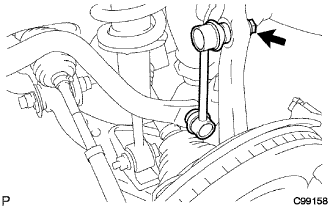
Install the front stabilizer link assembly LH to the steering knuckle with the nut.
-
Torque:
- 70 N*m{
714 kgf*cm
, 52 ft.*lbf
}
- HINT:
- If the ball joint turns together with the nut, use a 6 mm hexagon wrench to hold the stud.
| 5.
INSTALL FRONT STABILIZER LINK ASSEMBLY RH |
|
- HINT:
- The installation procedure for the RH side is the same as that for the LH side.
| 6.
INSTALL ENGINE UNDER COVER SUB-ASSEMBLY |
|
-
Torque:
- 29 N*m{
296 kgf*cm
, 21 ft.*lbf
}
| 7.
INSTALL FRONT WHEELS |
|
-
Torque:
- 112 N*m{
1137 kgf*cm
, 82 ft.*lbf
}
| 8.
STABILIZE SUSPENSION |
|
Lower the vehicle.
Bounce the vehicle up and down several times to stabilize the suspension.
| 9.
FULLY TIGHTEN FRONT SHOCK ABSORBER WITH COIL SPRING |
|
Fully tighten the nut.
-
Torque:
- 95 N*m{
969 kgf*cm
, 70 ft.*lbf
}
| 10.
INSPECT AND ADJUST FRONT WHEEL ALIGNMENT |
|
(Click here)