REMOVAL
Removal / installation · Vehicles built Jul 2007 – Jul 2009
Versions by build date: Jul 2007 – Jul 2009 Aug 2009 – Oct 2010 from Nov 2010
| 1.
DISCONNECT CABLE FROM NEGATIVE BATTERY TERMINAL |
|
| 2.
PLACE FRONT WHEELS FACING STRAIGHT AHEAD |
|
| 4.
REMOVE NO. 1 ENGINE UNDER COVER SUB-ASSEMBLY
|
 |
Remove the 4 bolts, then remove the No. 1 engine under cover.
| 5.
REMOVE REAR ENGINE UNDER COVER ASSEMBLY |
|
Remove the 4 bolts, then remove the rear engine under cover.
| 6.
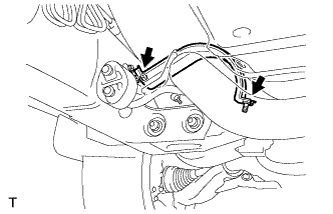
REMOVE NO. 2 EXHAUST FRONT PIPE ASSEMBLY
|
|
- Remove the 2 bolts, then remove the exhaust pipe stopper bracket. (for 4WD)
- Remove the 2 bolts and 2 nuts and separate the exhaust pipe support, then remove the No. 2 front exhaust pipe.
| 7.
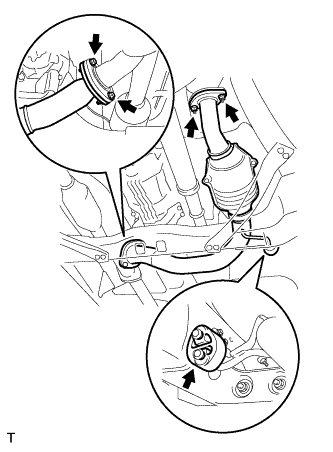
REMOVE FRONT EXHAUST PIPE ASSEMBLY
|
|
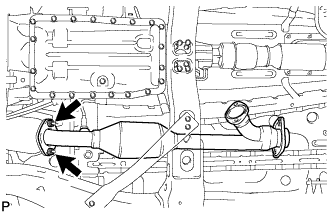
- Remove the 2 nuts, then remove the front exhaust pipe.
Remove the front exhaust pipe gasket.
| 8.
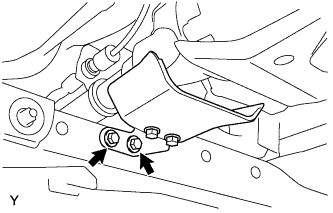
REMOVE PROPELLER SHAFT HEAT INSULATOR
|
|
Remove the 2 bolts and propeller shaft heat insulator.
| 9.
REMOVE FRONT PROPELLER SHAFT ASSEMBLY
|
|
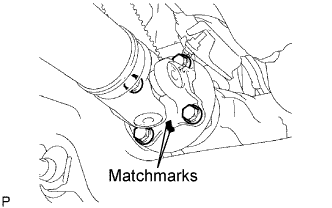
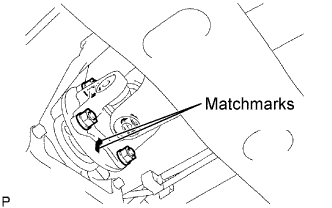
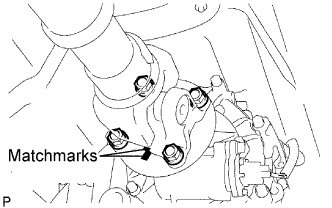
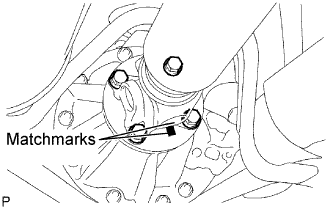
Place matchmarks on the propeller shaft flange and differential flange.
Remove the 4 nuts, 4bolts and 4 washers.
- Place matchmarks on the propeller shaft flange and transfer flange.
Remove the 4 nuts, 4 washers and the propeller shaft assembly.
| 10.
REMOVE PROPELLER SHAFT ASSEMBLY
|
|
Place matchmarks on the propeller shaft flange and transfer flange.
Remove the 4 nuts and 4 washers.
- Place matchmarks on the propeller shaft flange and differential flange.
Remove the 4 nuts, 4 bolts, 4 washers and the propeller shaft assembly.
| 11.
REMOVE FRONT SUSPENSION MEMBER BRACKET LH
|
|
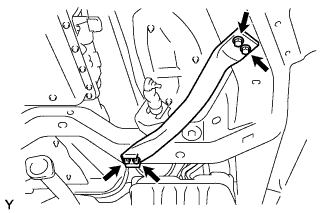
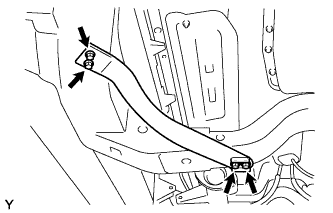
Remove the 4 bolts and the front suspension member bracket LH.
| 12.
REMOVE FRONT SUSPENSION MEMBER BRACKET RH
|
|
Remove the 4 bolts and the front suspension member bracket RH.
| 13.
REMOVE NO. 3 FRAME CROSSMEMBER SUB-ASSEMBLY
|
|
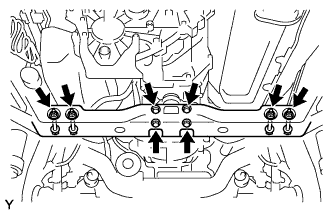
Remove the 4 bolts from the No. 3 frame crossmember sub-assembly.
Remove the 4 nuts and 4 bolts and remove the No. 3 frame crossmember sub-assembly.
| 14.
REMOVE NO.2 STEERING INTERMEDIATE SHAFT SUB-ASSEMBLY |
|
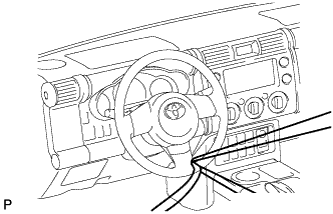
Fix the steering wheel with the seat belt in order to prevent it from rotating.
- HINT:
- The operation is effective for preventing any damage to the spiral cable.
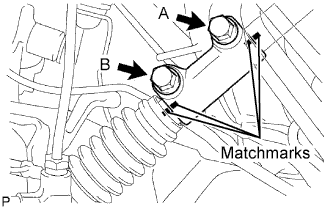
- Place matchmarks on the steering sliding yoke, No. 2 steering intermediate shaft and steering intermediate shaft.
Remove bolts A and B from the steering sliding yoke.
Slide the steering sliding yoke up and separate it from the No. 2 steering intermediate shaft.
Pull down the steering sliding yoke from the steering intermediate shaft to remove it.
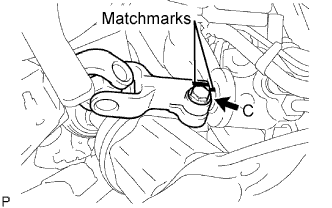
- Place matchmarks on the No. 2 steering intermediate shaft and power steering link.
Remove bolt C from the No. 2 steering intermediate shaft.
Slide the No. 2 steering intermediate shaft up and remove it from the power steering link.
| 15.
SEPARATE TIE ROD END SUB-ASSEMBLY LH |
|
Remove the cotter pin and nut.
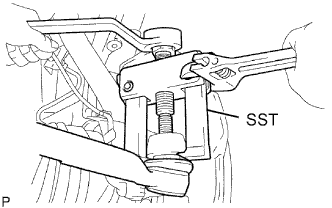
- Using SST, separate the tie rod end from the steering knuckle arm.
- SST
- 09628-62011
| 16.
SEPARATE TIE ROD END SUB-ASSEMBLY RH |
|
- HINT:
- The removal procedure for the RH side is the same as that for the LH side.
| 17.
SEPARATE PRESSURE FEED TUBE ASSEMBLY |
|
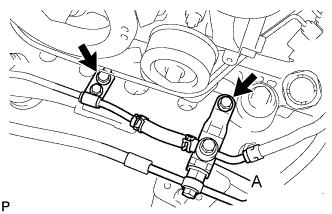
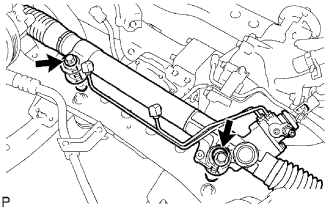
- Remove the 2 bolts and separate the tube support brackets.
- NOTICE:
- Ensure that A is not impacted during removal.
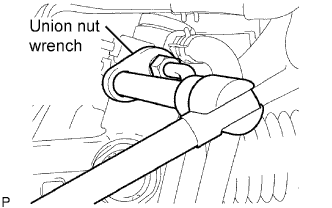
- Using union nut wrench, loosen the flare nut and separate the pressure feed tube.
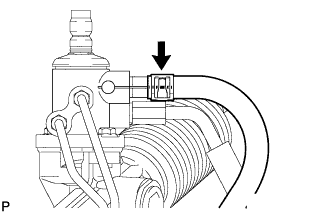
- Disengage the clip and disconnect the return hose.
| 18.
REMOVE POWER STEERING LINK |
|
Remove the 2 bolts and 2 nuts.
- NOTICE:
- The nut has a detent, so never turn the nut. Be sure to turn only the bolt.
Tilt the transmission and remove the power steering link.