INSTALLATION
Removal / installation · Vehicles built Nov 2010 – Jul 2012
Versions by build date: Jul 2007 – Oct 2010 Nov 2010 – Jul 2012 Aug 2012 – Oct 2012 from Nov 2012
| 1.
INSTALL ULTRASONIC SENSOR RETAINER |
 |
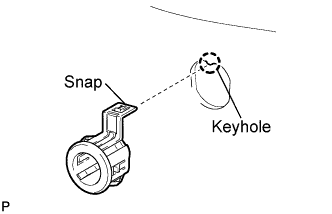
- Install the ultrasonic sensor retainer to the rear bumper.
- NOTICE:
- Do not damage the bumper with the snap when installing the retainer.
- HINT:
- When installing the retainer, align the keyhole and snap as shown in the illustration.
| 2.
INSTALL ULTRASONIC SENSOR |
|
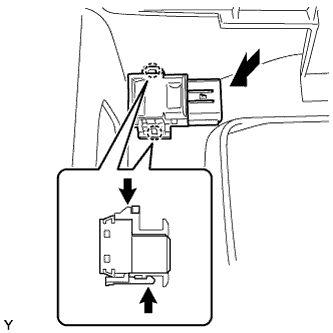
- Engage the 2 claws and install the ultrasonic sensor.
Connect the sensor connector.
| 3.
INSTALL REAR BUMPER EXTENSION MOULDING LH
|
|
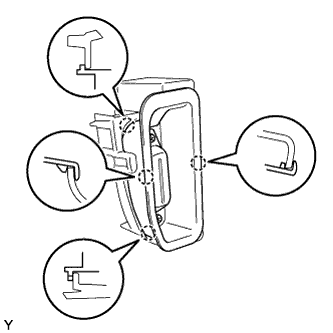
- Engage the 4 claws and install the rear bumper extension moulding.
| 4.
INSTALL REAR BUMPER EXTENSION MOULDING RH
|
|
- HINT:
- Use the same procedure as for the LH side.
| 5.
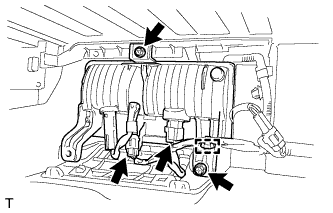
INSTALL REAR FOG LIGHT ASSEMBLY LH
|
|
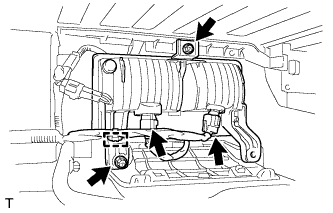
Install the rear fog light with the 2 screws.
Connect the 2 connectors and wire harness clamp.
| 6.
INSTALL REAR FOG LIGHT ASSEMBLY RH
|
|
Install the rear fog light with the 2 screws.
Connect the 2 connectors and wire harness clamp.
| 7.
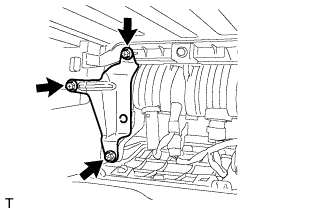
INSTALL REAR BUMPER SIDE RETAINER RH
|
|
Install the rear bumper extension retainer with the 3 screws.
| 8.
INSTALL REAR BUMPER SIDE RETAINER LH |
|
- HINT:
- Use the same procedure as for the RH side.
| 9.
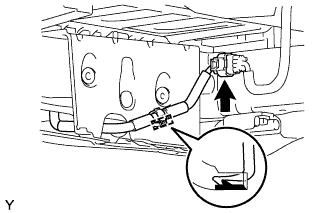
INSTALL NO. 8 FLOOR WIRE
|
|
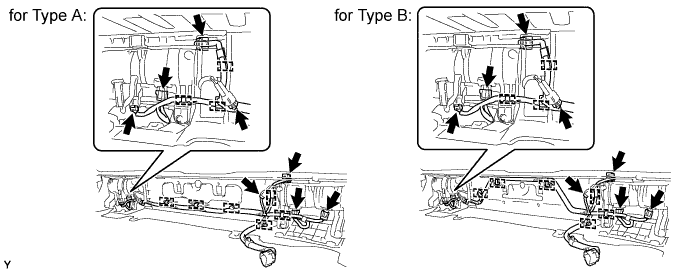

Engage the clamps.
Connect the connectors.
| 10.
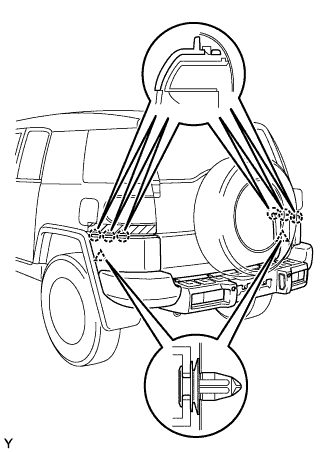
INSTALL REAR BUMPER COVER
|
|
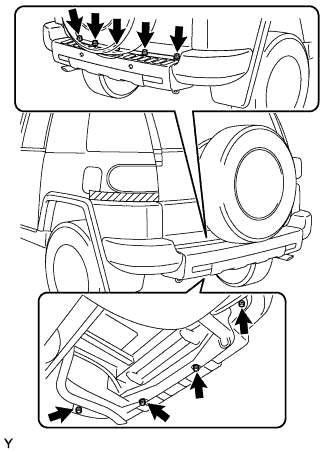
- Engage the 6 claws and the 2 clips and install the rear bumper cover.
- Engage the harness clamp, and connect the connector.
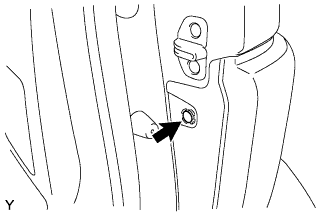
- Tighten the 7 bolts and the 2 screws.
-
Torque:
- 8.0 N*m{
82 kgf*cm
, 71 in.*lbf
}
for bolt
- 3.0 N*m{
31 kgf*cm
, 27 in.*lbf
}
for screw
- Install the clip.
- HINT:
- Use the same procedure for the RH side and LH side.
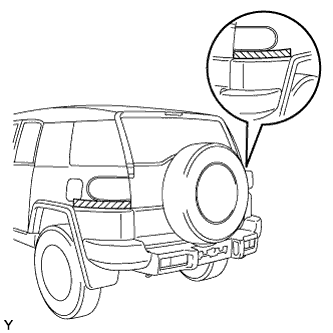
- Remove the protective tape.