REASSEMBLY
Removal / installation · Vehicles built from Aug 2012
Versions by build date: Jul 2007 – Oct 2010 Nov 2010 – Jul 2012 from Aug 2012
| 1. INSTALL ROOF WIRE (w/ CRAWL) |

w/ EC Mirror:
Apply new double-sided tape to the roof headlining along the markings of the roof headlining.
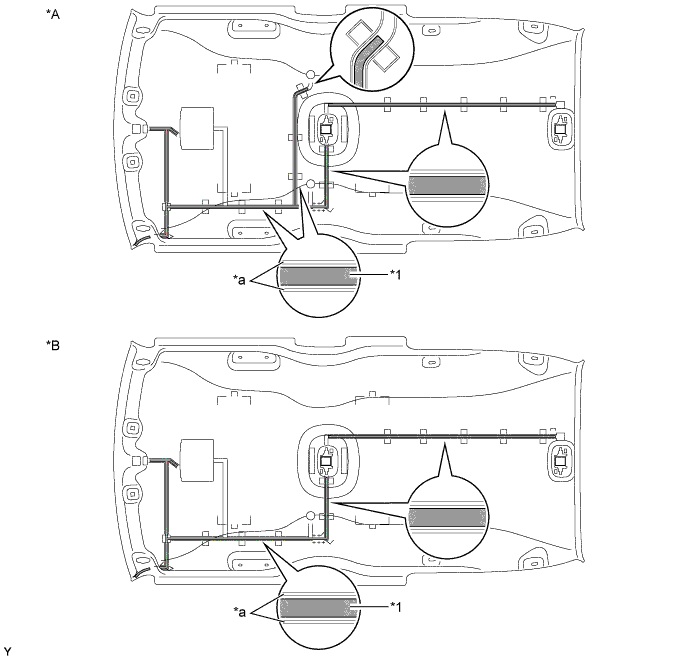

Text in Illustration *A
w/ Roof Speaker
*B
w/o Roof Speaker
*1
Double-sided Tape
-
-
*a
Marking
-
-
- NOTICE:
- Apply the tape securely in place.
- Do not touch the adhesive surface when applying the tape to prevent adhesion failure.
- Apply the tape securely in place.
Install the roof wire as shown in the illustration.
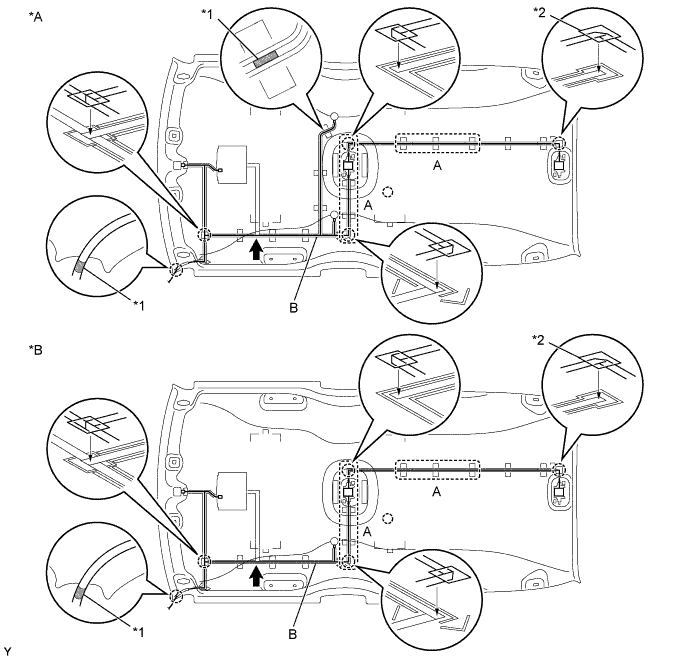
Text in Illustration *A
w/ Roof Speaker
*B
w/o Roof Speaker
*1
Marking Tape
*2
Fixed Tape
- NOTICE:
- Do not twist the flat wire harness when installing it.
- Securely fix the wire harness by pressing it.
- Securely fix the wire harness to secure a gap between the wire harness and the roof panel in part A.
- Securely fix the wire harness to avoid looseness in the wire harness between portion B and the marking tape.
- Do not twist the flat wire harness when installing it.
w/o EC Mirror:
Apply new double-sided tape to the roof headlining along the markings of the roof headlining.
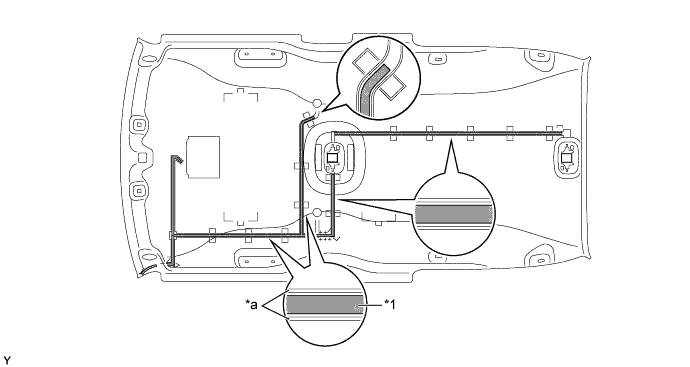
Text in Illustration *1
Double-sided Tape
-
-
*a
Marking
-
-
- NOTICE:
- Apply the tape securely in place.
- Do not touch the adhesive surface when applying the tape to prevent adhesion failure.
- Apply the tape securely in place.
Install the roof wire as shown in the illustration.
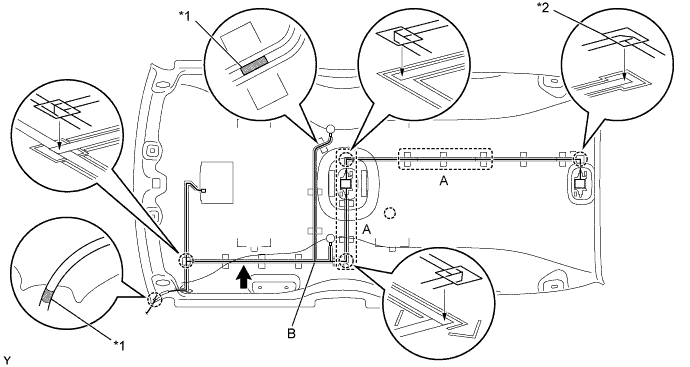
Text in Illustration *1
Marking Tape
*2
Fixed Tape
- NOTICE:
- Do not twist the flat wire harness when installing it.
- Securely fix the wire harness by pressing it.
- Securely fix the wire harness to secure a gap between the wire harness and the roof panel in part A.
- Securely fix the wire harness to avoid looseness in the wire harness between portion B and the marking tape.
- Do not twist the flat wire harness when installing it.
| 2. INSTALL ROOF WIRE (w/o CRAWL) |
w/ EC Mirror:
Apply new double-sided tape to the roof headlining along the markings of the roof headlining.
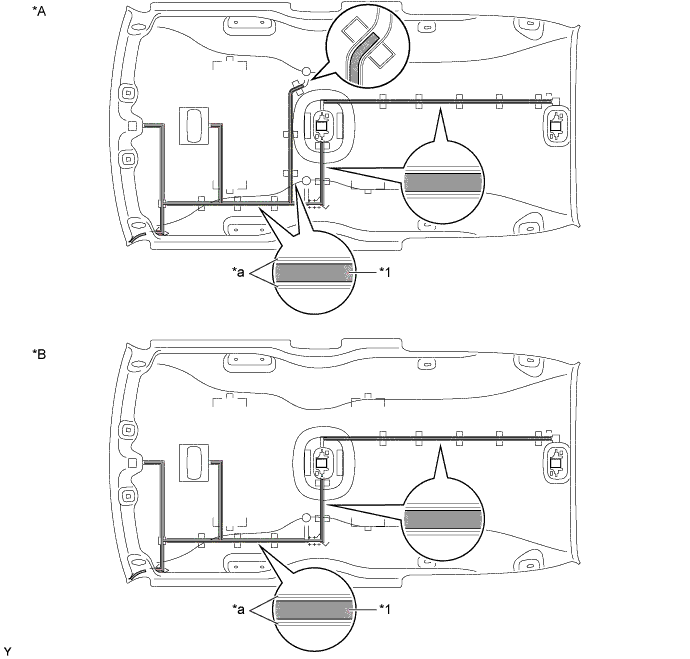
Text in Illustration *A
w/ Roof Speaker
*B
w/o Roof Speaker
*1
Double-sided Tape
-
-
*a
Marking
-
-
- NOTICE:
- Apply the tape securely in place.
- Do not touch the adhesive surface when applying the tape to prevent adhesion failure.
- Apply the tape securely in place.
Install the roof wire as shown in the illustration.
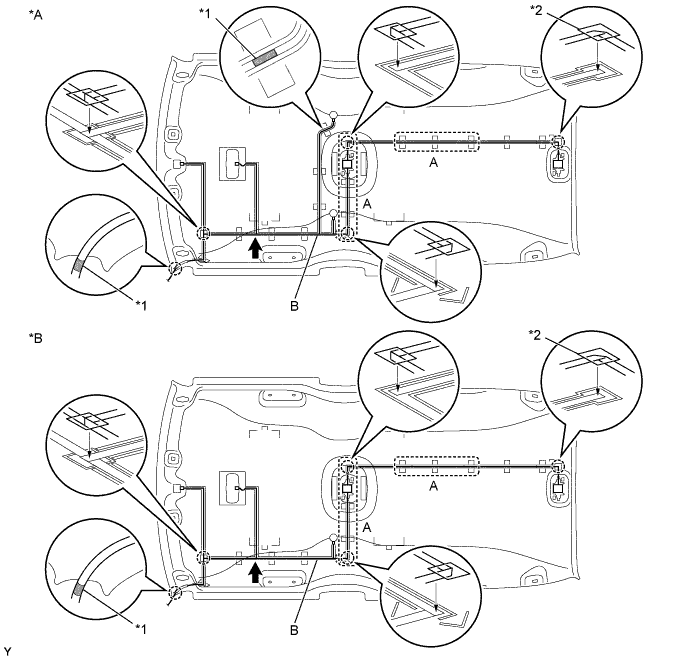
Text in Illustration *A
w/ Roof Speaker
*B
w/o Roof Speaker
*1
Marking Tape
*2
Fixed Tape
- NOTICE:
- Do not twist the flat wire harness when installing it.
- Securely fix the wire harness by pressing it.
- Securely fix the wire harness to secure a gap between the wire harness and the roof panel in part A.
- Securely fix the wire harness to avoid looseness in the wire harness between portion B and the marking tape.
- Do not twist the flat wire harness when installing it.
w/o EC Mirror:
Apply new double-sided tape to the roof headlining along the markings of the roof headlining.
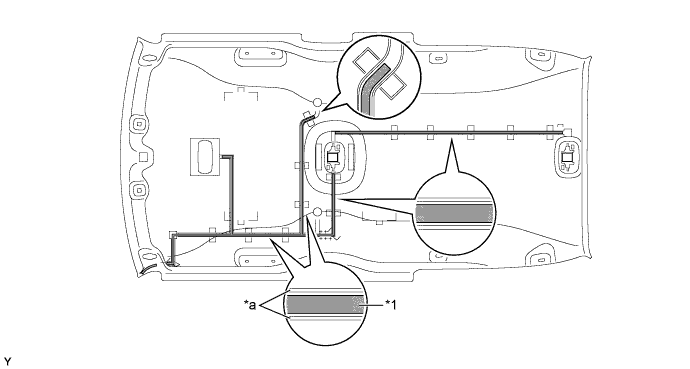
Text in Illustration *1
Double-sided Tape
-
-
*a
Marking
-
-
- NOTICE:
- Apply the tape securely in place.
- Do not touch the adhesive surface when applying the tape to prevent adhesion failure.
- Apply the tape securely in place.
Install the roof wire as shown in the illustration.
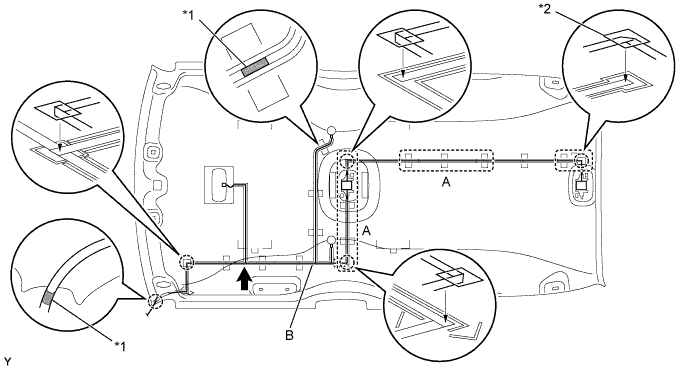
Text in Illustration *1
Marking Tape
*2
Fixed Tape
- NOTICE:
- Do not twist the flat wire harness when installing it.
- Securely fix the wire harness by pressing it.
- Securely fix the wire harness to secure a gap between the wire harness and the roof panel in part A.
- Securely fix the wire harness to avoid looseness in the wire harness between portion B and the marking tape.
- Do not twist the flat wire harness when installing it.
| 3. INSTALL ROOF HEADLINING PAD (w/o CRAWL) |
Align 2 new roof headlining pads with the markings of the roof headlining and install them onto the roof headlining.
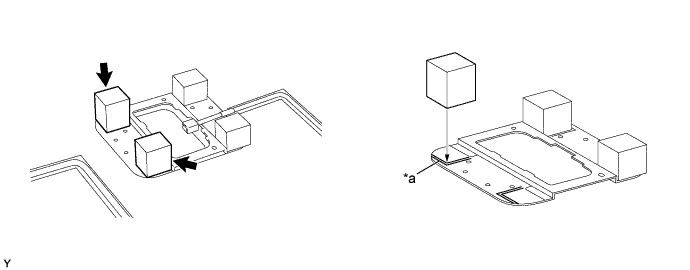
Text in Illustration *a
Marking
-
-
| 4. INSTALL NO. 2 ROOF SILENCER PAD |
Apply double-sided tape to the roof silencer pad.
Align the roof silencer pad with the markings of the roof headlining and install them onto the roof headlining.
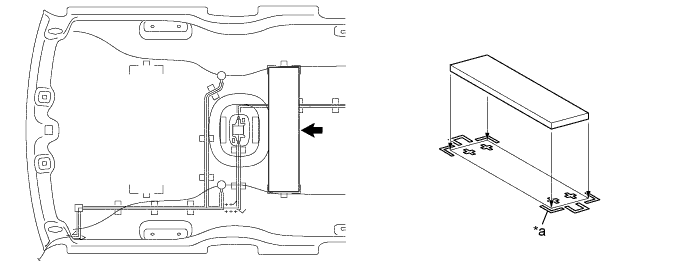
Text in Illustration *a
Marking
-
-
| 5. INSTALL ROOF SILENCER PAD |
Apply double-sided tape to the roof silencer pad.
Align the roof silencer pad with the markings of the roof headlining and install them onto the roof headlining.
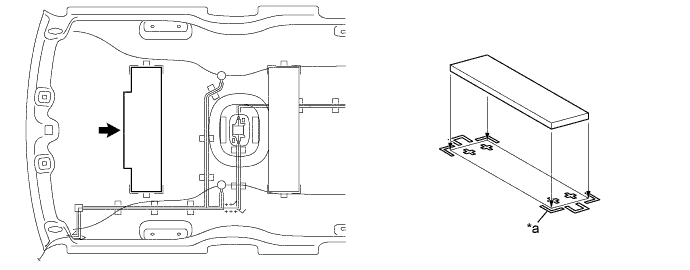
Text in Illustration *a
Marking
-
-
| 6. INSTALL ROOF SPEAKER ASSEMBLY (except 10 Speakers) |
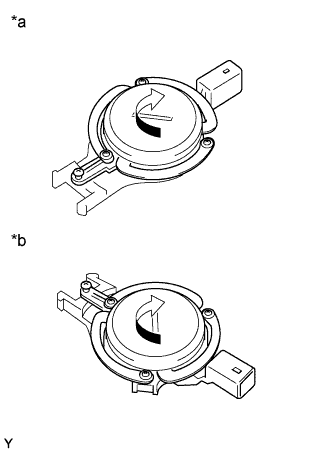 |
- HINT:
- Use the same procedure for both sides.
| *a |
for RH Side |
| *b |
for LH Side |
Install the roof speaker by turning it in the direction of the arrow shown in the illustration.
Tighten the screw.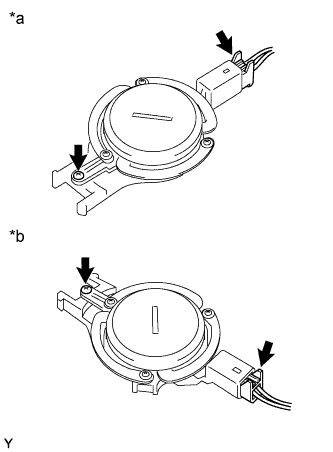
Text in Illustration *a
for RH Side
*b
for LH Side
Connect the speaker connector.
Cover the engaged portion of the connector and the lead line with a new hole cover, and attach them to the roof headlining securely.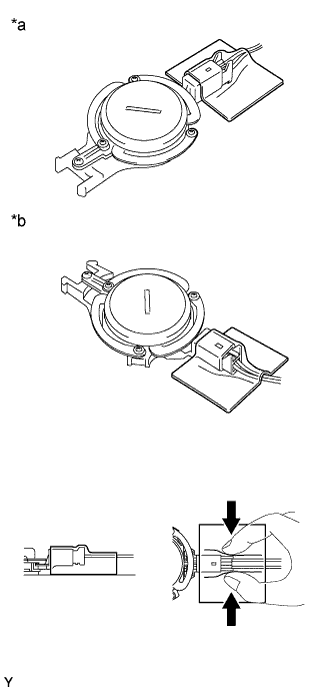
Text in Illustration *a
for RH Side
*b
for LH Side
- NOTICE:
- Securely attach the hole cover to the roof headlining to avoid looseness in the connector and the lead line.