1.
DISCONNECT CABLE FROM NEGATIVE BATTERY TERMINAL
2.
REMOVE GLOVE COMPARTMENT DOOR ASSEMBLY
Disengage the claw and separate the glove compartment door stoppers from the glove compartment door.
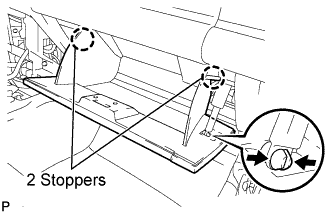
Slightly flex the upper part of the glove compartment door assembly to release the 2 stoppers and open the glove compartment door until it becomes horizontal.
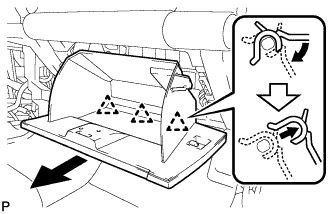
Pull the glove compartment door assembly toward the rear of the vehicle to release the 3 hinges and remove the glove compartment door assembly.
3.
REMOVE FRONT DOOR OPENING TRIM WEATHERSTRIP
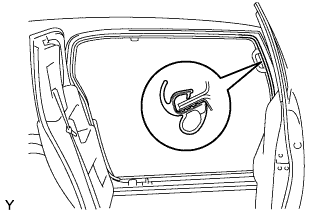
Remove the front door opening trim weatherstrip to the extent that the front pillar garnish can be removed.
4.
REMOVE ASSIST GRIP PLUG
HINT:
Use the same procedure for both sides.
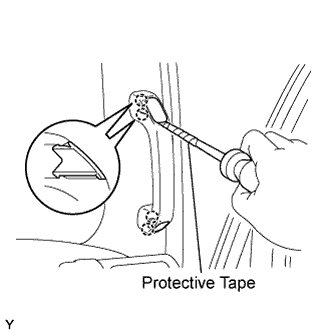
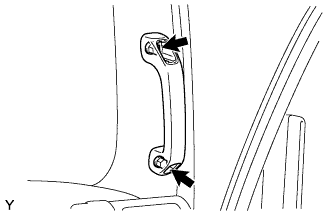
Using a screwdriver with its tip wrapped in protective tape, disengage the 2 claws and remove the assist grip plug.
5.
REMOVE ASSIST GRIP ASSEMBLY
Remove the 2 screws and the assist grip.
6.
REMOVE FRONT PILLAR GARNISH
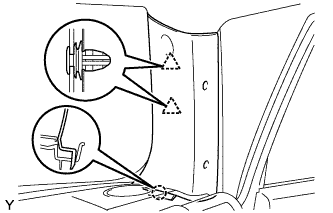
Disengage the 2 clips and the claw and remove the front pillar garnish.
7.
REMOVE RADIATOR GRILLE
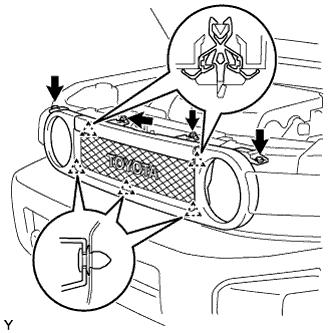
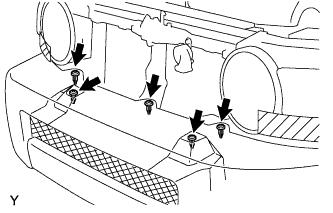
Using a clip remover, remove the 2 clips.
Remove the 2 screws.
Disengage the 5 clips and remove the radiator grille.
8.
REMOVE FRONT BUMPER COVER
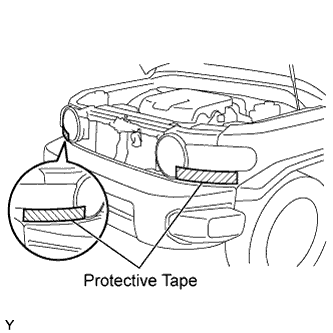
Apply protective tape as shown in the illustration.
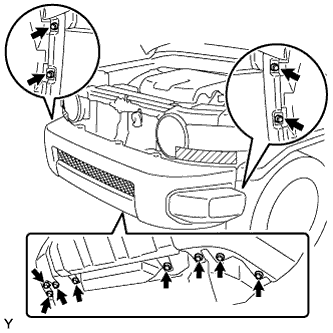
Using a clip remover, remove the 5 clips.
Remove the 8 screws and the 4 bolts.
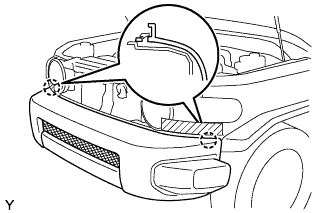
Disengage the 2 claws and remove the front bumper cover.
9.
REMOVE SIDE STEP SUB-ASSEMBLY (w/ Side Step)
HINT:
Use the same procedure as for the LH side (Click here).
10.
REMOVE ROCKER PANEL MOULDING
HINT:
Use the same procedure as for the LH side (Click here).
11.
REMOVE FRONT FENDER MUDGUARD
HINT:
Use the same procedure as for the LH side (Click here).
12.
REMOVE FRONT BUMPER SIDE SUPPORT
HINT:
Use the same procedure as for the LH side (Click here).
13.
REMOVE FRONT FENDER MOULDING SUB-ASSEMBLY
HINT:
Use the same procedure as for the LH side (Click here).
14.
REMOVE RADIO ANTENNA POLE SUB-ASSEMBLY
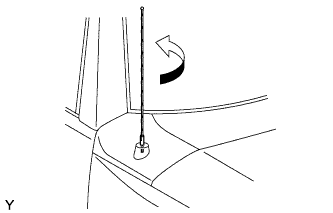
Remove the radio antenna pole by turning it in the direction of the arrow shown in the illustration.
15.
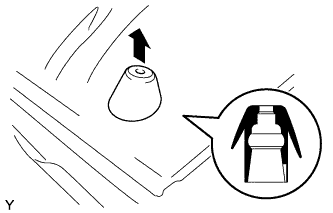
REMOVE ANTENNA ORNAMENT
Pull out the antenna ornament vertically.
16.
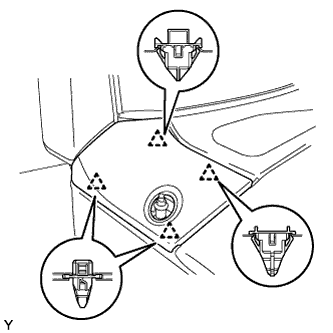
REMOVE FRONT FENDER SIDE UPPER PANEL
Disengage the 4 clips and remove the front fender side panel upper RH.
Remove the 4 clips from the front fender side panel upper RH.
17.
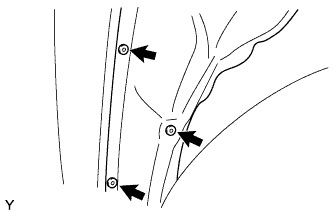
REMOVE FENDER SPLASH REAR SHIELD SUB-ASSEMBLY
Remove the 3 clips and the fender splash rear shield to extent that the radio antenna holder can be removed.
18.
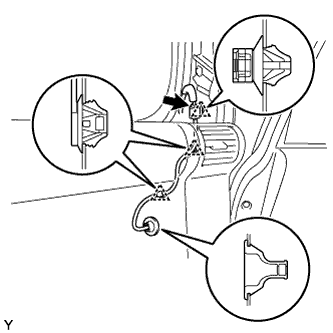
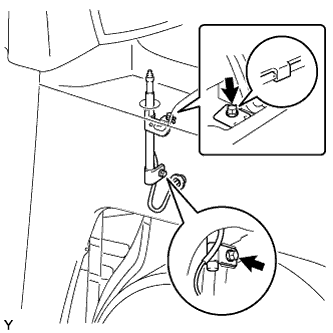
REMOVE RADIO ANTENNA HOLDER ASSEMBLY
Disconnect the connector.
Using a clip remover, remove the 2 clamps and the connector.
Remove the grommet and insert the feeder line through the body hole.
Remove the 2 bolts, the hook and the radio antenna holder.