INSTALLATION
Removal / installation · Vehicles built Jul 2007 – Oct 2010
Versions by build date: Jul 2007 – Oct 2010 Nov 2010 – Jul 2012 from Aug 2012
| 1.
INSTALL UNLOCK WARNING SWITCH |
 |
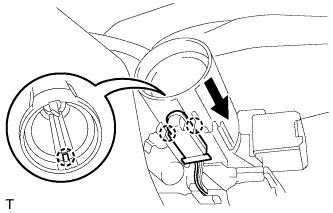
- Install the unlock warning switch onto the steering column bracket upper.
Connect the connector.
| 2.
INSTALL KEY INTER LOCK SOLENOID (for Automatic Transmission) |
|
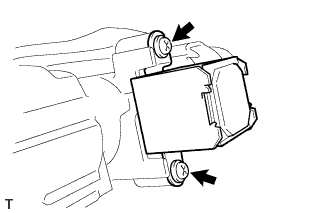
- Install the key inter lock solenoid with the 2 screws.
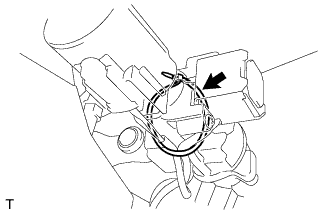
- Install the clamp onto the steering column bracket upper.
| 3.
INSTALL IGNITION SWITCH LOCK CYLINDER AND KEY SET |
|
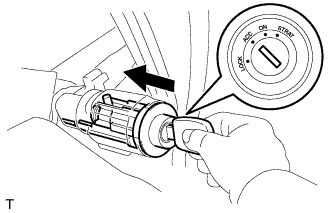
- Make sure that the ignition switch lock cylinder is in the ACC position.
Install the ignition switch lock cylinder.
| 4.
INSTALL INSTRUMENT PANEL SUB-ASSEMBLY
|
|
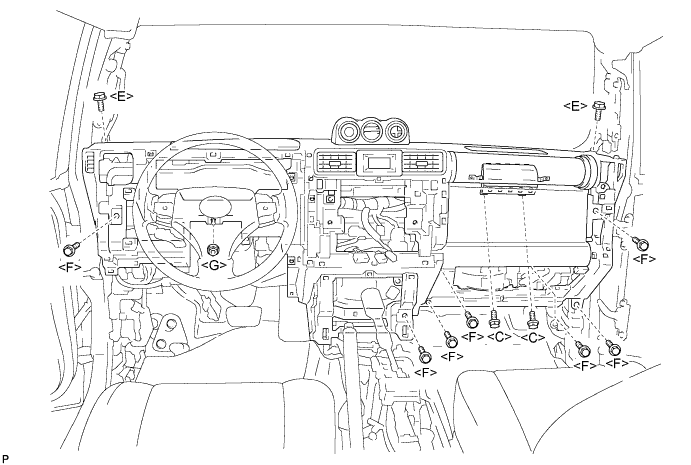

Install the lower instrument panel with the 2 <C> bolts, 2 <E> bolts, 7 <F> bolts and nut <G>.
-
Torque:
- 20 N*m{
204 kgf*cm
, 15 ft.*lbf
}
for bolt <C>
Engage the clamps and connect the connectors.
| 5.
CONNECT PASSENGER AIRBAG CONNECTOR
|
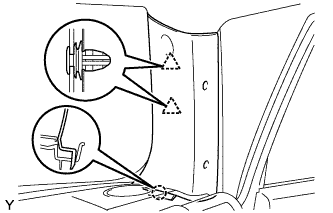
|
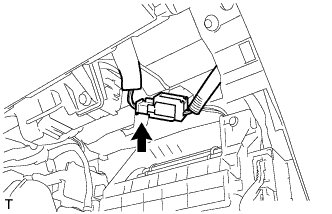
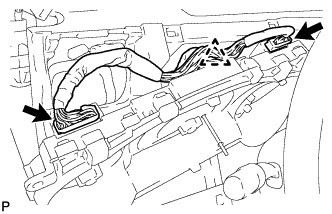
Connect the passenger airbag connector.
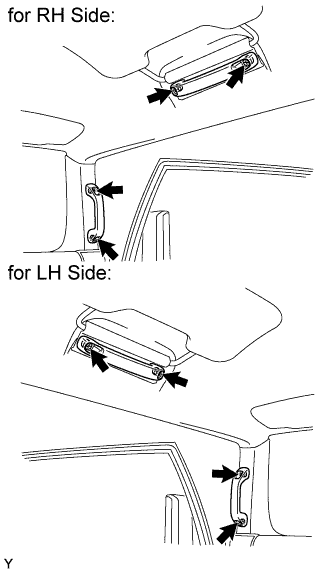
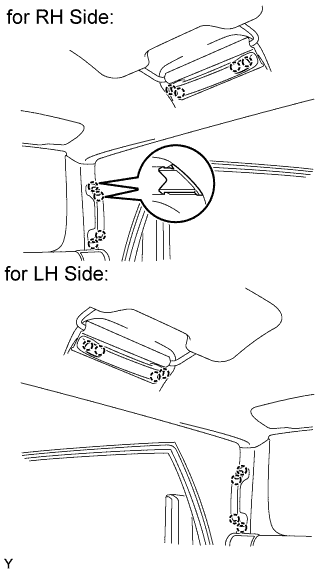
| 6.
REMOVE INSTRUMENT PANEL FINISH PANEL END LH
|
|
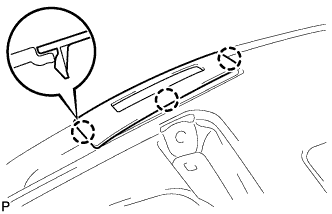
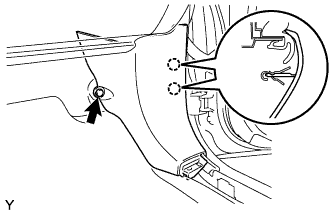
- Engage the 3 claws and install the instrument panel finish panel end.
| 7.
INSTALL ASSIST GRIP RETAINER RH
|
|
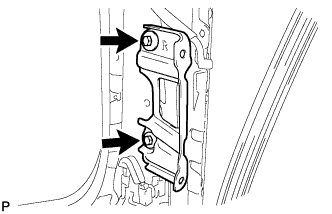
- Install the assist grip retainer with the 2 bolts.
-
Torque:
- 29 N*m{
296 kgf*cm
, 21 ft.*lbf
}
| 8.
INSTALL ASSIST GRIP RETAINER LH
|
|
- HINT:
- Use the same procedure as for the RH side.
| 9.
INSTALL FRONT NO. 2 SPEAKER ASSEMBLY
|
|
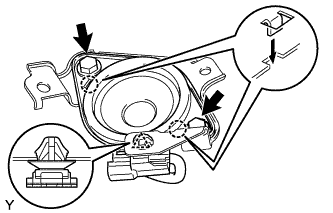
- Install the clamp.
Insert the 2 hooks into the 2 cutout of the front speaker bracket and install the front No. 2 speaker with the 2 bolts.
-
Torque:
- 8.1 N*m{
85 kgf*cm
, 72 in.*lbf
}
| 10.
INSTALL NO. 2 INSTRUMENT PANEL SPEAKER PANEL SUB-ASSEMBLY
|
|
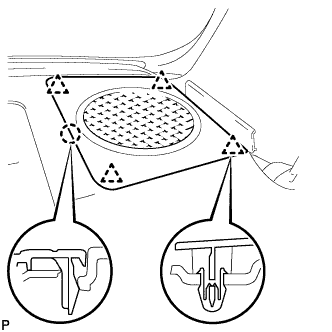
- Engage the 4 clips and claw and install the instrument panel speaker panel.
| 11.
INSTALL NO. 1 INSTRUMENT PANEL SPEAKER PANEL SUB-ASSEMBLY
|
|
- HINT:
- Use the same procedure as for the RH side.
| 12.
INSTALL NO. 2 INSTRUMENT PANEL REGISTER ASSEMBLY
|
|
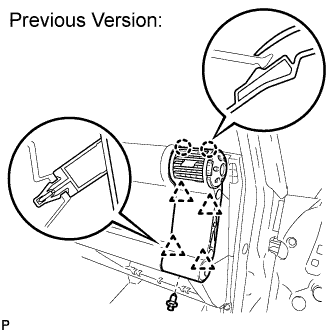
- Install the No. 2 instrument panel register assembly (Previous Version).
Engage the 4 clips and 2 claws and install the instrument panel register.
Install the clip.
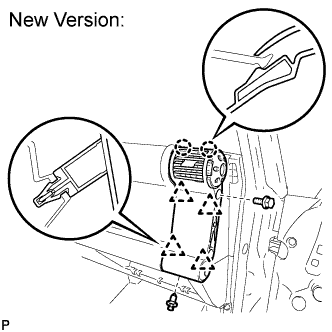
- Install the No. 2 instrument panel register assembly (New Version).
Engage the 4 clips and 2 claws and install the instrument panel register.
Install the bolt and clip.
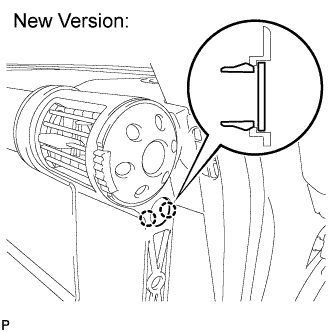
- Engage the 2 claws and install the instrument panel hole cover.
| 13.
INSTALL INSTRUMENT PANEL LOWER FINISH PANEL SUB-ASSEMBLY RH
|
|
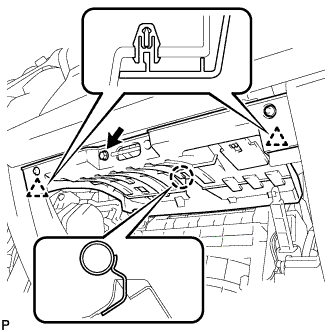
- Install the connectors to the instrument panel lower finish panel.
Engage the claw and 2 clips and install the instrument panel lower finish panel.
Install screw <A>.
| 14.
INSTALL GLOVE COMPARTMENT DOOR ASSEMBLY
|
|
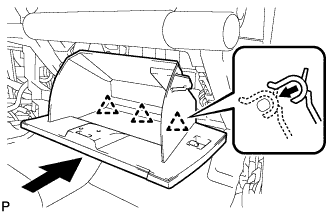
- Install the glove compartment door assembly with the 3 hinges while holding it horizontal.
- Slightly flex the upper part of the glove compartment door assembly, and install the glove compartment door assembly.
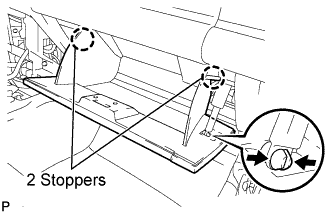
Install the glove compartment door stoppers onto the glove compartment door.
| 15.
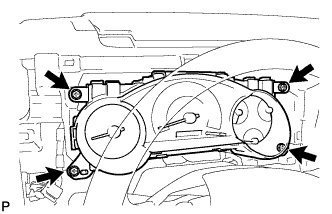
INSTALL COMBINATION METER ASSEMBLY
|
|
- Connect the 2 connectors and the clamp.
- Install the combination meter assembly with the 4 screws.
-
Torque:
- 7.0 N*m{
71 kgf*cm
, 62 in.*lbf
}
| 16.
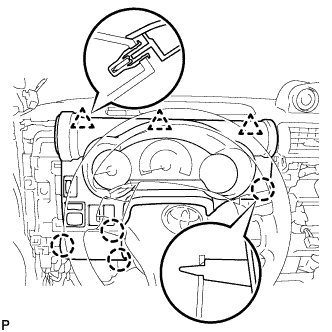
INSTALL INSTRUMENT CLUSTER LOWER FINISH PANEL
|
|
Connect the connectors.
Engage the 3 clips and 4 claws and install the instrument cluster lower finish panel.
| 17.
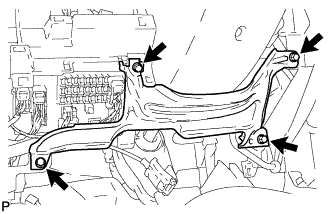
INSTALL LOWER INSTRUMENT PANEL LH
|
|
- Install the lower instrument panel with the 4 <F> bolts.
| 18.
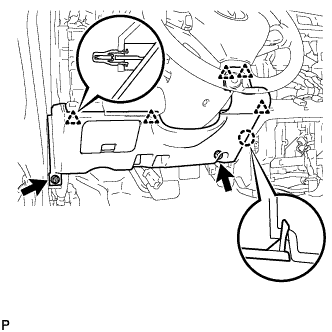
INSTALL LOWER INSTRUMENT PANEL FINISH PANEL SUB-ASSEMBLY LH
|
|
- Engage the 5 clips and claw and install the lower instrument panel finish panel.
Install the 2 <F> bolts.
| 19.
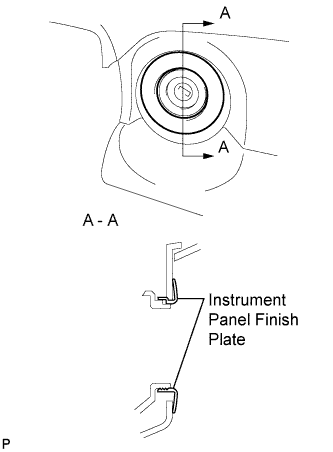
INSTALL INSTRUMENT PANEL FINISH PLATE
|
|
Install the instrument panel finish plate.
| 20.
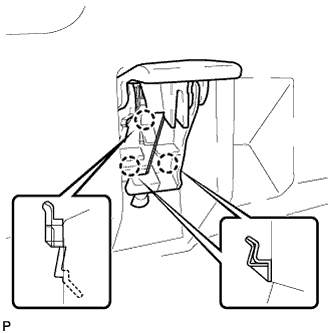
CONNECT HOOD LOCK CONTROL LEVER SUB-ASSEMBLY
|
|
- Engage the 3 claws and install the hood lock control lever.
| 21.
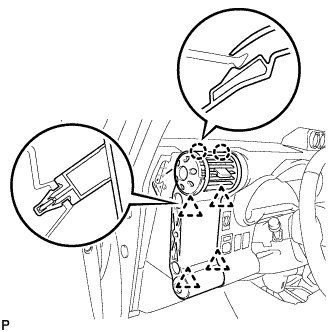
INSTALL NO. 1 INSTRUMENT PANEL REGISTER ASSEMBLY
|
|
- Engage the 4 clips and 2 claws and install the instrument panel register.
| 22.
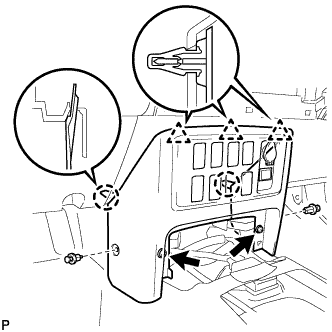
INSTALL INSTRUMENT LOWER COVER SUB-ASSEMBLY
|
|
- Engage the 3 clips and 2 claws and install the instrument lower cover.
Install the 2 <F> bolts and 2 clips.
| 23.
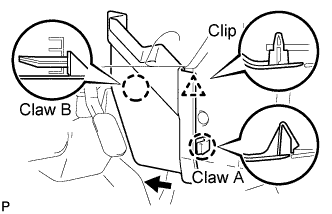
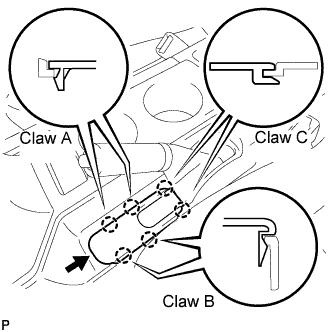
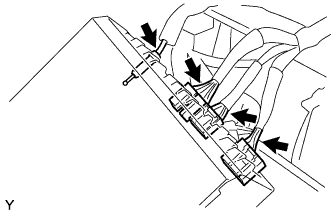
INSTALL CONSOLE UPPER PANEL NO. 1 GARNISH
|
|
Slide the console upper panel garnish toward the front of the vehicle and engage claw B.
Engage the claw A and clip and install the console upper panel garnish.
| 24.
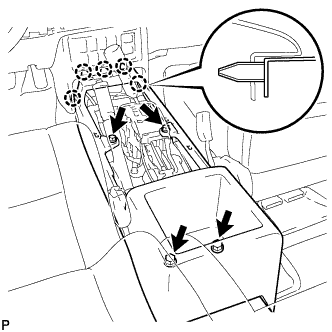
INSTALL FRONT CONSOLE BOX ASSEMBLY
|
|
- Engage the 5 claws and install the front console box.
Install the 4 <D> screws.
| 25.
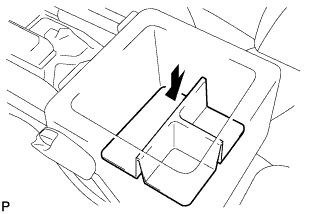
INSTALL BOX BOTTOM MAT
|
|
- Install the box bottom mat.
| 26.
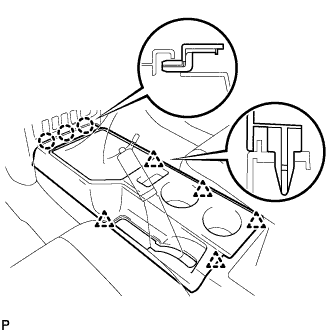
INSTALL CONSOLE UPPER REAR PANEL SUB-ASSEMBLY
|
|
- Engage the 3 claws and 5 clips and install the console upper rear panel.
| 27.
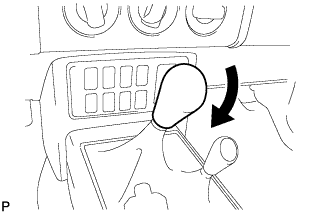
INSTALL SHIFT LEVER KNOB SUB-ASSEMBLY (for 4WD)
|
|
- Install the shift lever knob.
| 28.
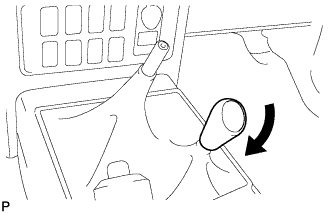
INSTALL SHIFT LEVER KNOB SUB-ASSEMBLY (for Manual Transmission)
|
|
- Install the shift lever knob.
| 29.
INSTALL PARKING BRAKE HOLE COVER SUB-ASSEMBLY
|
|
Slide the parking brake hole cover toward the rear of the vehicle and engage the 2 C claws.
Engage the 4 claws and install the parking brake hole cover.
| 30.
INSTALL RADIO RECEIVER ASSEMBLY
|
|
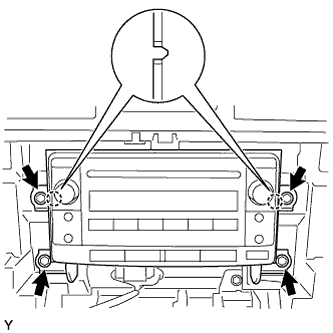
- Connect the plug, the head unit connector and the 2 radio connectors.
- Align the 2 bosses of the radio bracket with the hole in the instrument panel and install the radio receiver with the 4 bolts.
-
Torque:
- 2.5 N*m{
25 kgf*cm
, 22 in.*lbf
}
| 31.
INSTALL INTEGRATION CONTROL AND PANEL ASSEMBLY
|
|
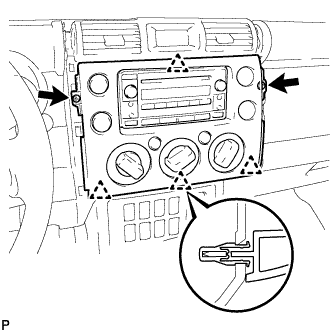
Connect the 3 connectors.
Engage the 4 clips and install the integration control panel assembly.
Install the 2 <H> screws.
| 32.
INSTALL INSTRUMENT PANEL GARNISH LH
|
|
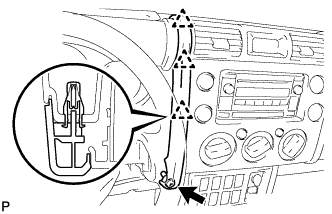
- Engage the 3 clips and install the instrument panel garnish.
Install 2 <H> screws.
| 33.
INSTALL INSTRUMENT PANEL GARNISH RH
|
|
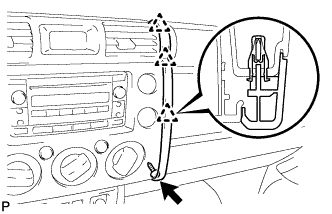
- Engage the 3 clips and install the instrument panel garnish.
Install screw <H>.
| 34.
INSTALL FRONT PILLAR GARNISH RH
|
|
- Engage the claw and the 2 clips and install the front pillar garnish.
| 35.
INSTALL FRONT PILLAR GARNISH LH
|
|
- HINT:
- Use the same procedure as for the RH side.
| 36.
INSTALL ASSIST GRIP ASSEMBLY
|
|
- HINT:
- Use the same procedure to install all the assist grips.
Install the assist grip with the 2 bolts.
-
Torque:
- 8.0 N*m{
82 kgf*cm
, 71 in.*lbf
}
| 37.
INSTALL ASSIST GRIP PLUG
|
|
- HINT:
- Use the same procedure to install all the assist grip plugs.
Engage the 2 claws and install the assist grip plug.
| 38.
INSTALL FRONT DOOR OPENING TRIM WEATHERSTRIP LH
|
|
Install the front door opening trim weatherstrip.
| 39.
INSTALL FRONT DOOR OPENING TRIM WEATHERSTRIP RH
|
|
Install the front door opening trim weatherstrip.
| 40.
INSTALL COWL SIDE TRIM BOARD RH
|
|
- Engage the 2 claws and install the cowl side trim board.
Install the clip.
| 41.
INSTALL COWL SIDE TRIM BOARD LH
|
|
- HINT:
- Use the same procedure as for the RH side.
| 42.
INSTALL FOOTREST CLIP
|
|
- HINT:
- Use the same procedure for both sides.
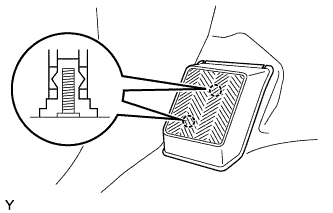
Engage the 2 claws and install the footrest clip.
| 43.
INSTALL FRONT FLOOR FOOTREST
|
|
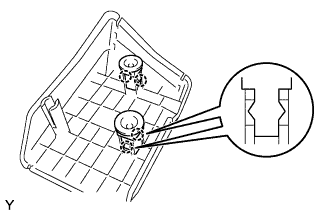
- Engage the 2 studs and install the front floor footrest.
| 44.
INSTALL FRONT DOOR SCUFF PLATE RH
|
|
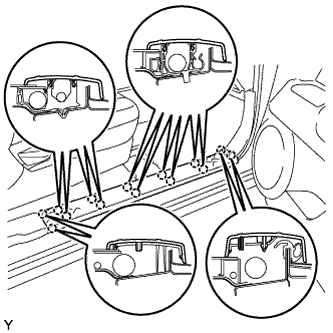
- Engage the 14 claws and install the door scuff plate.
| 45.
INSTALL FRONT DOOR SCUFF PLATE LH
|
|
- HINT:
- Use the same procedure as for the RH side.
| 46.
CONNECT CABLE TO NEGATIVE BATTERY TERMINAL |
|
-
Torque:
- 3.9 N*m{
40 kgf*cm
, 35 in.*lbf
}
| 47.
INSPECT SRS WARNING LIGHT |
|
(Click here)