INSTALLATION
Removal / installation · Vehicles built Jul 2007 – Oct 2010
Versions by build date: Jul 2007 – Oct 2010 from Nov 2010
| 1.
INSTALL CLOCK ASSEMBLY |
 |
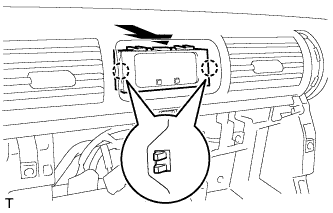
- Engage the 2 claws and install the clock assembly.
- HINT:
- Push the clock assembly in the direction shown in the illustration, to install it.
| 2.
INSTALL RADIO RECEIVER ASSEMBLY
|
|
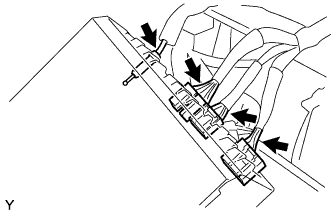
- Connect the plug, the head unit connector and the 2 radio connectors.
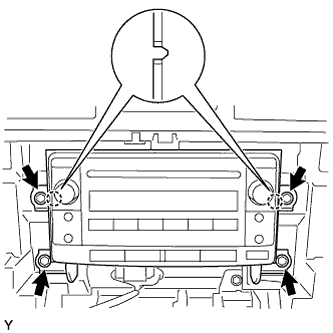
- Align the 2 bosses of the radio bracket with the hole in the instrument panel and install the radio receiver with the 4 bolts.
-
Torque:
- 2.5 N*m{
25 kgf*cm
, 22 in.*lbf
}
| 3.
INSTALL INTEGRATION CONTROL PANEL ASSEMBLY
|
|
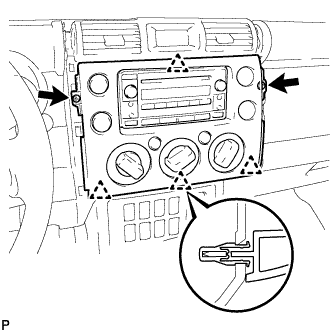
Connect the 3 connectors.
Engage the 4 clips and install the integration control panel assembly.
Install the 2 <H> screws.
| 4.
INSTALL INSTRUMENT PANEL GARNISH RH
|
|
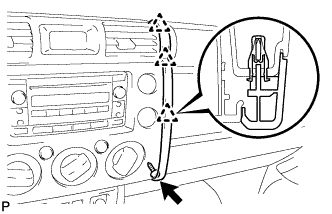
- Engage the 3 clips and install the instrument panel garnish.
Install screw <H>.
| 5.
INSTALL INSTRUMENT PANEL GARNISH LH
|
|
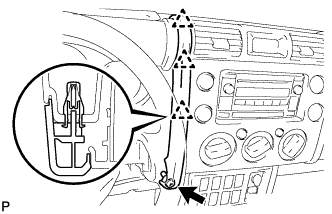
- Engage the 3 clips and install the instrument panel garnish.
Install 2 <H> screws.
| 6.
CONNECT CABLE TO NEGATIVE BATTERY TERMINAL |
|
-
Torque:
- 3.9 N*m{
40 kgf*cm
, 35 in.*lbf
}