REMOVAL
Removal / installation · Vehicles built Nov 2010 – Oct 2012
Versions by build date: Aug 2009 – Oct 2010 Nov 2010 – Oct 2012 Nov 2012 – Jul 2014 from Aug 2014
| 1.
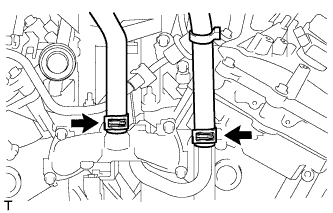
DISCONNECT HEATER WATER HOSE ASSEMBLY |
 |
Disconnect the 2 hoses and remove the heater water hose assembly.
| 2.
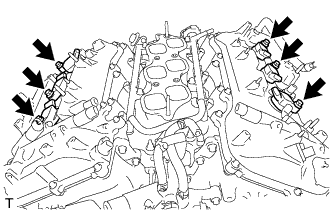
REMOVE IGNITION COIL ASSEMBLY |
|
Remove the 6 bolts and 6 ignition coils.
| 3.
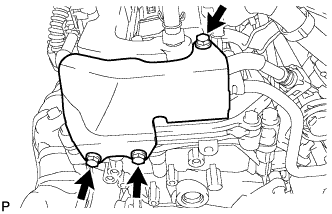
REMOVE REAR CYLINDER HEAD COVER
|
|
- Remove the 3 bolts and cover.
| 4.
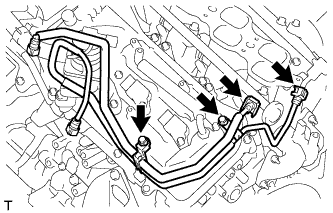
REMOVE FUEL PIPE SUB-ASSEMBLY |
|
Disconnect the 2 fuel pipes (Click here).
Remove the 2 bolts and No. 1 fuel pipe and No. 2 fuel pipe.
| 5.
REMOVE FUEL DELIVERY PIPE SUB-ASSEMBLY
|
|
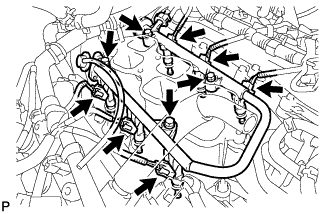
- Disconnect the 6 fuel injector connectors.
Remove the 4 bolts and fuel delivery pipe together with the 6 fuel injectors.
- NOTICE:
- Be careful not to drop the injectors when removing the fuel delivery pipe.
| 6.
REMOVE FUEL INJECTOR ASSEMBLY
|
|
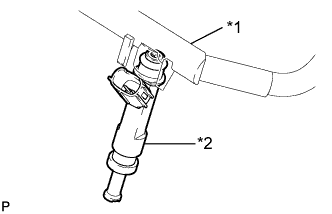
- Pull the 6 fuel injectors from the fuel delivery pipe.
Text in Illustration
*1
|
Fuel Delivery Pipe
|
*2
|
Fuel Injector
|
Remove the O-ring and injector vibration insulator from each fuel injector.
| 7.
REMOVE INTAKE MANIFOLD
|
|
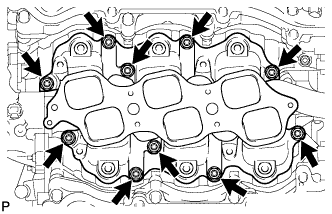
- Remove the 4 nuts, 6 bolts and intake manifold.
Remove the 2 gaskets.
| 8.
REMOVE WATER BY-PASS PIPE SUB-ASSEMBLY (w/ Oil Cooler)
|
|
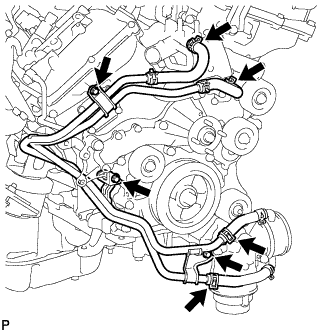
Disconnect the 4 hoses.
Remove the 3 bolts and water by-pass pipe.
| 9.
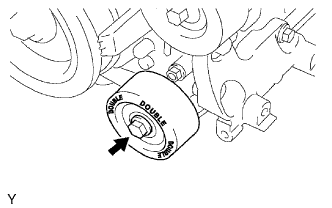
REMOVE NO. 1 IDLER PULLEY SUB-ASSEMBLY
|
|
Remove the bolt and No. 1 idler pulley.
| 10.
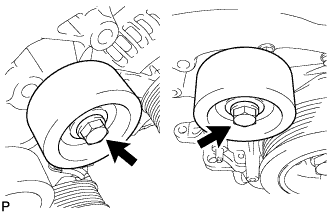
REMOVE NO. 2 IDLER PULLEY SUB-ASSEMBLY
|
|
for Cover Separate Type:
Remove the 2 bolts, 2 idler pulley cover plates, 2 No. 2 idler pulleys, and 2 No. 2 idler pulley cover plates.
for Cover Integrated Type:
Remove the 2 bolts and 2 No. 2 idler pulleys.
| 11.
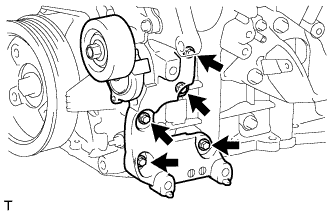
REMOVE V-RIBBED BELT TENSIONER ASSEMBLY
|
|
Remove the 5 bolts and V-ribbed belt tensioner.
| 12.
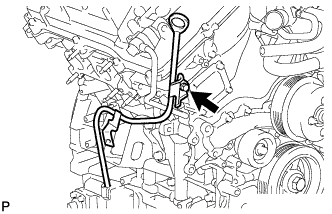
REMOVE ENGINE OIL LEVEL DIPSTICK GUIDE
|
|
Remove the dipstick.
Remove the bolt and dipstick guide.
Remove the O-ring from the dipstick guide.
| 13.
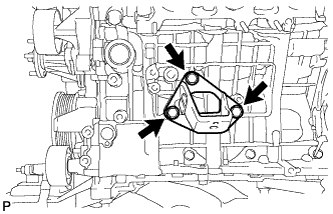
REMOVE FRONT NO. 1 ENGINE MOUNTING BRACKET LH |
|
- Remove the 3 bolts and front No. 1 engine mounting bracket LH.
| 14.
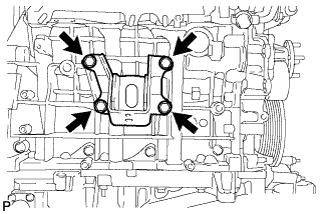
REMOVE FRONT NO. 1 ENGINE MOUNTING BRACKET RH |
|
- Remove the 4 bolts and front No. 1 engine mounting bracket RH.
| 15.
REMOVE FLYWHEEL RING GEAR (for Manual Transmission) |
|
- CAUTION:
- Wear protective gloves. Hot areas on the flywheel ring gear may injure your hands.
- HINT:
- If the flywheel ring gear is deformed or the gears are damaged, replace it.
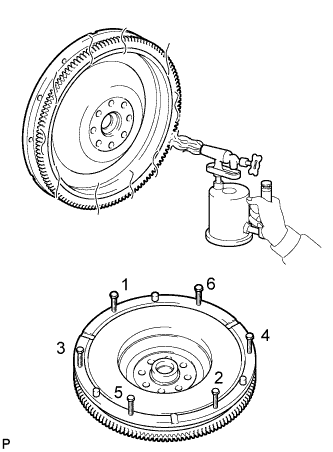
- Using a torch, heat the ring gear evenly to approximately 200°C (392°F).
Temporarily install 6 bolts (8 mm (0.315 in.) x 1.25 pitch) with a length of 70 mm (2.76 in.) or more to the flywheel.
Uniformly tighten the 6 bolts in the order shown in the illustration.
Remove the ring gear from the flywheel.