 |
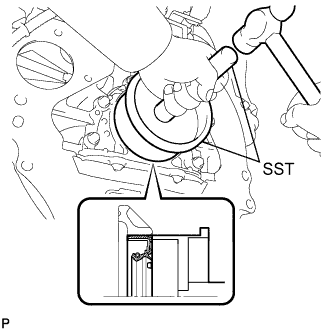
Using SST and a hammer, tap in the oil seal until its surface is flush with the rear oil seal retainer edge.
- SST
- 09223-15030
09950-70010 (09951-07150)
- NOTICE:
- Wipe off extra grease from the crankshaft.
ENGINE REAR OIL SEAL > INSTALLATION |
| 1. INSTALL ENGINE REAR OIL SEAL |
Apply MP grease to a new oil seal lip.
|
Using SST and a hammer, tap in the oil seal until its surface is flush with the rear oil seal retainer edge.
| 2. INSTALL FLYWHEEL SUB-ASSEMBLY (for Manual Transmission) |
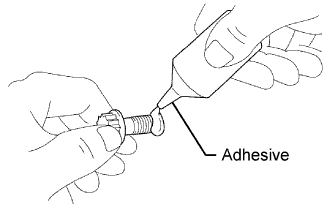 |
Apply adhesive to 2 or 3 threads of the mounting bolt end.
Install the flywheel.
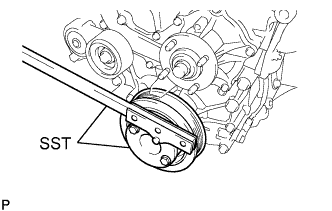 |
Fix the crankshaft with SST.
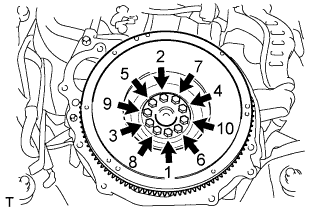 |
Install and uniformly tighten the 10 mounting bolts in several steps in the sequence shown in the illustration.(*1)
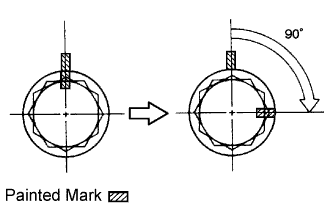 |
Mark the mounting bolt with paint.(*2)
Retighten the mounting bolt by 90° in the order shown in step (*1).
Check that the painted mark is now at a 90° angle to that in step (*2).
| 3. INSTALL DRIVE PLATE AND RING GEAR SUB-ASSEMBLY (for Automatic Transmission) |
|
Apply adhesive to 2 or 3 threads of the mounting bolt end.
Install the spacer FR, drive plate and spacer RR on the crankshaft.
|
Fix the crankshaft with SST.
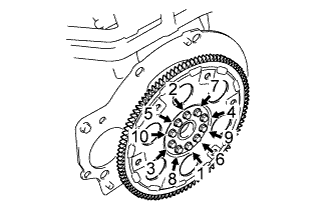 |
Install and uniformly tighten the 10 mounting bolts in several steps in the sequence shown in the illustration.
| 4. INSTALL CLUTCH DISC ASSEMBLY (for Manual Transmission) |
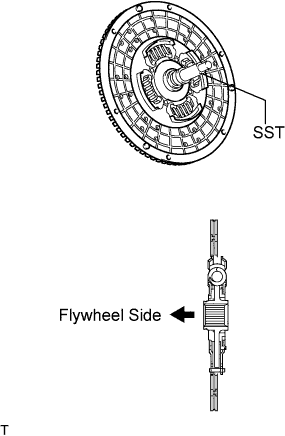 |
Insert SST into the clutch disc assembly, then insert them into the flywheel sub-assembly.
| 5. INSTALL CLUTCH COVER ASSEMBLY (for Manual Transmission) |
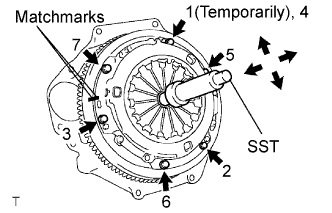 |
Align the matchmark on the clutch cover assembly with the one on the flywheel sub-assembly.
Following the procedures shown in the illustration, tighten the 6 bolts starting from the bolt located near the knock pin on the top.
| 6. INSPECT AND ADJUST CLUTCH COVER ASSEMBLY (for Manual Transmission) |
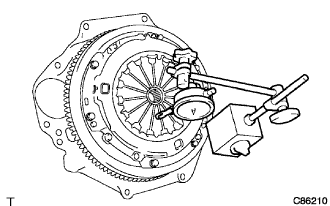 |
Using a dial indicator with a roller instrument, check the diaphragm spring tip alignment.
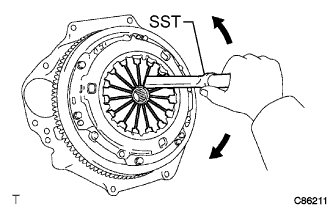 |
If alignment is not as specified, adjust the diaphragm spring tip alignment using SST.
| 7. INSTALL MANUAL TRANSMISSION UNIT ASSEMBLY (for Manual Transmission) |
| 8. INSTALL AUTOMATIC TRANSMISSION ASSEMBLY (for Automatic Transmission) |
| 9. PERFORM INITIALIZATION |