INSTALLATION
Removal / installation · Vehicles built from Dec 2017
Versions by build date: Oct 2014 – Mar 2016 Apr 2016 – Dec 2016 Jan 2017 – Nov 2017 from Dec 2017
| 1. INSTALL AIR CONDITIONING RADIATOR ASSEMBLY |

Install the air conditioning radiator assembly with the 3 screws.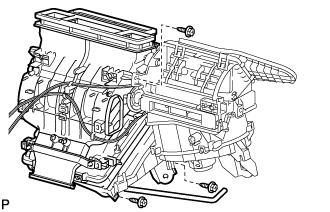

for LHD, w/ PTC: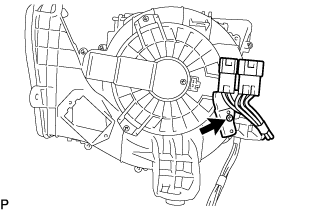
Install the wire harness with the screw.
for RHD, w/ PTC:
Attach the clamp.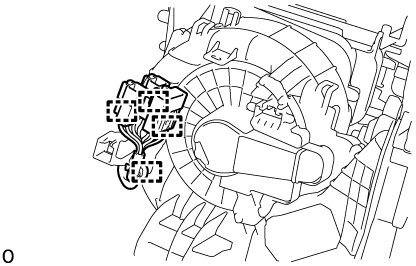
| 2. INSTALL AIR DUCT NO.2 |
Engage the 2 claws to install the air duct No.2.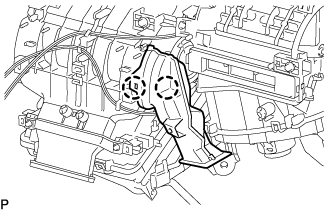
| 3. INSTALL AIR CONDITIONER UNIT ASSEMBLY |
Install the air conditioner unit assembly with the 3 bolts.
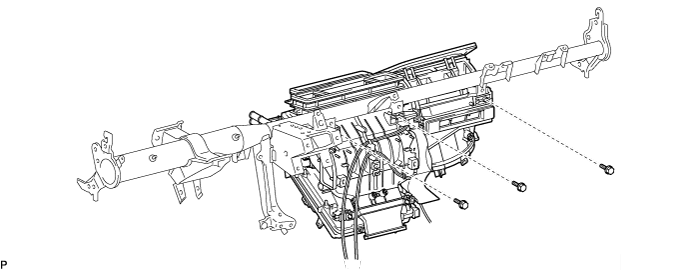
| 4. INSTALL INSTRUMENT PANEL REINFORCEMENT ASSEMBLY |
Driver seat:
Using a "Torx" socket wrench (T40), install the instrument panel reinforcement assembly with the 2 Torx bolts.
Passenger seat:
Using a hexagon wrench 12 mm, install the instrument panel reinforcement assembly with the 2 bolts.
- Torque:
- 6.0 N*m{ 61 kgf*cm , 53 in.*lbf }
Using a "Torx" socket wrench (T40), install the instrument panel reinforcement assembly with the 2 "Torx" bolts.
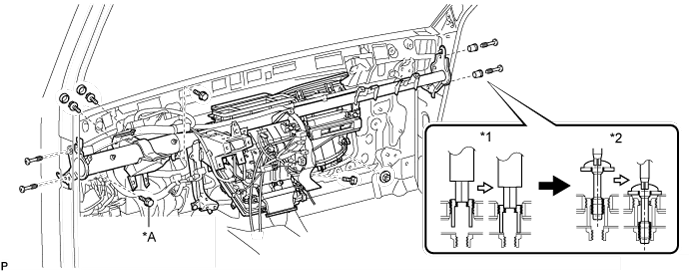
Text in Illustration *A
for Manual Transmission
-
-
*1
Collar
*2
''Torx'' Bolt
- Torque:
- 20 N*m{ 204 kgf*cm , 15 ft.*lbf }
Install the 2 bolts and nut. (AUTOMATIC TRANSMISSION)
Install the 3 bolts and nut. (MANUAL TRANSMISSION)
Install the 2 bolts and cap.
Attach the clamps and connectors.
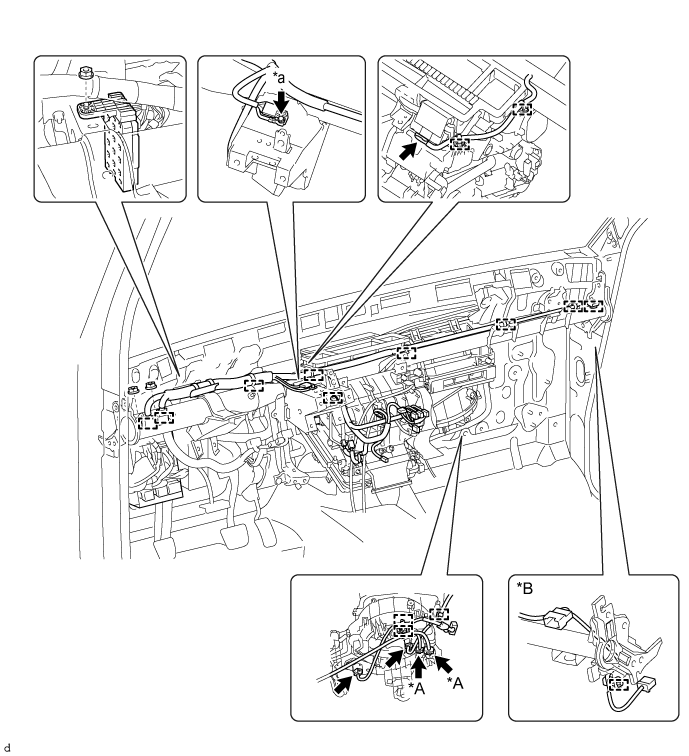
*A
w/ PTC
*B
for Wide Body
*a
Ground Wire
-
-
Install the bolt and nut.
- Torque:
- Ground Wire:
- 8.4 N*m{ 86 kgf*cm , 74 in.*lbf }
| 5. INSTALL INSTRUMENT PANEL TO FLOOR BRACE SUB-ASSEMBLY |
| 6. CONNECT PARKING BRAKE CONTROL HANDLE SUB-ASSEMBLY |
| 7. INSTALL AIR DUCT NO.1 |
| 8. INSTALL STEERING COLUMN ASSEMBLY |
| 9. INSTALL INSTRUMENT PANEL ASSEMBLY |
| 10. INSTALL HEATER WATER HOSE INLET A |
| 11. INSTALL HEATER WATER HOSE OUTLET |
| 12. INSTALL COOLER REFRIGERANT LIQUID PIPE B |
Remove the attached vinyl tape from the pipe.
Sufficiently apply compressor oil to a new O-ring and the fitting surface of the cooler refrigerant liquid pipe B.
- Compressor oil:
- ND-OIL 8 or equivalent
Install the O-ring on the cooler refrigerant liquid pipe B.
Install the cooler refrigerant liquid pipe B.
| 13. INSTALL COOLER REFRIGERANT SUCTION PIPE A |
Remove the attached vinyl tape from the hose.
Sufficiently apply compressor oil to a new O-ring and the fitting surface of the cooler refrigerant suction pipe A.
- Compressor oil:
- ND-OIL 8 or equivalent
Install the O-ring on the cooler refrigerant suction pipe A.
Move the hook connector in the direction indicated by the arrow in the illustration.
Insert the pipe joints into the fitting holes securely and tighten the bolt.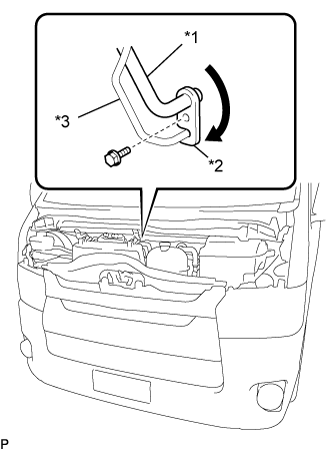
Text in Illustration *1
Cooler Refrigerant Suction Pipe A
*2
Hook Connector
*3
Cooler Refrigerant Liquid
- Torque:
- 5.4 N*m{ 55 kgf*cm , 48 in.*lbf }
| 14. INSTALL INTERCOOLER ASSEMBLY (w/ Intercooler) |
for 1KD-FTV:(Click here)
for 2KD-FTV:(Click here)
for 1GD-FTV:(Click here)
| 15. REMOVE NO.1 ENGINE UNDER COVER (w/ Under Cover and Intercooler) |
| 16. INSTALL WINDSHIELD WIPER MOTOR AND LINK ASSEMBLY |
| 17. CONNECT CABLE TO NEGATIVE BATTERY TERMINAL |
- Torque:
- 5.4 N*m{ 55 kgf*cm , 48 in.*lbf }
- NOTICE:
- When disconnecting the cable, some systems need to be initialized after the cable is reconnected (Click here).
| 18. ADD ENGINE COOLANT |
for 1KD-FTV:(Click here)
for 2KD-FTV:(Click here)
for 1TR-FE:(Click here)
for 2TR-FE:(Click here)
for 5L-E:(Click here)
for 1GD-FTV:(Click here)
| 19. CHARGE REFRIGERANT |
| 20. WARM UP ENGINE |
| 21. CHECK FOR ENGINE COOLANT LEAKS |
for 1KD-FTV:(Click here)
for 1TR-FE:(Click here)
for 1GD-FTV:(Click here)
| 22. INSPECT COOLING SYSTEM |
for 2KD-FTV:(Click here)
for 2TR-FE:(Click here)
for 5L-E:(Click here)
| 23. CHECK FOR LEAKAGE OF REFRIGERANT |