REMOVAL
Removal / installation · Vehicles built from Oct 2014
| 1.
REMOVE MANUAL TRANSMISSION UNIT ASSEMBLY |
 |
(Click here)
| 2.
REMOVE CLUTCH RELEASE FORK SUB-ASSEMBLY |
|
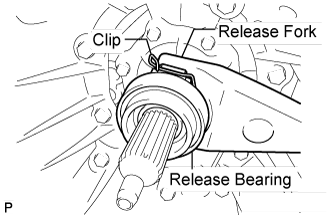
- Remove the clutch release fork with the clutch release bearing from the transmission unit.
Remove the release bearing and clip from the clutch release fork.
| 3.
REMOVE CLUTCH RELEASE FORK BOOT |
|
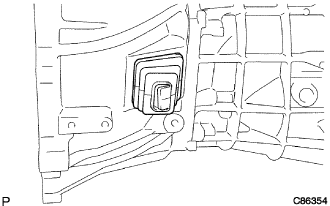
- Remove the clutch release fork boot from the transmission unit.
| 4.
REMOVE RELEASE FORK SUPPORT |
|
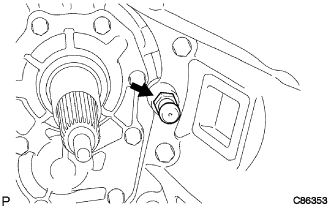
- Remove the release fork support from the transmission unit.
| 5.
REMOVE CLUTCH COVER ASSEMBLY |
|
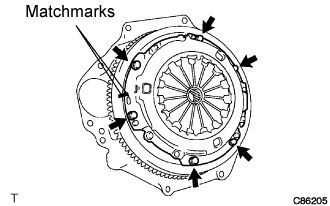
- Put matchmarks on the clutch cover assembly and the flywheel sub-assembly.
Loosen each set bolt one turn at a time until spring tension is released.
- NOTICE:
- Do not drop the clutch disc assembly.
Remove the set bolts, and pull off the clutch cover assembly.
| 6.
REMOVE CLUTCH DISC ASSEMBLY |
|
- NOTICE:
- Keep the lining part of the clutch disc assembly, the pressure plate and surface of the flywheel sub-assembly away from oil and foreign matter.
| 7.
INSPECT INPUT SHAFT BEARING |
|
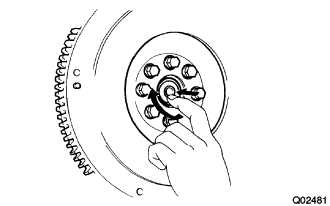
- Turn the bearing by hand while applying force in the direction of the rotation.
- HINT:
- The bearing is permanently lubricated and requires no cleaning or lubrication.
| 8.
REMOVE INPUT SHAFT BEARING |
|
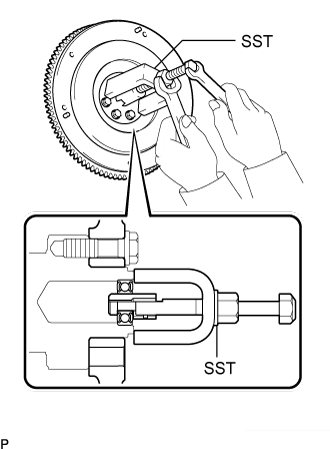
- Remove the 2 bolts at symmetrically opposite points.
Using SST, remove the input shaft bearing.
- SST
- 09303-35011