2014-2019 Hiace · Service Manual TRANSMISSION

INSTALLATION

Removal / installation · Vehicles built Jan 2017 – Nov 2017

Versions by build date: Oct 2014 – Dec 2014 Jan 2015 – Mar 2016 Apr 2016 – Dec 2016 Jan 2017 – Nov 2017 from Dec 2017


1. INSTALL TORQUE CONVERTER CLUTCH ASSEMBLY

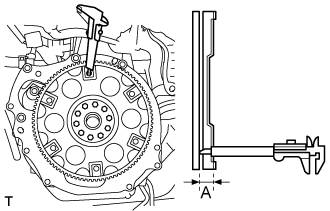
  1. C102921E01
    Using vernier calipers measure the dimension A between the transmission and the end of the surface of the drive plate.

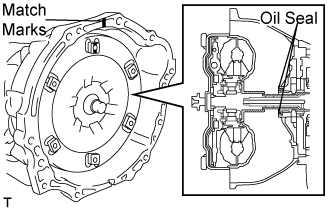
  1. C101844E01
    Aligning the matchmarks on the transmission case and torque converter assembly, engage the spline of the input shaft and turbine runner.

    NOTICE:
    Install the torque converter assembly to the input shaft in horizontally.

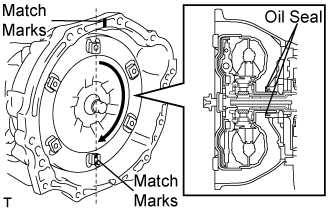
  1. C101845E01
    Engage the spline of the stator shaft and stator while turning the torque converter assembly to a clockwise.

    NOTICE:
    1. Turn the torque converter assembly approximately 180°.
    2. Be sure not to damage the oil seal.
    3. Install the torque converter assembly to the input shaft in horizontally.

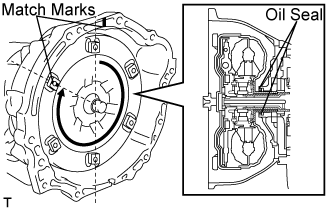
  1. C101846E01
    Turn the torque converter assembly to the clockwise and align the match marks on the torque converter assembly and transmission case to engage the key of the oil pump drive gear into the slot on the torque converter assembly.

    NOTICE:
    1. Do not push the torque converter when align the match marks.
    2. Be sure not to damage the oil seal.
    3. Install the torque converter assembly to the input shaft horizontally.

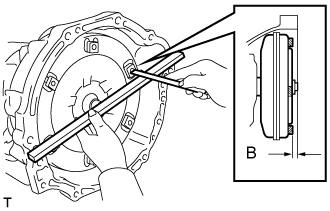
  1. C101847E01
    Using calipers and a straight edge, measure dimension B shown in the illustration and check that B is greater than A measured in step (a).

    Standard:
    A + 1 mm(0.04 in) or more


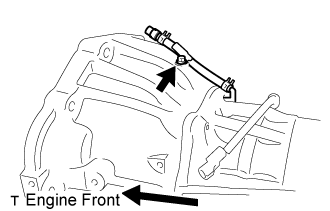
2. INSTALL BREATHER PLUG HOSE

  1. C103234E02
    Install the breather plug hose with the bolt.

    Torque:
    7.4 N*m{ 75 kgf*cm , 65 in.*lbf }


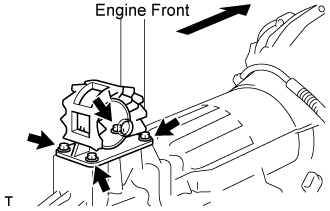
3. INSTALL ENGINE MOUNTING INSULATOR ASSEMBLY REAR

  1. C102922E02
    Install the engine mounting insulator assembly rear with 4 bolts.

    Torque:
    29 N*m{ 296 kgf*cm , 21 ft.*lbf }


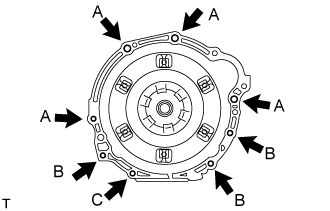
4. INSTALL AUTOMATIC TRANSMISSION ASSEMBLY

  1. C103762E01
    Install the automatic transmission assembly with 8 bolts.

    Torque:
    Bolt A:
    71 N*m{ 724 kgf*cm , 55 ft.*lbf }
    Bolt B, C:
    37 N*m{ 377 kgf*cm , 29 ft.*lbf }


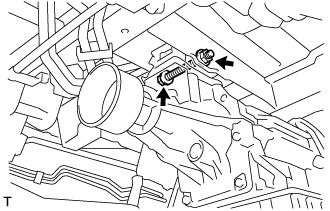
5. INSTALL ENGINE MOUNTING INSULATOR ASSEMBLY REAR

  1. C101781
    Install the engine mounting insulator assembly rear with bolt, nut and 2 washers.

    Torque:
    98 N*m{ 999 kgf*cm , 77 ft.*lbf }


6. INSTALL DRIVE PLATE AND TORQUE CONVERTER CLUTCH SETTING BOLT

  1. C102925E02
    Turn the crankshaft pulley and install the 6 torque converter clutch setting bolts.

    Torque:
    41 N*m{ 420 kgf*cm , 32 ft.*lbf }

    HINT:
    First install the match mark bolt (black painted).

  1. C102926E02
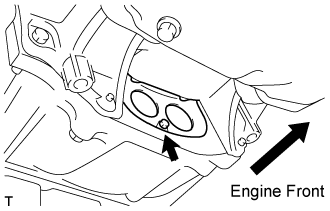
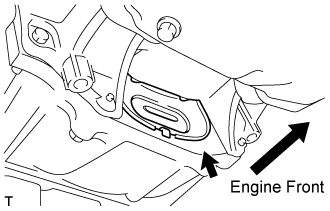
    Install the flywheel housing dust seal to the automatic transmission assembly.


7. INSTALL WIRE HARNESS

  1. C102927E02
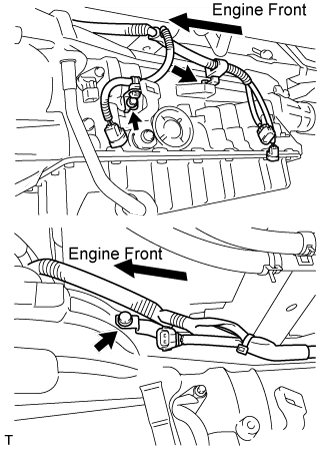
    Install the wire harness to the automatic transmission assembly with the 3 bolts.

    Torque:
    5.4 N*m{ 55 kgf*cm , 47 in.*lbf }


8. CONNECT CONNECTOR

  1. C102929E04
    Connect the connector of park/neutral position switch connector and temperature sensor.

  1. C101834E04
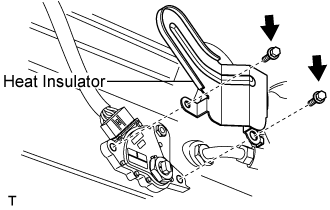
    Install the heat insulator to the park/neutral position switch assembly with 2 bolts.

    Torque:
    7.5 N*m{ 76 kgf*cm , 65 in.*lbf }

  1. C101774E03
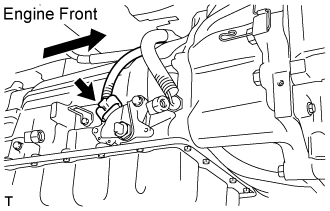
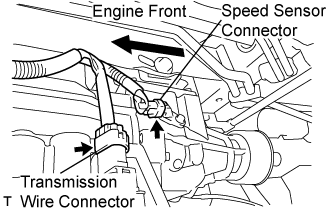
    Connect the speed sensor (SP2) connector and transmission wire connector of the transmission wire.

  1. C102928E01
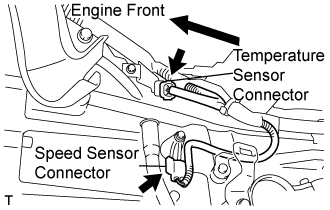
    Connect the speed sensor (NC0) connector and temperature sensor connector.


9. INSTALL OIL COOLER TUBE

  1. C102930E02
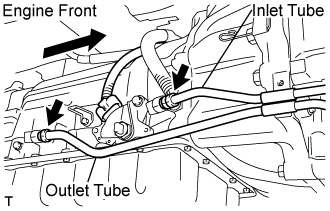
    Using a 17 mm union nut wrench, install the 2 oil cooler tubes to the automatic transmission assembly.

    Torque:
    34 N*m{ 347 kgf*cm , 26 ft.*lbf }

    NOTICE:
    Use the formula to calculate special torque values for situations where a union nut wrench is combined with a torque wrench (Click here).

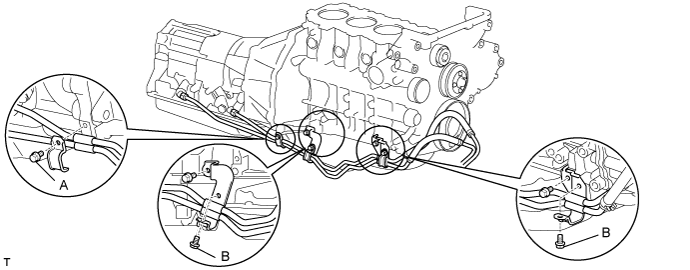
  1. Install the 3 oil cooler tube clamps with 3 bolts.

    Torque:
    Bolt A:
    12 N*m{ 125 kgf*cm , 8 ft.*lbf }
    Bolt B:
    5.0 N*m{ 51 kgf*cm , 44 in.*lbf }


    C102932E01


10. INSTALL STARTER ASSEMBLY

  1. A102709E01
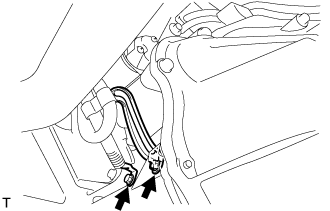
    Remove the 2 bolts, then remove the ground cable and bracket.

  1. A113538E02
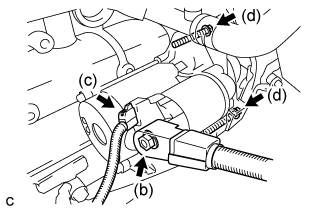
    Remove the nut and disconnect the wire harness from terminal 30.

  1. Disconnect the terminal 50 connector from the starter assembly.

  1. Remove the 2 bolts and the starter assembly.


11. INSTALL TRANSMISSION CONTROL CABLE BRACKET NO.1

  1. C102931E03
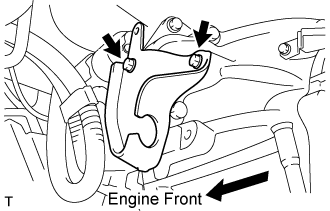
    Install the transmission control cable bracket to the automatic transmission assembly with the 2 bolts.

    Torque:
    14 N*m{ 143 kgf*cm , 11 ft.*lbf }


12. INSTALL TRANSMISSION CONTROL CABLE ASSEMBLY

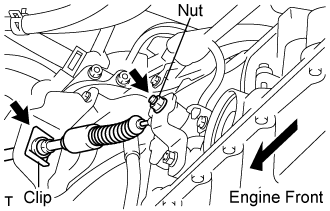
  1. C102933E04
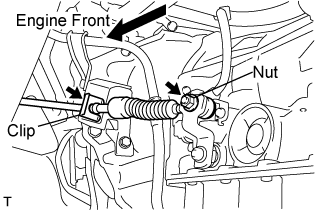
    Install the transmission control cable assembly to the control shaft lever and transmission control bracket No.1 with the nut and a new clip.

    Torque:
    15 N*m{ 150 kgf*cm , 11 ft.*lbf }


13. INSTALL TRANSMISSION OIL FILLER TUBE SUB-ASSEMBLY

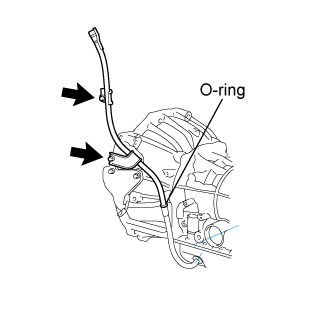
  1. C102934E06
    Coat a new O-ring with ATF and install the oil filler tube.

  1. Install the oil filler tube with 2 bolts.

    Torque:
    12 N*m{ 125 kgf*cm , 10 ft.*lbf }


14. INSTALL EXHAUST PIPE ASSEMBLY FRONT
  1. w/ Secondary air injection system:

    1. Install the fuel ratio sensor. (Click here)

      Torque:
      44 N*m{ 449 kgf*cm , 32 ft.*lbf }

  1. For unleaded gasoline engine:

    1. Install the oxygen sensor. (Click here)

      Torque:
      44 N*m{ 449 kgf*cm , 32 ft.*lbf }

  1. Inspect the compression spring.

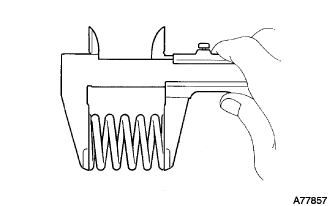
    1. A077857
      Using vernier calipers, measure the free length of the compression springs.

      Minimum length:
      40.5mm(1.594 in.)

      HINT:
      If the free length is less than the minimum, replace the compression spring.

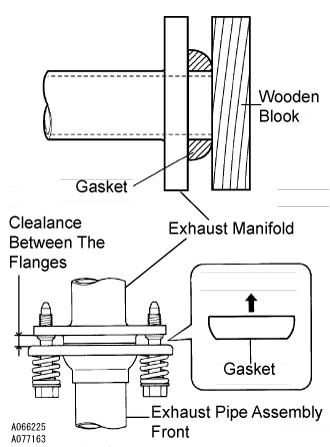
  1. A102062E03
    Install the gasket.

    1. Fully insert a new gasket to the exhaust manifold by hand.

    2. Using a wooden block, uniformly strike the gasket so that the gasket and exhaust manifold are properly fit.

      NOTICE:
      1. Be careful with the installation direction of the gasket.
      2. Do not reuse the gasket.
      3. Do not damage the gasket.
      4. To ensure a proper seal, do not use the exhaust pipe assembly front to force the gasket onto the exhaust manifold.

  1. Install a new gasket to the exhaust pipe assembly front.

  1. Connect the exhaust pipe assembly front to the exhaust pipe support.

  1. Install the exhaust pipe assembly front with the 4 bolts, 2 nuts, and 2 compression springs.

    Torque:
    Exhaust manifold side:
    43 N*m{ 438 kgf*cm , 32 ft.*lbf }

    Torque:
    Exhaust pipe assembly tail side:
    48 N*m{ 489 kgf*cm , 35 ft.*lbf }

    NOTICE:
    After installation, check that the clearance is almost the same at any point between the flanges of the exhaust manifold and exhaust pipe assembly front.

  1. For unleaded gasoline engine:

    1. Connect the sensor connector(s).


15. INSTALL PROPELLER SHAFT ASSEMBLY

  1. C102186E01
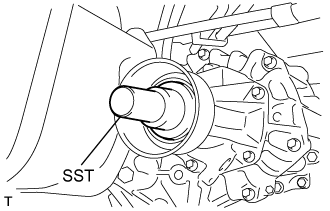
    Remove the SST from the extension housing.

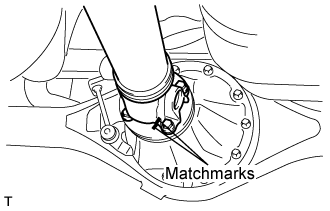
  1. Install the propeller shaft assembly in the extension housing.

  1. Align the matchmarks on the propeller shaft flange and differential flange.

  1. C102185E01
    Install the propeller shaft assembly with the 4 nuts, 4 bolts and 4 washers.

    Torque:
    74 N*m{ 755 kgf*cm , 54 ft.*lbf }


16. INSTALL ENGINE SIDE UNDER COVER LH

17. INSTALL ENGINE SIDE UNDER COVER RH

18. INSTALL ENGINE UNDER COVER SUB-ASSEMBLY NO.2

19. INSTALL ENGINE UNDER COVER NO.1

20. CONNECT BATTERY NEGATIVE CABLE

21. ADD AUTOMATIC TRANSMISSION FLUID

22. INSPECT AUTOMATIC TRANSMISSION FLUID

HINT:
Drive the vehicle so that the engine and transmission are at normal operating temperature.

Fluid temperature:
70 to 80 °C (158 to 176 °F)

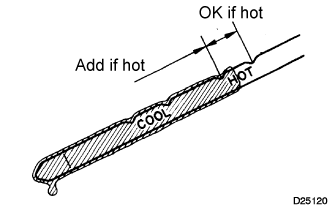
  1. D025120E01
    Park the vehicle on a level surface and set the parking brake.

  1. With the engine idling and the brake pedal depressed, move shift the lever into all positions from P to L and return to the P position.

  1. Take out the dipstick and wipe it clean.

  1. Put it back all the way.

  1. Take it out again and check that the fluid level is within the HOT range.
    If the fluid level is below the HOT range, add new fluid and recheck the fluid level. If the fluid level exceeds the HOT range, drain the fluid once, add the proper amount of new fluid and recheck the fluid level.


23. INSPECT SHIFT LEVER POSITION
  1. When shifting from P position only with ignition switch ON and depress the break pedal.

  1. Make sure that the shifting lever moves smoothly and can be moderately operated.

  1. When starting engine, make sure that the vehicle moves forward when shifting from N to D position and moves reward when shifting R position.


24. ADJUST SHIFT LEVER POSITION

  1. C101771E02
    Remove a clip, nut, and disconnect between the control shaft lever to transmission control cable assembly from the control shaft lever and transmission control cable bracket No.1.

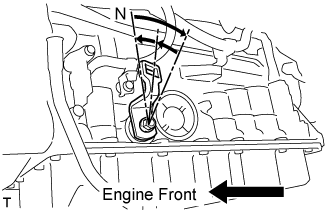
  1. C101788E05
    Turn the control shaft lever until stop to a clockwise direction, return the control shaft lever 2 notches to N position.

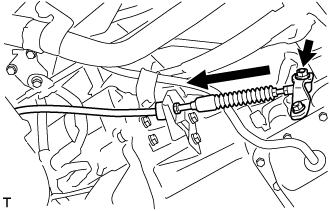
  1. C101803
    Set the shift lever to N position while holding the shift lever lightly toward the R position side and install it.

    Torque:
    15 N*m{ 150 kgf*cm , 11 ft.*lbf }

    NOTICE:
    Tighten the nut with it closing up cranky.

  1. Inspect the operation condition and work.


25. CHECK EXHAUST GAS LEAKS

26. PERFORM INITIALIZATION
(Click here)
← INSTALLATION (Apr 2016 – Dec 2016)INSTALLATION (from Dec 2017) →