REMOVAL
Removal / installation · Vehicles built Oct 2014 – Dec 2016
Versions by build date: Oct 2014 – Dec 2016 from Jan 2017
| 1. REMOVE BACK DOOR INSIDE HANDLE ASSEMBLY (w/ Back Door Inside Handle) |

Remove the screw and the back door inside handle assembly.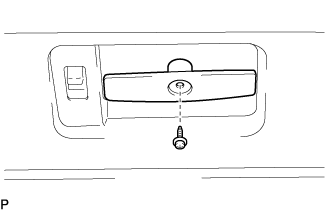

| 2. REMOVE BACK DOOR INSIDE HANDLE BEZEL (w/ Back Door Inside Handle) |
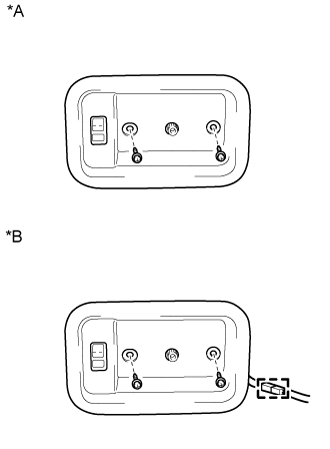 |
w/o Illumination:
Remove the 2 screws and the back door inside handle bezel.
w/ Illumination:
Remove the 2 screws and the back door inside handle bezel.
Disconnect the connector.
Text in Illustration *A
w/o Illumination
*B
w/ Illumination
| 3. REMOVE BACK DOOR PULL STRAP (w/ Strap) |
Remove the screw and back door pull strap.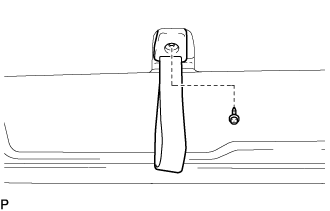
| 4. REMOVE BACK DOOR TRIM BOARD (for Board) |
Using a clip remover, remove the 16 clips and the back door trim board.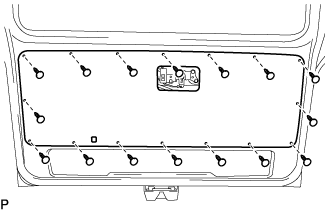
| 5. REMOVE BACK DOOR TRIM BOARD (for Molded Door Trim) |
Remove the 2 screws.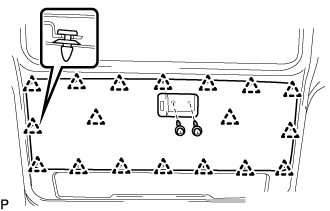
Using a clip remover, remove the 18 clips and the back door trim board.
| 6. REMOVE BACK DOOR OUTSIDE GARNISH |
w/ Smart Entry and Start System:
Disconnect the 2 connectors.
w/o Smart Entry and Start System:
Disconnect the connector.
Remove the 5 nuts.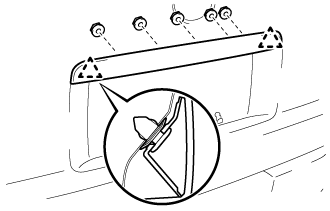
Detach the 2 clips and remove the back door outside garnish.
Remove the grommet.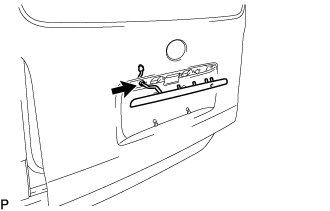
| 7. REMOVE LICENSE PLATE LIGHT ASSEMBLY |
w/ Smart Entry and Start System:
(Click here)
w/o Smart Entry and Start System:
(Click here)
| 8. REMOVE DOOR ELECTRICAL KEY SWITCH COVER (w/ Smart Entry and Start System) |
Remove the door electrical key switch cover.