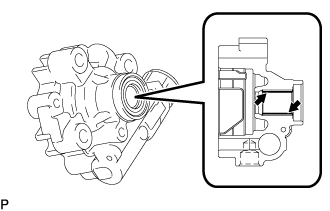
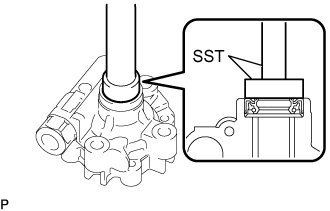
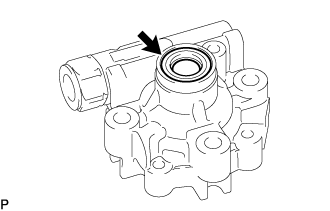
Make sure to install the vane pump housing oil seal so that it is facing in the correct direction.
Be careful not to damage the vane pump housing oil seal.
Coat the lip of a new vane pump housing oil seal with MP grease.
Text in Illustration
MP Grease
2.
INSTALL VANE PUMP SHAFT WITH PULLEY
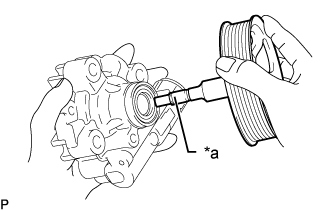
Install the vane pump shaft with pulley to the front vane pump housing.
Text in Illustration
*a
Protective Tape
NOTICE:
Wrap protective tape around the spline of the vane pump shaft with pulley in order to prevent damage to the vane pump housing oil seal.
Be careful not to damage the vane pump housing oil seal.
3.
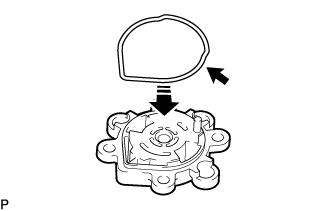
INSTALL VANE PUMP FRONT SIDE PLATE
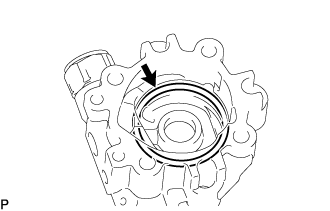
Coat a new O-ring with power steering fluid and install to the front vane pump housing.
Text in Illustration
Power Steering Fluid
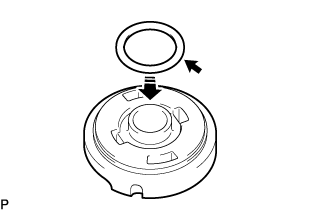
Coat a new O-ring with power steering fluid and install it to the front vane pump side plate.
Text in Illustration
Power Steering Fluid
Install in this Direction
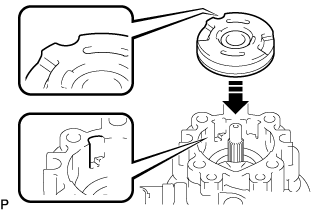
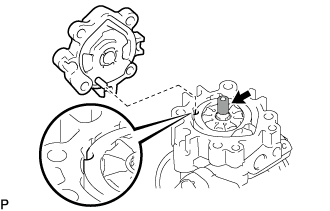
Install the front vane pump side plate to the front vane pump housing while aligning the semicircle-shaped cuts of both parts.
Text in Illustration
Install in this Direction
NOTICE:
Be sure to install the front vane pump side plate in the correct position and so that it is facing the correct direction.
4.
INSTALL VANE PUMP CAM RING
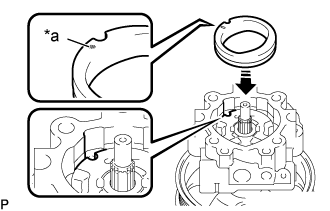
With the inscribed mark facing upward, install the vane pump cam ring to the front vane pump housing while aligning the semicircle-shaped cutouts of both parts.
Text in Illustration
*a
Inscribed Mark
Install in this Direction
NOTICE:
Be sure to install the vane pump cam ring in the correct position and with the correction,
5.
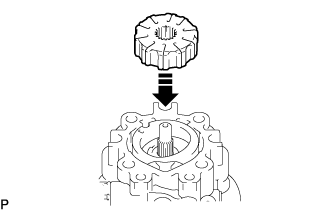
INSTALL VANE PUMP ROTOR
Install the vane pump rotor to the front vane pump housing.
Text in Illustration
Install in this Direction
HINT:
The top bottom of the vane pump rotor are symmetrical.
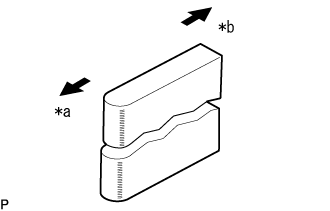
Coat the 10 vane pump plates with power steering fluid.
Install the 10 vane pump plates.
Text in Illustration
*a
Outward
*b
Inward
NOTICE:
Make sure that the round ends of the vane pump plates are facing outward.
6.
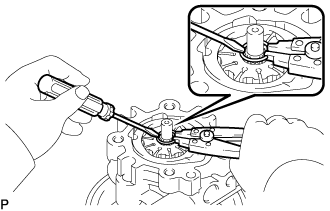
INSTALL VANE PUMP SHAFT SNAP RING
Using a screwdriver and snap ring expander, install a new snap ring to the vane pump shaft with pulley.
7.
INSTALL REAR VANE PUMP HOUSING
Coat a new O-ring with power steering fluid and install it to the rear vane pump housing.
Text in Illustration
Power Steering Fluid
Install in this Direction
Coat the rear vane pump housing of the vane pump shaft with pulley and the surrounding surface with power steering fluid.
Text in Illustration
Power Steering Fluid
Align the straight pin of the rear vane pump housing with the hole created by the semicircle-shaped cutouts of the cam ring, front side plate and front vane pump housing.
NOTICE:
Make sure that the O-ring is not out of position before installing the rear vane pump housing.
Install the rear vane pump housing with the 4 bolts.
Torque:
22 N*m{
224 kgf*cm
, 16 ft.*lbf
}
8.
SECURE VANE PUMP ASSEMBLY
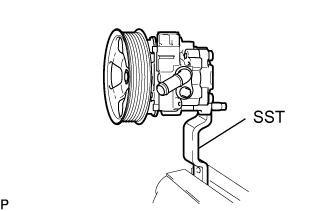
Using SST, secure the vane pump assembly in a vise.
SST
09630-00014
(09631-00132)
9.
INSPECT TOTAL PRELOAD
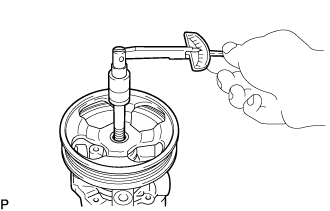
Check that the pump rotates smoothly without abnormal noise.
Temporarily install a service bolt.
Recommended Service Bolt:
Item
Specified Condition
Thread diameter
10 mm (0.394 in.)
Thread pitch
1.25 mm (0.0492 in.)
Bolt length
50 mm (1.97 in.)
Using a torque wrench, check the rotating torque.
Standard Rotating torque:
0.3 N*m (3 kgf*cm, 2 in.*lbf) or less
If the rotating torque is not as specified, check the installation condition of each part.
10.
INSTALL PRESSURE PORT UNION SUB-ASSEMBLY
Install a new O-ring to the pressure port union sub-assembly.
Install the pressure port union sub-assembly to the front vane pump housing.
Torque:
69 N*m{
704 kgf*cm
, 51 ft.*lbf
}
11.
INSTALL SUCTION PORT UNION
Coat a new O-ring with power steering fluid.
Install the O-ring to the suction port union.
Install the suction port union to the front vane pump housing with the bolt.