REMOVAL
Removal / installation · Vehicles built Apr 2016 – Dec 2016
Versions by build date: Oct 2014 – Dec 2014 Jan 2015 – Mar 2016 Apr 2016 – Dec 2016 from Jan 2017
| 1.
DISCONNECT CABLE FROM NEGATIVE BATTERY TERMINAL |
 |
- CAUTION:
- Wait for 90 seconds after disconnecting the cable to prevent the airbag working (Click here).
| 2.
REMOVE FRONT DOOR SCUFF PLATE LH |
|
for Semi-trim (Click here)for Full-trim (Click here)
| 3.
REMOVE FRONT DOOR OPENING TRIM LH |
|
for Semi-trim (Click here)for Full-trim (Click here)
| 4.
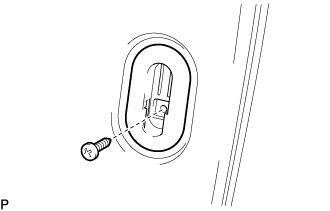
REMOVE SEPARATOR BAR BRACKET LOWER (for Semi-trim LH Side)
|
|
- Remove the screw and separator bar bracket lower.
- HINT:
- Use the same procedure described for the other side.
| 5.
REMOVE CENTER PILLAR GARNISH COVER LOWER LH |
|
for Semi-trim (Click here)for Full-trim (Click here)
| 6.
REMOVE SEAT ASSEMBLY LH |
|
for Semi-trim (Click here)for Full-trim (Click here)
| 7.
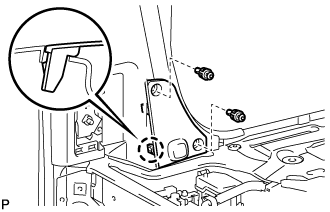
REMOVE SEAT BELT ANCHOR COVER (for LH Side) |
|
- Disengage the claw and remove the 2 clips and seat belt anchor cover.
| 8.
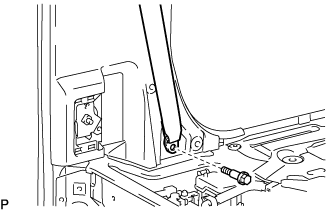
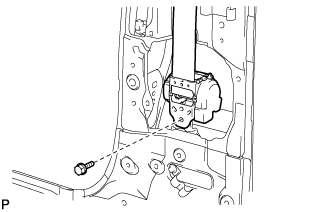
DISCONNECT FRONT SEAT OUTER BELT ASSEMBLY LH |
|
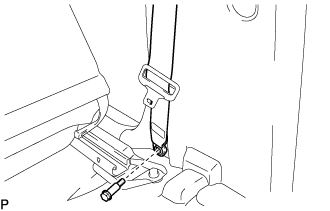
- Remove the bolt and disconnect the floor side of the front seat outer belt assembly LH.
| 9.
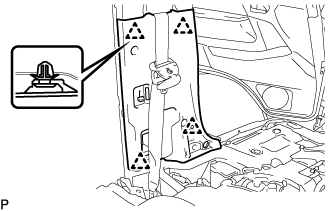
REMOVE CENTER PILLAR GARNISH LOWER LH (for Semi-trim)
|
|
- Using a screwdriver, detach the 4 clips and remove the center pillar garnish lower LH.
| 10.
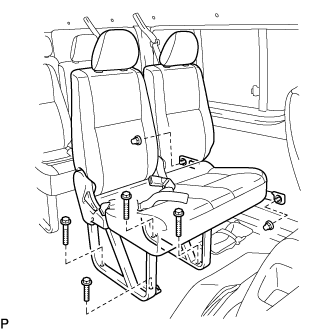
REMOVE REAR NO.2 SEAT ASSEMBLY (for Full-trim LH Side)
|
|
- Remove the 4 bolts, 2 nuts and rear No.2 seat assembly.
- HINT:
- Use the same procedure for the second row.
- Use the same procedure for the third row.
| 11.
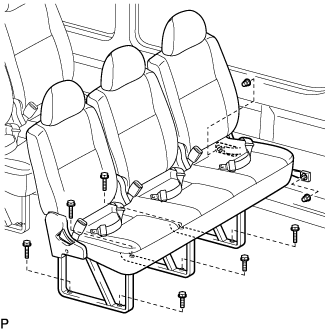
REMOVE REAR NO.3 SEAT ASSEMBLY (for Full-trim LH Side)
|
|
- Remove the 6 bolts, 2 nuts and rear No.3 seat assembly.
| 12.
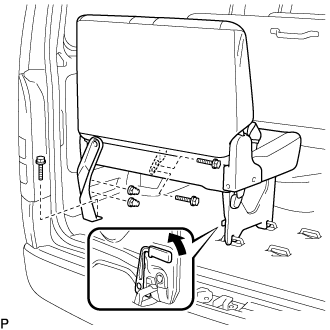
REMOVE REAR NO.4 SEAT ASSEMBLY (for Full-trim LH Side)
|
|
- Remove the 3 bolts and 2 nuts.
Pull the lever in the direction indicated by the arrow in the illustration, release the 2 locks, and remove the rear No.4 seat assembly.
| 13.
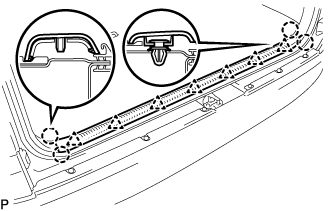
REMOVE BACK DOOR SCUFF PLATE (for Full-trim LH Side)
|
|
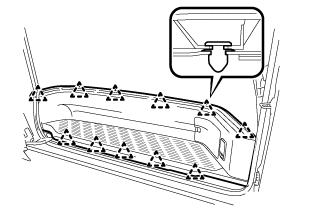
- Detach the 7 clips and 4 claws and remove the back door scuff plate.
| 14.
REMOVE BACK DOOR WEATHERSTRIP (for Full-trim LH Side) |
|
| 15.
REMOVE QUARTER TRIM PANEL ASSEMBLY REAR LH (for Full-trim) |
|
for Middle roof type (Click here)for High roof type (Click here)
| 16.
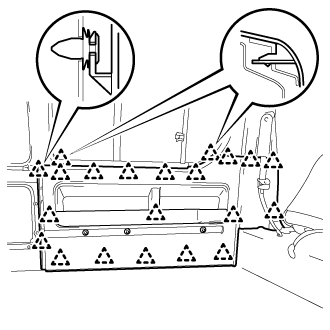
REMOVE SIDE NO.1 TRIM ASSEMBLY LH (for Full-trim)
|
|
- Detach the 21 clips and remove the side No. 1 trim assembly LH.
| 17.
REMOVE FRONT SEAT OUTER BELT ASSEMBLY LH |
|
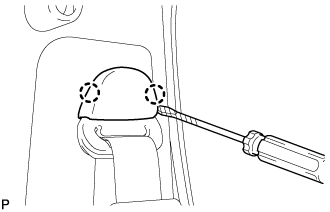
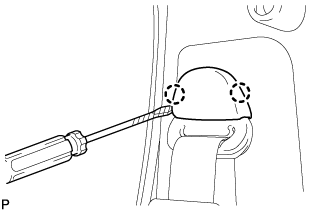
- Using a screwdriver, disengage the 2 claws and disconnect the shoulder side cover of the front seat outer belt assembly LH.
- HINT:
- Tape the screwdriver tip before use.
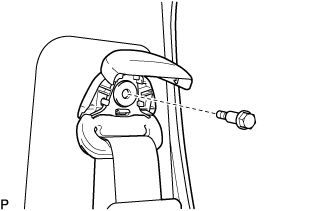
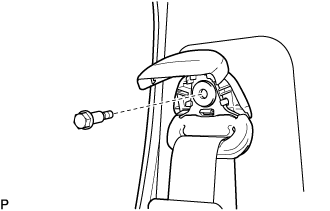
- Remove the bolt and disconnect the shoulder side of the front seat outer belt assembly LH.
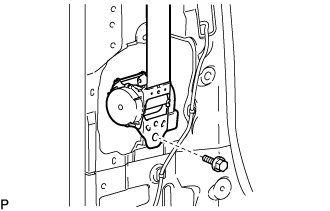
- w/o Pretensioner:
Remove the bolt and front seat outer belt assembly LH.
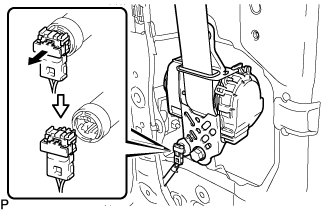
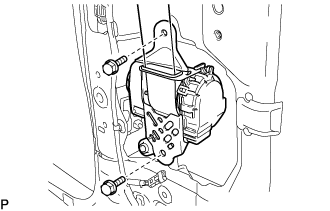
- w/ Pretensioner:
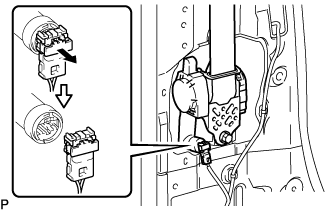
Using a screwdriver, pull out the locking button in the direction shown by the arrow to release the lock, and disconnect the pretensioner connector.
- HINT:
- Tape the screwdriver tip before use.
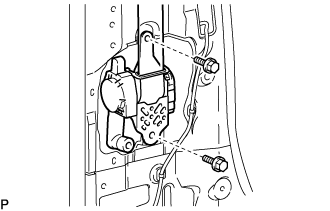
- Remove the 2 bolts and front seat outer belt assembly LH.
| 18.
REMOVE FRONT DOOR SCUFF PLATE RH |
|
for Semi-trim (Click here)for Full-trim (Click here)
| 19.
REMOVE FRONT DOOR OPENING TRIM RH |
|
for Semi-trim (Click here)for Full-trim (Click here)
| 20.
REMOVE REAR DOOR SCUFF PLATE RH (for Full-trim)
|
|
- Detach the 11 clips and remove the rear door scuff plate RH.
| 21.
REMOVE SLIDE DOOR WEATHERSTRIP NO.1 RH |
|
for Semi-trim (Click here)for Full-trim (Click here)
| 22.
REMOVE SEPARATOR BAR BRACKET LOWER (for Semi-trim RH Side)
|
|
- Remove the screw and separator bar bracket lower.
- HINT:
- Use the same procedure described for the other side.
| 23.
REMOVE ASSIST GRIP PLUG (for Full-trim RH Side)
|
|
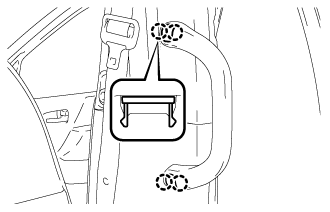
- Using a screwdriver, detach the 4 claws and remove the 2 assist grip plugs.
- HINT:
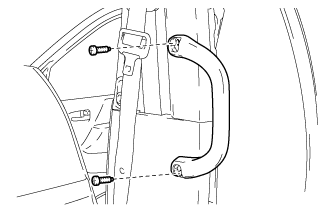
- Tape the screwdriver tip before use.
| 24.
REMOVE ASSIST GRIP ASSEMBLY REAR (for Full-trim RH Side)
|
|
- Remove the 2 screws and assist grip assembly rear.
| 25.
DISCONNECT FRONT SEAT OUTER BELT ASSEMBLY RH |
|
- Remove the bolt and disconnect the floor side of the front seat outer belt assembly RH.
| 26.
REMOVE CENTER PILLAR GARNISH LOWER RH |
|
for Semi-trim (Click here)for Full-trim (Click here)
| 27.
REMOVE FRONT SEAT OUTER BELT ASSEMBLY RH |
|
- Using a screwdriver, disengage the 2 claws and disconnect the shoulder side cover of the front seat outer belt assembly RH.
- HINT:
- Tape the screwdriver tip before use.
- Remove the bolt and disconnect the shoulder side of the front seat outer belt assembly RH.
- w/o Pretensioner:
Remove the bolt and front seat outer belt assembly RH.
- w/ Pretensioner:
Using a screwdriver, pull out the locking button in the direction shown by the arrow to release the lock, and disconnect the pretensioner connector.
- HINT:
- Tape the screwdriver tip before use.
- Remove the 2 bolts and front seat outer belt assembly RH.