7GR-FKS FUEL FUEL PUMP ECU REMOVAL
CAUTION / NOTICE / HINT
The necessary procedures (adjustment, calibration, initialization or registration) that must be performed after parts are removed and installed, or replaced during fuel pump control ECU removal/installation are shown below.
| Replaced Part or Performed Procedure | Necessary Procedure | Effect/Inoperative Function when Necessary Procedure not Performed | Link |
|---|---|---|---|
| Battery terminal is disconnected/reconnected | Memorize steering angle neutral point | Parking assist monitor system | ( ) |
- HINT:
-
When the cable is disconnected / reconnected to the battery terminal, systems temporarily stop operating. However, each system has a function that completes learning the first time the system is used.
- ·
Learning completes when vehicle is driven
Effect/Inoperative when not Performed Necessary Procedures Link Lane control system Drive the vehicle straight ahead at 15 km/h (10 mph) or more for 1 second or more. ( )
Pre-collision system
·Learning completes when vehicle is operated normally
Effect/Inoperative when not Performed Necessary Procedures Link Power slide door system Fully close the slide door by hand.
- HINT:
-
Initialization is not necessary if the above procedures are performed while the slide door is closed.
( )
Air conditioning system After the ignition switch is turned to ON, the servo motor standard position is recognized. -
PROCEDURE

 1. PRECAUTION
- NOTICE:
-
After turning the ignition switch is turned off, there may be a waiting time before disconnecting the negative (-) battery terminal.
-
Click hereGeneral>SETUP>WHEN DISCONNECTING OR RECONNECTING BATTERY TERMINAL>BEFORE DISCONNECTING BATTERY
2.DISCONNECT CABLE FROM NEGATIVE BATTERY TERMINAL
3.REMOVE FRONT SEAT ASSEMBLY LH
for Separate Seat Type:
Click hereVehicle Interior>SEAT>FRONT SEAT ASSEMBLY (for Separate Seat Type)>REMOVAL
for Fixed Bench Seat Type:
Click hereVehicle Interior>SEAT>FRONT SEAT ASSEMBLY (for Fixed Bench Seat Type)>REMOVAL
for Sliding Bench Seat Type:
Click hereVehicle Interior>SEAT>FRONT SEAT ASSEMBLY (for Sliding Bench Seat Type)>REMOVAL
89678B
4.REMOVE NO. 2 UREA PUMP CONTROL BRACKET
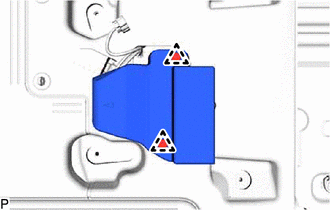
Remove the 2 clips and No. 2 urea pump control bracket.
89571
5.REMOVE FUEL PUMP CONTROL ECU
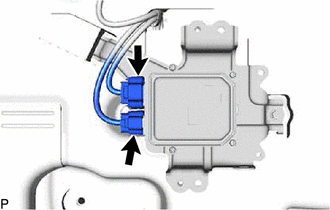
Disconnect the 2 connectors.
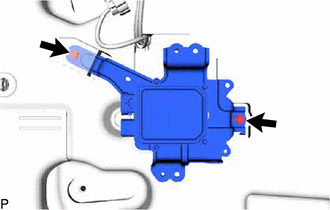
Remove the 2 bolts and fuel pump control ECU.
- NOTICE:
-
Do not reuse the fuel pump control ECU if it has been dropped or subjected to a severe impact.
- HINT:
-
If a malfunction such as pump lock occurs and the fuel pump is damaged, excessive current may be continuously applied to the fuel pump control ECU, damaging its internal parts. Make sure to replace the fuel pump control ECU at the same time when replacing the fuel pump.
89677D
6.REMOVE NO. 1 UREA PUMP CONTROL BRACKET
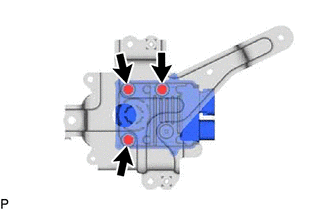
Remove the 3 screws and No. 1 urea pump control bracket from the fuel pump control ECU.