RC60J MANUAL TRANSMISSION / TRANSAXLE SHIFT AND SELECT TRANSMISSION CONTROL CABLE REMOVAL
PROCEDURE

 1.SECURE VEHICLE
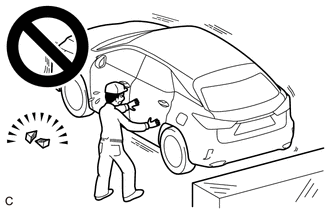
Fully apply the parking brake and chock a wheel.
- CAUTION:
-
- ·
Make sure to apply the parking brake and chock a wheel before performing this procedure.
·If the vehicle is not secure and the shift lever is moved to N, the vehicle may suddenly move, possibly resulting in an accident or serious injury.
55314A
2.REMOVE CENTER LOWER INSTRUMENT PANEL
87211
3.REMOVE NO. 1 AIR DUCT (for LHD)
87211
4.REMOVE NO. 1 AIR DUCT (for RHD)
33825
5.REMOVE TRANSMISSION CONTROL CABLE INSULATOR (for 7GR-FKS)
33820B
6.DISCONNECT TRANSMISSION CONTROL CABLE ASSEMBLY
- NOTICE:
-
Do not bend the transmission control cable assembly within a radius of 120 mm (4.72 in.).
for Transmission Assembly Side:
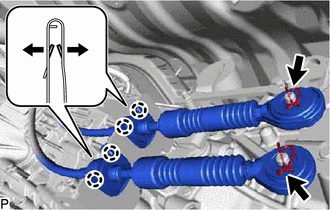
Remove the 2 clips and disconnect the transmission control cable assembly from the transmission control shaft lever.
Using a screwdriver, disengage the 8 claws and disconnect the transmission control cable assembly with the 2 clips from the No. 3 transmission control cable bracket.
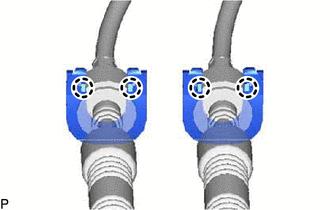
Using a screwdriver, disengage the 4 claws and remove the 2 clips from the transmission control cable assembly.
for Shift Lever Assembly Side:
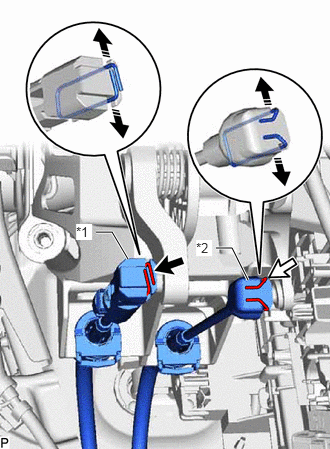
| *1 | Select Control Cable |
| *2 | Shift Control Cable |

|
Push the ends of the clip apart |
Push the ends of the clip apart, and then disconnect the select control cable and shift control cable from the shift lever assembly.
|
|
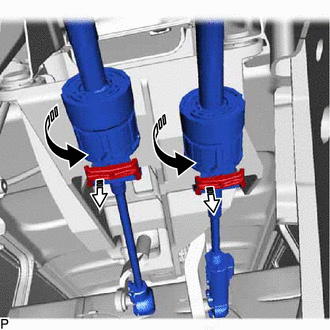
Rotate approximately 180° |

|
Pull Out |
Pull out the cable locks of the shift control cable and select control cable.
Rotate the nut counterclockwise approximately 180° and, while holding the lock nut in that position, disconnect the shift control cable and select control cable from the shift lever assembly.
- NOTICE:
-
Do not over-rotate the cable lock as it will come off the internal spring and the transmission control cable assembly will not be reusable.
33820B
7.REMOVE TRANSMISSION CONTROL CABLE ASSEMBLY
- NOTICE:
-
Do not bend the transmission control cable assembly within a radius of 120 mm (4.72 in.).
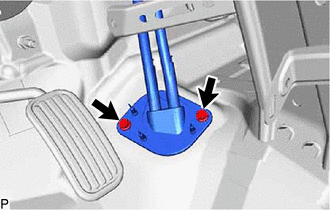
Remove the 2 bolts and then pull out the transmission control cable assembly from the vehicle body.