HEATING / AIR CONDITIONING REAR COOLING UNIT REASSEMBLY
PROCEDURE

 88625A
1.INSTALL NO. 2 COOLER THERMISTOR (REAR EVAPORATOR TEMPERATURE SENSOR)
88710H
2.INSTALL AIR CONDITIONING TUBE AND ACCESSORY ASSEMBLY
Remove the vinyl tape from the air conditioner tube and accessory assembly and the connecting part of the rear evaporator sub-assembly.
Apply a sufficient amount of compressor oil (ND-OIL 8) to 2 new O-rings and the fitting surface of the rear evaporator sub-assembly.
- NOTICE:
-
Keep the O-rings and O-ring fitting surfaces free of foreign matter.
Install the 2 O-rings to the rear evaporator sub-assembly.
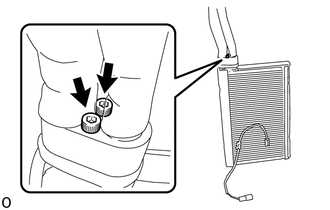
Using a 4 mm hexagon wrench, install the air conditioner tube and accessory assembly with the 2 bolts.
- NOTICE:
-
Make sure not to cut the O-ring while installing it (Cut O-rings cannot be installed).
- Torque:
- 3.5 N*m (36 kgf*cm, 31 in.*lbf)
88501R
3.INSTALL REAR EVAPORATOR SUB-ASSEMBLY
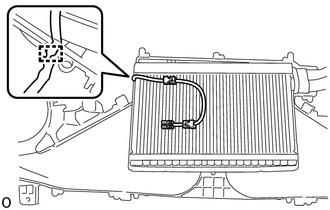
Install the rear evaporator sub-assembly to the case.
Attach the guide to install the No. 2 cooler thermistor connector.
Attach the guide and claw to install the rear cooling unit case center.
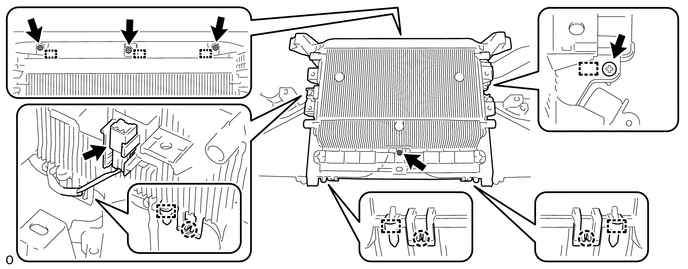
Install the 5 screws and No. 2 cooler thermistor connector.
87103D
4.INSTALL REAR BLOWER WITH FAN MOTOR SUB-ASSEMBLY
87138G
5.INSTALL REAR COOLER BLOWER RESISTOR (for Resistor Type)
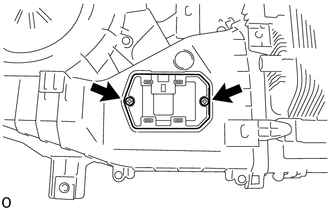
Install the rear cooler blower resistor with the 2 screws.
- HINT:
-
Use the same procedure for the other side.
87165C
6.INSTALL BLOWER MOTOR CONTROL (for Controller Type)
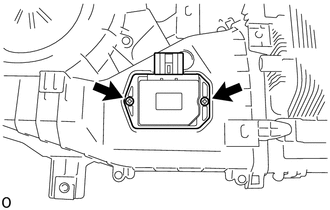
Install the blower motor control with the 2 screws.