HEATING / AIR CONDITIONING CONDENSER REMOVAL
CAUTION / NOTICE / HINT
The necessary procedures (adjustment, calibration, initialization, or registration) that must be performed after parts are replaced during the condenser removal/installation are shown below.
| Replaced Part or Performed Procedure | Necessary Procedures | Effect/Inoperative Function When Necessary Procedures are not Performed | Link |
|---|---|---|---|
·
Front television camera assembly (Including removal and installation) ·
Radiator grille assembly (Including removal and installation) ·
Front bumper assembly (Including removal and installation) |
Front television camera view adjustment | Panoramic view monitor system | ( ) |
·
Front television camera assembly, radiator grille assembly or front bumper assembly ·
Television camera assembly ·
Side television camera assembly LH or outer rear view mirror assembly LH ·
Side television camera assembly RH or outer rear view mirror assembly RH |
Television camera view adjustment (Adjustment of all cameras)
|
Panoramic view monitor system | ()
|
- HINT:
- ·
When the front bumper is damaged or deformed due to an accident or contact with other objects, etc., or the bumper installation area on the body is repaired, it is necessary to perform millimeter wave radar sensor adjustment.
Click hereEngine / Hybrid System>CRUISE CONTROL>MILLIMETER WAVE RADAR SENSOR>ADJUSTMENT
PROCEDURE

 1. RECOVER REFRIGERANT FROM REFRIGERATION SYSTEM
2.REMOVE FRONT BUMPER ASSEMBLY
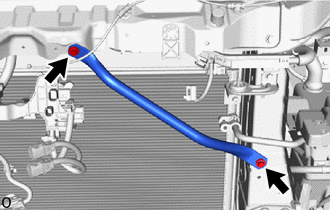
except Wagon:
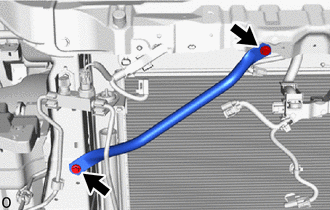
Click hereVehicle Exterior>EXTERIOR PANELS / TRIM>FRONT BUMPER (except Wagon)>REMOVAL
for Wagon:
Click hereVehicle Exterior>EXTERIOR PANELS / TRIM>FRONT BUMPER (for Wagon)>REMOVAL
86510
3.REMOVE HIGH PITCHED HORN ASSEMBLY
Click hereVehicle Exterior>HORN>HORN>REMOVAL
86520
4.REMOVE LOW PITCHED HORN ASSEMBLY
Click hereVehicle Exterior>HORN>HORN>REMOVAL
5.REMOVE CONDENSER FAN (for 1GD-FTV, w/ Condenser fan)
17311B
6.REMOVE NO. 1 AIR INLET DUCT (for 1GD-FTV, w/o Condenser fan)
53286F
7.REMOVE RADIATOR SIDE AIR SEAL LH (w/o Condenser fan)
except Wagon:
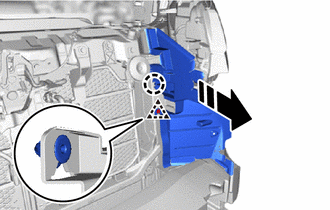

|
Remove in this Direction |
Detach the clip and claw to remove the radiator side air seal LH.
for Wagon, for 1GD-FTV:
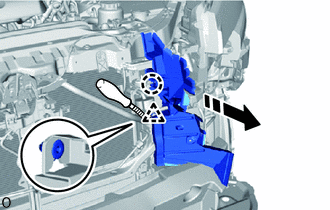
|
|
Remove in this Direction |
Detach the clip and claw to remove the radiator side air seal LH.
for Wagon, for 7GR-FKS:
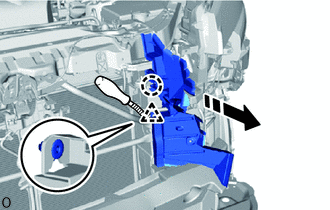
|
|
Remove in this Direction |
Detach the clip and claw to remove the radiator side air seal LH.
53285N
8.REMOVE RADIATOR SIDE AIR SEAL RH (w/o Condenser fan)
except Wagon:
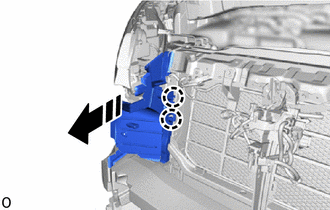
|
|
Remove in this Direction |
Detach the claw and remove the radiator side air seal RH.
for Wagon, for 1GD-FTV:
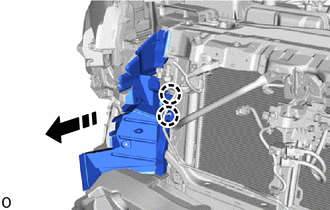
|
|
Remove in this Direction |
Detach the claw and remove the radiator side air seal RH.
for Wagon, for 7GR-FKS:
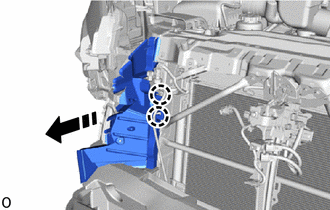
|
|
Remove in this Direction |
Detach the claw and remove the radiator side air seal RH.
88703
9.DISCONNECT DISCHARGE HOSE SUB-ASSEMBLY (for 1GD-FTV)
except Wagon:
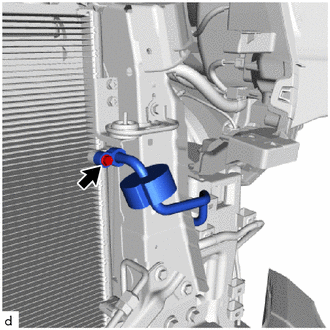
Remove the bolt and disconnect the discharge hose sub-assembly.
Remove the O-ring from the discharge hose sub-assembly.
- NOTICE:
-
Seal the openings of the disconnected parts using vinyl tape to prevent entry of moisture and foreign matter.
for Wagon:
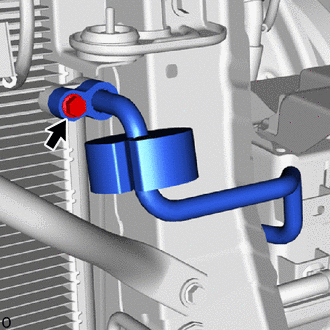
Remove the bolt and disconnect the discharge hose sub-assembly.
Remove the O-ring from the discharge hose sub-assembly.
- NOTICE:
-
Seal the openings of the disconnected parts using vinyl tape to prevent entry of moisture and foreign matter.
88710
10.DISCONNECT AIR CONDITIONING TUBE ASSEMBLY (for 1GD-FTV)
except Wagon:
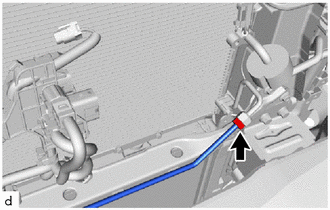
Using a double wrench, remove the union nuts and disconnect the air conditioning tube assembly.
Remove the O-ring from the air conditioning tube assembly.
- NOTICE:
-
Seal the openings of the disconnected parts using vinyl tape to prevent entry of moisture and foreign matter.
for Wagon:
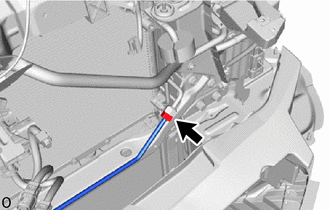
Using a double wrench, remove the union nuts and disconnect the air conditioning tube assembly.
Remove the O-ring from the air conditioning tube assembly.
- NOTICE:
-
Seal the openings of the disconnected parts using vinyl tape to prevent entry of moisture and foreign matter.
88703
11.DISCONNECT DISCHARGE HOSE SUB-ASSEMBLY (for 7GR-FKS)
except Wagon:
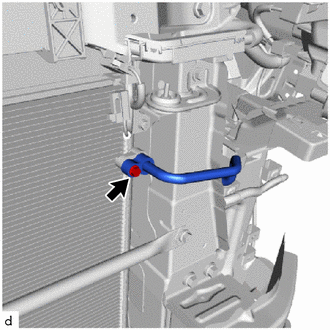
Remove the bolt and disconnect the discharge hose sub-assembly.
Remove the O-ring from the discharge hose sub-assembly.
- NOTICE:
-
Seal the openings of the disconnected parts using vinyl tape to prevent entry of moisture and foreign matter.
for Wagon:
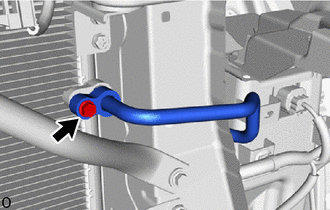
Remove the bolt and disconnect the discharge hose sub-assembly.
Remove the O-ring from the discharge hose sub-assembly.
- NOTICE:
-
Seal the openings of the disconnected parts using vinyl tape to prevent entry of moisture and foreign matter.
88710
12.DISCONNECT AIR CONDITIONING TUBE ASSEMBLY (for 7GR-FKS)
except Wagon:
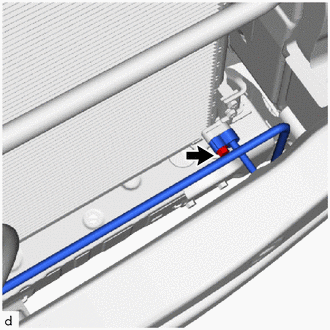
Remove the bolt and disconnect the air conditioning tube assembly.
Remove the O-ring from the air conditioning tube assembly.
- NOTICE:
-
Seal the openings of the disconnected parts using vinyl tape to prevent entry of moisture and foreign matter.
for Wagon:
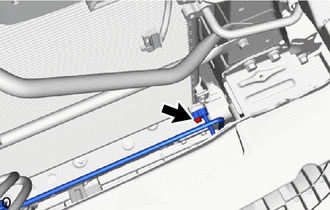
Remove the bolt and disconnect the air conditioning tube assembly.
Remove the O-ring from the air conditioning tube assembly.
- NOTICE:
-
Seal the openings of the disconnected parts using vinyl tape to prevent entry of moisture and foreign matter.
51466
13.REMOVE UPPER RADIATOR SUPPORT BRACE LH (for Wagon, 1GD-FTV)
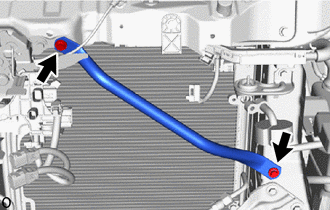
Remove the 2 bolts and upper radiator support brace LH.
51465
14.REMOVE UPPER RADIATOR SUPPORT BRACE RH (for Wagon, 1GD-FTV)
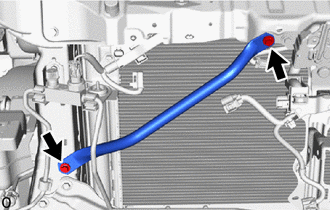
Remove the 2 bolts and upper radiator support brace RH.
53510
15.REMOVE HOOD LOCK ASSEMBLY (for LHD)
53510
16.REMOVE HOOD LOCK ASSEMBLY (for RHD)
53209B
17.REMOVE HOOD LOCK SUPPORT BRACE SUB-ASSEMBLY
for 7GR-FKS:
Click hereEngine / Hybrid System>7GR-FKS (COOLING)>RADIATOR>REMOVAL
for 1GD-FTV:
Click hereEngine / Hybrid System>1GD-FTV (COOLING)>RADIATOR>REMOVAL
17751
18.REMOVE NO. 1 AIR CLEANER INLET (for 1GD-FTV)
44360
19.DISCONNECT VANE PUMP OIL RESERVOIR ASSEMBLY (for 1GD-FTV)
53205
20.REMOVE UPPER RADIATOR SUPPORT SUB-ASSEMBLY (for 1GD-FTV)
21.REMOVE COOLER BRACKET (for 1GD-FTV)
except Wagon:
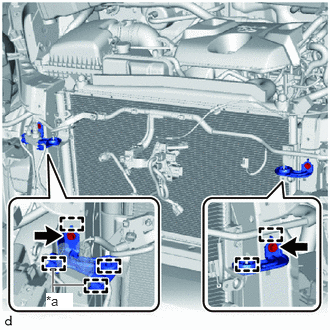
| *a | Clamp |
Remove the 2 bolts.
Detach the guide and clamp and remove each cooler bracket.
for Wagon:
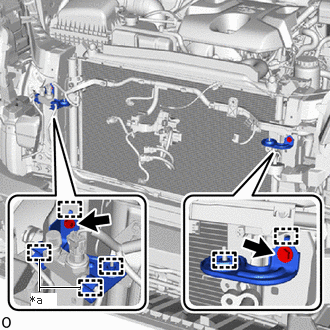
| *a | Clamp |
Remove the 2 bolts.
Detach the guide and clamp and remove each cooler bracket.
22.REMOVE COOLER CONDENSER ASSEMBLY (for 1GD-FTV)
except Wagon:
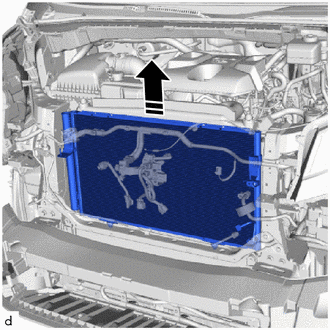
|
|
Remove in this Direction |
Remove the cooler condenser assembly as shown in the illustration.
for Wagon:
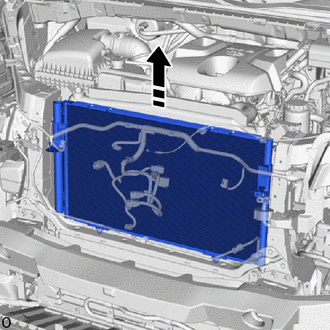
|
|
Remove in this Direction |
Remove the cooler condenser assembly as shown in the illustration.
88716B
23.REMOVE COOLER REFRIGERANT LIQUID PIPE B (for 1GD-FTV)
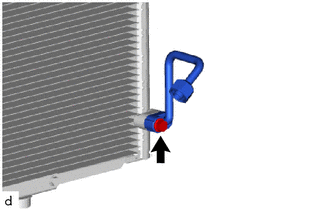
Remove the bolt and cooler refrigerant liquid pipe B.
24.REMOVE NO. 1 COOLER CONDENSER CUSHION (for 1GD-FTV)
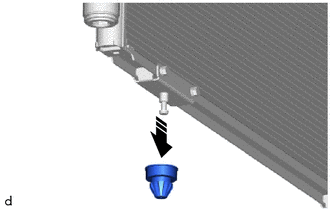
|
|
Remove in this Direction |
Remove each No. 1 cooler condenser cushions.
52139E
25.REMOVE FRONT BUMPER CENTER BRACE (for 7GR-FKS)
except Wagon:
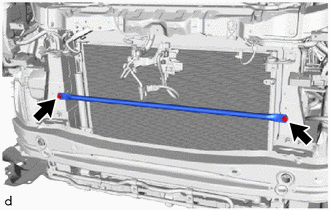
Remove the 2 bolts and front bumper center brace.
for Wagon:
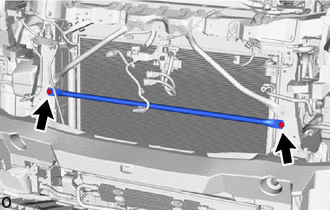
Remove the 2 bolts and front bumper center brace.
51466
26.REMOVE UPPER RADIATOR SUPPORT BRACE LH (for Wagon, 7GR-FKS)
Remove the 2 bolts and upper radiator support brace LH.
51465
27.REMOVE UPPER RADIATOR SUPPORT BRACE RH (for Wagon, 7GR-FKS)
Remove the 2 bolts and upper radiator support brace RH.
28.REMOVE COOLER BRACKET (for 7GR-FKS)
except Wagon:
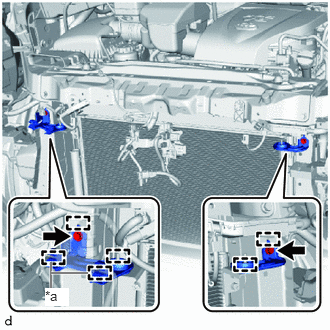
| *a | Clamp |
Remove the 2 bolts.
Detach the guide and clamp and remove each cooler bracket.
for Wagon:
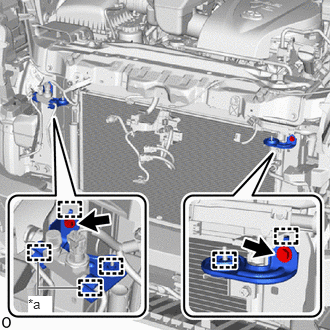
| *a | Clamp |
Remove the 2 bolts.
Detach the guide and clamp and remove each cooler bracket.
29.REMOVE COOLER CONDENSER ASSEMBLY (for 7GR-FKS)
except Wagon:
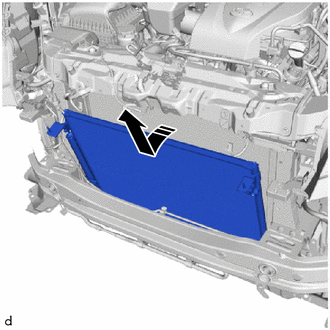
|
|
Remove in this Direction |
Remove the cooler condenser assembly as shown in the illustration.
except Wagon:
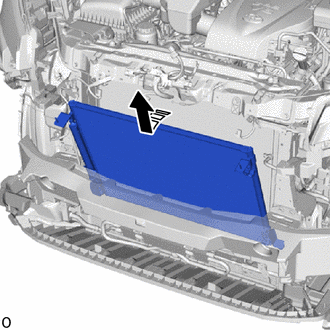
|
|
Remove in this Direction |
Remove the cooler condenser assembly as shown in the illustration.
30.REMOVE NO. 1 COOLER CONDENSER CUSHION (for 7GR-FKS)
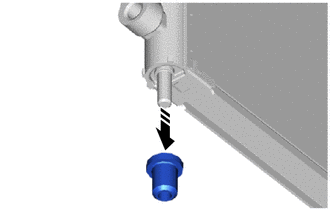
|
|
Remove in this Direction |
Remove each No. 1 cooler condenser cushions.