Make an adjustment with no vacuum in the brake booster assembly. (Depress the brake pedal several times with the engine stopped.)
HINT:
Adjustment of the brake booster push rod is required when the brake master cylinder sub-assembly is replaced with a new one.
Adjustment is not necessary when the removed brake master cylinder sub-assembly is reused and the brake booster assembly is replaced with a new one.
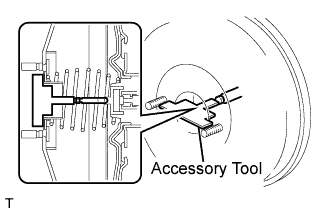
Apply chalk to the tip of the accessory tool.
HINT:
An accessory tool is enclosed with a new brake master cylinder sub-assembly.
Place the accessory tool on the brake booster assembly.
Measure the clearance between the brake booster push rod and accessory tool.
Standard clearance:
0 mm (0 in.)
HINT:
Adjust the clearance in the following cases:
If there is a clearance between the accessory tool and the shell of the brake booster (floating accessory tool), the push rod is protruding too far.
If the chalk does not stick on the tip of the brake booster push rod, the push rod protrusion is insufficient.
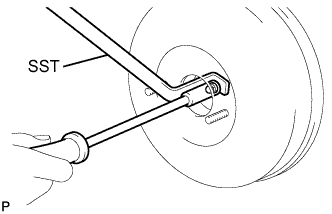
If the clearance is not as specified, adjust the push rod length by holding the rod using SST and turning the tip of the rod using a socket driver (7 mm).
SST
09737-00020
HINT:
Check the push rod clearance again after adjustment.
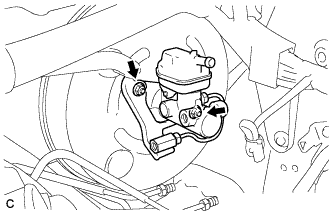
Install a new O-ring to the brake master cylinder sub-assembly.
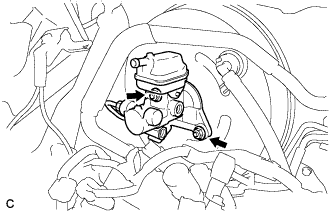
Install the brake master cylinder sub-assembly to the brake booster assembly with the 2 nuts.
Torque:
13 N*m{
132 kgf*cm
, 10 ft.*lbf
}
NOTICE:
The master cylinder requires careful handling. Do not allow the master cylinder to receive any impact, such as from being dropped. Do not reuse a master cylinder that has been dropped.
Do not strike or pinch the master cylinder piston, and do not cause any damage to the master cylinder piston by any other means.
When installing the master cylinder to the brake booster, or when removing the master cylinder from the brake booster, make sure that the master cylinder is kept horizontal or its tip faces downward (the piston faces upward) to prevent the master cylinder piston from falling out.
Do not allow any foreign objects to contaminate the master cylinder piston. If a foreign object gets on the piston, remove it by using a shop rag or a piece of cloth and then apply an even layer of lithium soap based glycol grease around the circumference (sliding part) of the piston.
Do not use any other type of grease or fluid.
3.
CONNECT BRAKE LINE (for LHD)
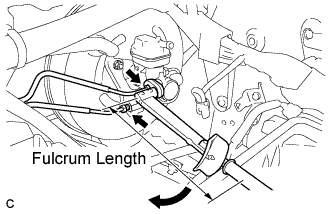
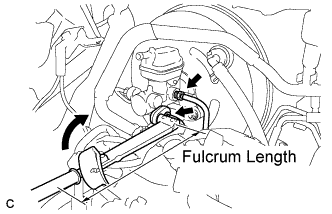
Using a union nut wrench (12 mm), connect the 2 brake lines to the brake master cylinder sub-assembly.
Torque:
without union nut wrench:
20 N*m{
204 kgf*cm
, 15 ft.*lbf
}
with union nut wrench:
18 N*m{
184 kgf*cm
, 13 ft.*lbf
}
NOTICE:
Use a torque wrench with a fulcrum length of 250 mm (9.84 in.).
This torque value is effective when the union nut wrench is parallel to the torque wrench.
Install a new O-ring to the brake master cylinder sub-assembly.
Install the brake master cylinder sub-assembly to the brake booster assembly with the 2 nuts.
Torque:
13 N*m{
132 kgf*cm
, 10 ft.*lbf
}
NOTICE:
The master cylinder requires careful handling. Do not allow the master cylinder to receive any impact, such as from being dropped. Do not reuse a master cylinder that has been dropped.
Do not strike or pinch the master cylinder piston, and do not cause any damage to the master cylinder piston by any other means.
When installing the master cylinder to the brake booster, or when removing the master cylinder from the brake booster, make sure that the master cylinder is kept horizontal or its tip faces downward (the piston faces upward) to prevent the master cylinder piston from falling out.
Do not allow any foreign objects to contaminate the master cylinder piston. If a foreign object gets on the piston, remove it by using a shop rag or a piece of cloth and then apply an even layer of lithium soap based glycol grease around the circumference (sliding part) of the piston.
Do not use any other type of grease or fluid.
5.
CONNECT BRAKE LINE (for RHD)
Using a union nut wrench (12 mm), connect the 2 brake lines to the brake master cylinder sub-assembly.
Torque:
without union nut wrench:
20 N*m{
204 kgf*cm
, 15 ft.*lbf
}
with union nut wrench:
18 N*m{
184 kgf*cm
, 13 ft.*lbf
}
NOTICE:
Use a torque wrench with a fulcrum length of 250 mm (9.84 in.).
This torque value is effective when the union nut wrench is parallel to the torque wrench.
6.
CONNECT NO. 1 RESERVOIR TUBE
Connect the No. 1 reservoir tube to the brake master cylinder reservoir assembly.
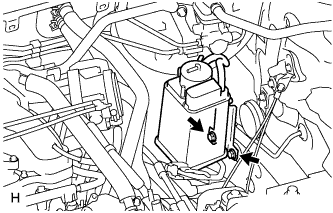
Install the charcoal canister assembly with the 2 bolts.
Torque:
26.5 N*m{
270 kgf*cm
, 20 ft.*lbf
}
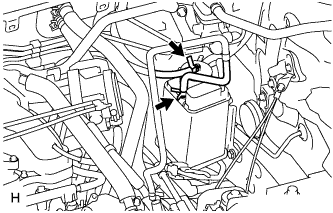
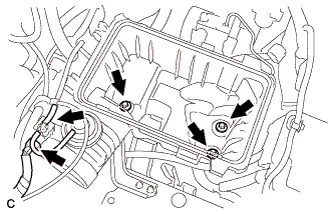
Connect the 2 hoses.
9.
INSTALL AIR CLEANER CASE SUB-ASSEMBLY (for LHD)
Install the air cleaner case with the 3 bolts.
Torque:
5.0 N*m{
51 kgf*cm
, 44 in.*lbf
}
Connect the hose and connector.
10.
INSTALL AIR CLEANER FILTER ELEMENT SUB-ASSEMBLY (for LHD)
11.
INSTALL AIR CLEANER CAP SUB-ASSEMBLY (for LHD)
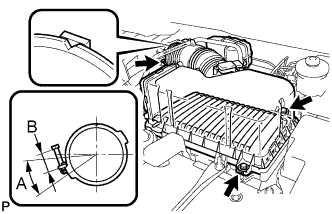
Install the air cleaner filter element, align the groove on the air cleaner hose with the throttle body alignment tab and tighten the clamp as shown in the illustration.
HINT:
A = 30°
B = 11 to 14 mm (0.433 in. to 0.551 in.)
Install the air cleaner cap with the 2 bolts and clips.
Torque:
5.0 N*m{
51 kgf*cm
, 44 in.*lbf
}
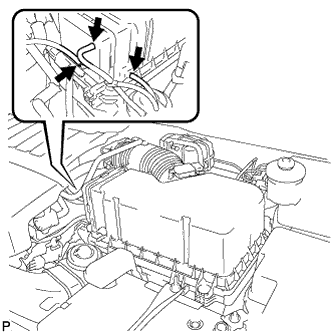
Connect the 3 vacuum hoses.
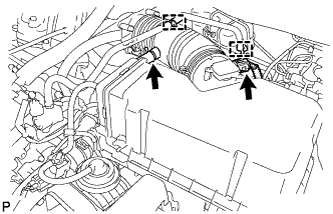
Connect the mass air flow meter connector.
Connect the No. 2 ventilation hose and fuel vapor feed hose assembly.
12.
INSTALL NO. 2 AIR CLEANER INLET (for LHD)
Install the No. 2 air cleaner inlet with the 2 bolts.
Torque:
7.0 N*m{
71 kgf*cm
, 62 in.*lbf
}
Connect the 2 vacuum hoses and harness clamps.
13.
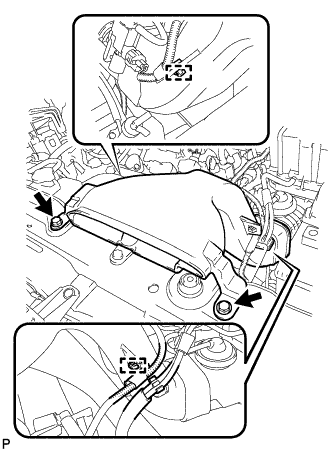
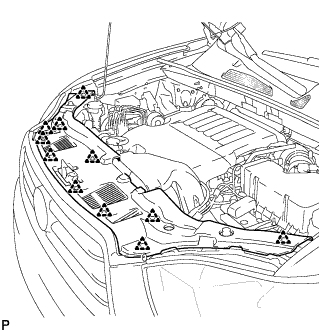
INSTALL COOL AIR INTAKE DUCT SEAL (for LHD)
Install the cool air intake duct seal with the 11 clips.
14.
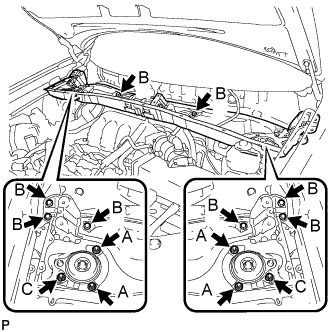
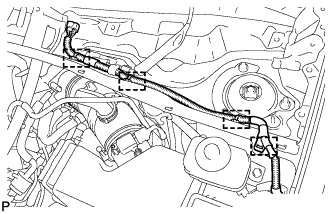
INSTALL OUTER COWL TOP PANEL SUB-ASSEMBLY
Install the outer cowl top panel sub-assembly with the 8 bolts and 6 nuts.
Torque:
Nut A:
85 N*m{
866 kgf*cm
, 63 ft.*lbf
}
Bolt B:
8.8 N*m{
90 kgf*cm
, 78 in.*lbf
}
Nut C:
8.8 N*m{
90 kgf*cm
, 78 in.*lbf
}
Engage the 4 clamps.
15.
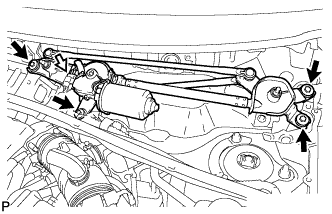
INSTALL WINDSHIELD WIPER MOTOR AND LINK
Install the windshield wiper motor and link assembly with the 4 bolts.
Torque:
7.0 N*m{
71 kgf*cm
, 62 in.*lbf
}
Connect the connector.
16.
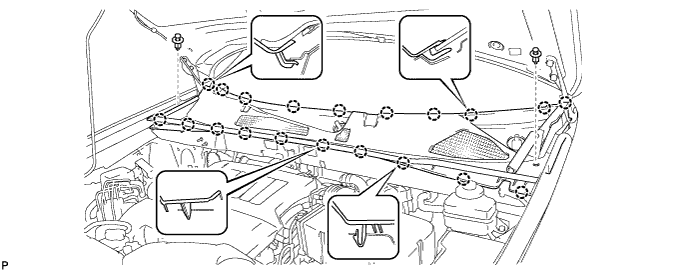
INSTALL COWL TOP VENTILATOR LOUVER SUB-ASSEMBLY
Engage the 20 claws.
Install the cowl top ventilator louver sub-assembly with the 2 clips.
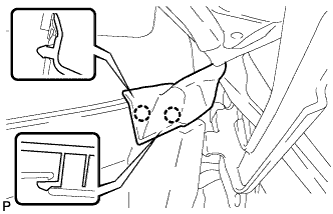
Engage the 2 claws and connect the front fender to cowl side seal LH.
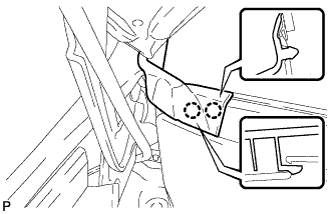
Engage the 2 claws and connect the front fender to cowl side seal RH.
17.
INSTALL FRONT WIPER ARM AND BLADE ASSEMBLY RH
Operate the wiper and stop the windshield wiper motor at the automatic stop position.
When reinstalling:
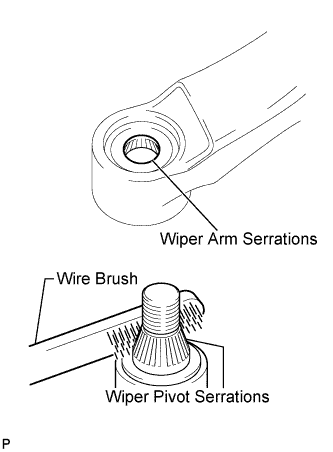
Clean the wiper arm serrations.
Clean the wiper pivot serrations with a wire brush.
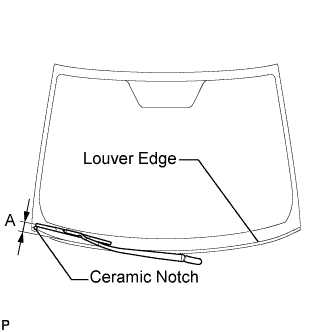
Install the front wiper arm and blade assembly RH with the nut to the position shown in the illustration.
Torque:
24 N*m{
245 kgf*cm
, 18 ft.*lbf
}
HINT:
Hold the wiper arm by hand when tightening the nut.
Area
Measurement
A
25.6 mm (1.00 in.)
18.
INSTALL FRONT WIPER ARM AND BLADE ASSEMBLY LH
Operate the wiper and stop the windshield wiper motor at the automatic stop position.
When reinstalling:
Clean the wiper arm serrations.
Clean the wiper pivot serrations with a wire brush.
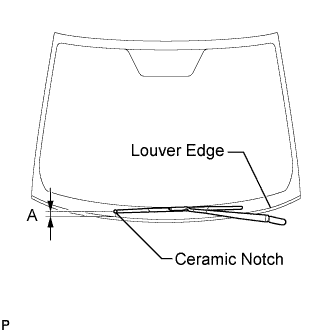
Install the front wiper arm and blade assembly LH with the nut to the position shown in the illustration.
Torque:
24 N*m{
245 kgf*cm
, 18 ft.*lbf
}
HINT:
Hold the wiper arm by hand when tightening the nut.
Area
Measurement
A
31.9 mm (1.26 in.)
Operate the front wipers while spraying washer fluid onto the windshield glass. Make sure that the front wipers function properly and the wipers do not come into contact with the vehicle body.