REMOVAL
Removal / installation · Vehicles built from Jul 2010
Versions by build date: May 2007 – Jul 2008 Aug 2008 – Jun 2010 from Jul 2010
| 1.
REMOVE ROOF HEADLINING ASSEMBLY |
 |
(Click here)
| 2.
REMOVE QUARTER WINDOW ASSEMBLY |
|
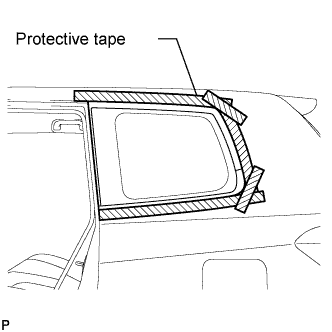
- Apply protective tape to the outer surface of the vehicle body to prevent scratches.
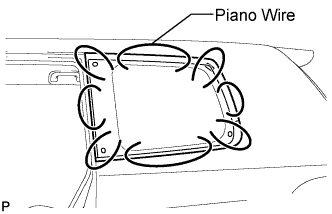
- From the interior, insert a piano wire between the vehicle body and glass as shown in the illustration.
Tie objects that can serve as handles (for example, wooden blocks) to both wire ends.
- NOTICE:
- When separating the quarter window assembly from the vehicle, be careful not to damage the vehicle's paint or interior/exterior ornaments.
Cut through the adhesive by pulling the piano wire around the quarter window assembly.
- NOTICE:
- Leave as much adhesive on the vehicle body as possible when cutting through the adhesive.
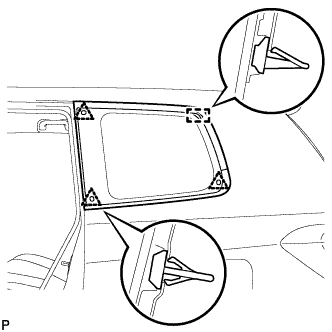
- Disengage the 3 clips.
- NOTICE:
- Please be careful not to break it because there is not the supplying of a clip.
Disengage the retainer.
- NOTICE:
- Please be careful not to break it because there is not the supplying of a retainer.
Using suction cups, remove the glass.
- NOTICE:
- Be careful not to drop the glass.
| 3.
CLEAN QUARTER WINDOW ASSEMBLY |
|
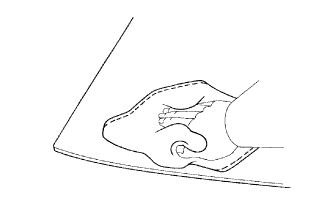
- Clean the outer edges of the glass with a non-residue solvent.
- NOTICE:
- Do not touch the glass surface after cleaning it.
- Be careful not to damage the glass, retainer, and spacers.
- Ever if using a new glass, clean the glass with a non-residue solvent.
| 4.
CLEAN VEHICLE BODY |
|
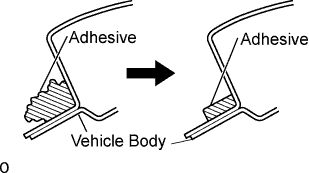
- Clean and shape the contact surfaces of the vehicle body.
On the contact surfaces of the vehicle body, use a knife to cut away excess adhesive as shown in the illustration.
- HINT:
- Leave as much adhesive on the vehicle body as possible.
- NOTICE:
- Be careful not to damage the vehicle body.
Clean the contact surfaces of the vehicle body with cleaner.
- HINT:
- Even if all the adhesive has been removed, clean the vehicle body.