 |
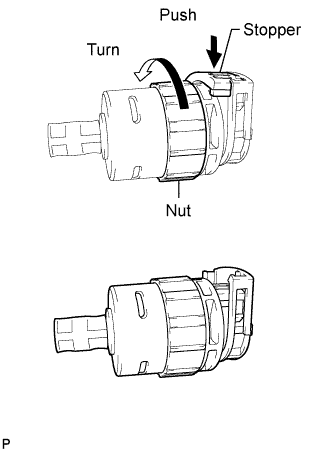
Rotate the transmission control cable nut counterclockwise and, while holding the nut in that position, press in the stopper.
TRANSMISSION CONTROL CABLE ASSEMBLY > INSTALLATION |
| 1. INSTALL TRANSMISSION CONTROL CABLE ASSEMBLY |
|
Rotate the transmission control cable nut counterclockwise and, while holding the nut in that position, press in the stopper.
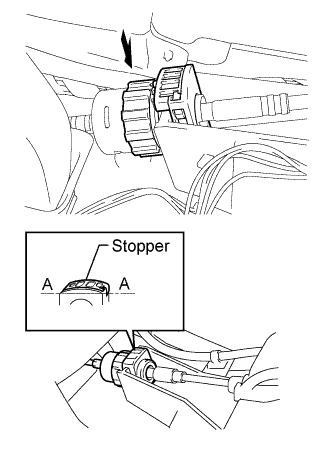 |
Install the outer part of the transmission control cable assembly to the shift lever retainer.
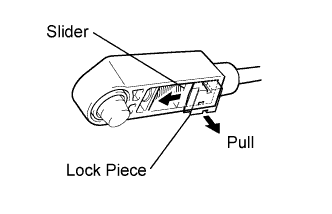 |
Slide the slider in the direction shown in the illustration and pull out the lock piece.
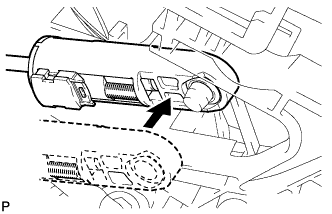 |
Install the cable end to the shift control unit.
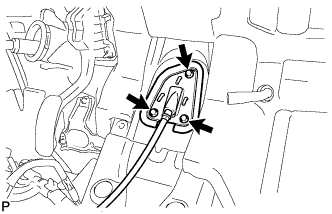 |
Install the transmission control cable assembly with the 3 bolts.
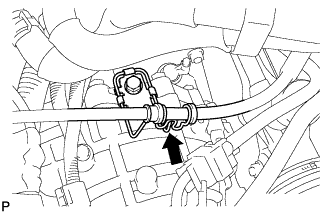 |
Connect the transmission control cable assembly to the No. 2 transmission control cable bracket.
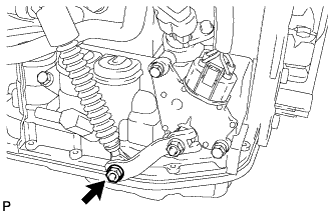 |
Temporarily install the transmission control cable assembly to the control shaft lever with the nut.
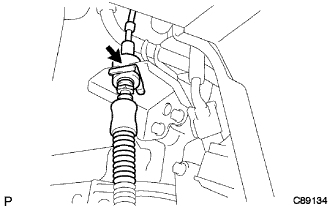 |
Connect the transmission control cable assembly to the bracket with a new clip.
| 2. INSTALL AIR CONDITIONING UNIT |
| 3. INSTALL AIR CLEANER BRACKET |
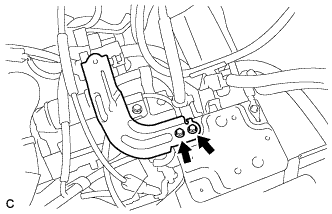 |
Install the 2 bolts and air cleaner bracket.
| 4. INSTALL AIR CLEANER CASE SUB-ASSEMBLY |
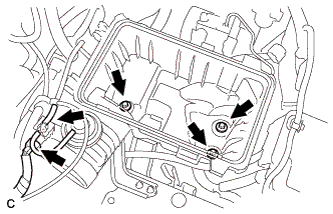 |
Install the air cleaner case with the 3 bolts.
Connect the hose and connector.
| 5. INSTALL AIR CLEANER FILTER ELEMENT SUB-ASSEMBLY |
| 6. INSTALL AIR CLEANER CAP SUB-ASSEMBLY |
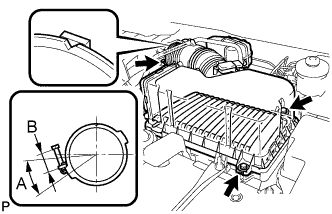 |
Install the air cleaner filter element, align the groove on the air cleaner hose with the throttle body alignment tab and tighten the clamp as shown in the illustration.
Install the air cleaner cap with the 2 bolts and clips
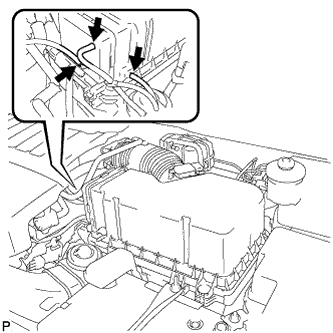 |
Connect the 3 vacuum hoses.
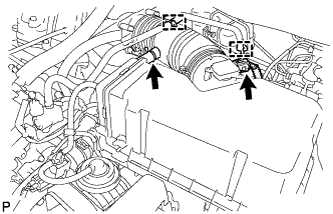 |
Connect the mass air flow meter connector.
Connect the No. 2 ventilation hose and fuel vapor feed hose assembly.
| 7. INSTALL NO. 1 AIR CLEANER INLET |
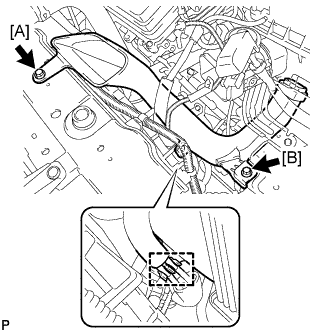 |
Install the No. 1 air cleaner inlet with the 2 bolts.
Connect the 2 vacuum hoses.
| 8. INSTALL NO. 2 AIR CLEANER INLET |
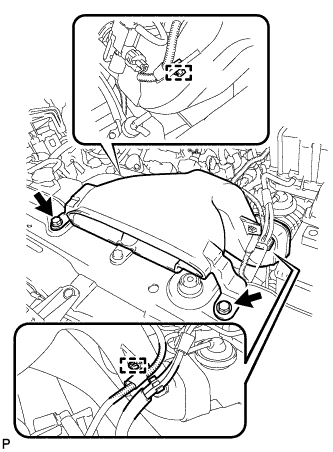 |
Install the No. 2 air cleaner inlet with the 2 bolts.
Connect the 2 vacuum hoses and harness clamps.
| 9. INSTALL COOL AIR INTAKE DUCT SEAL |
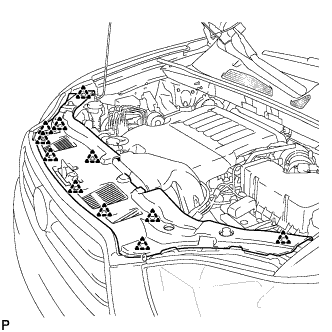 |
Install the cool air intake duct seal with the 11 clips.
| 10. INSTALL BATTERY |
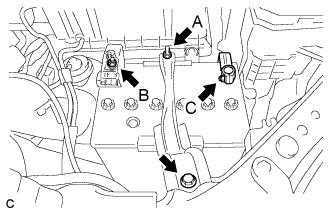 |
Install the battery tray and battery.
Install the battery clamp with the bolt and nut.
Install the positive battery terminal and nut.
Connect the negative battery terminal, and tighten the nut.
| 11. CONNECT CABLE TO NEGATIVE BATTERY TERMINAL |
| 12. ADJUST SHIFT LEVER POSITION |
Move the shift lever to N.
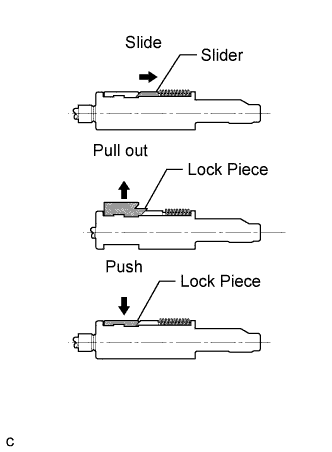 |
Slide the slider in the direction shown in the illustration and pull out the lock piece.
Push the lock piece into the adjuster case.
After adjusting the shift lever position, check the operation and function of the shift lever. If there is a problem, adjust the position again.
| 13. INSPECT SHIFT LEVER POSITION |
When shifting from the P position to the R position with the ignition switch to ON and the brake pedal depressed, make sure that the shift lever moves smoothly and correctly into the position.
Start the engine and make sure that the vehicle moves forward when shifting from the N position to the D position and moves rearward when shifting to the R position. If the operation cannot be done as specified, inspect the park/neutral position switch assembly and check the shift lever assembly installation condition.