Home › BRAKE › BRAKE CONTROL › BRAKE CONTROL POWER SUPPLY

BRAKE CONTROL POWER SUPPLY > INSTALLATION

for Preparation Click here


NOTICE:
While the battery is connected, even if the power switch is off, the brake control system activates when the brake pedal is depressed or any door courtesy switch turns on. Therefore, when servicing the brake system components, do not operate the brake pedal or open/close the doors while the battery is connected.


1. INSTALL BRAKE CONTROL POWER SUPPLY


    C171429
  1. Install the No. 2 brake control power supply bracket with the 2 bolts.

    Torque:
    5.0 N*m{ 51 kgf*cm , 44 in.*lbf }

    NOTICE:
    Do not drop the brake control power supply. If the brake control power supply has been dropped, replace the brake control power supply with a new one.
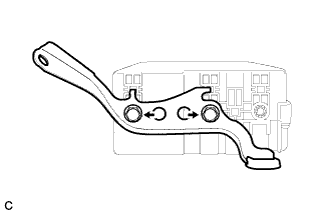
    C171430
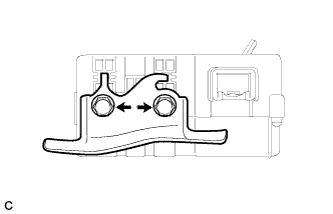
  1. Install the No. 1 brake control power supply bracket with the 2 bolts.

    Torque:
    5.0 N*m{ 51 kgf*cm , 44 in.*lbf }

    NOTICE:
    Do not drop the brake control power supply. If the brake control power supply has been dropped, replace the brake control power supply with a new one.


2. INSTALL BRAKE CONTROL POWER SUPPLY WITH BRACKET


    C171428
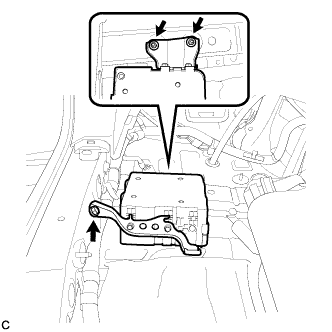
  1. Install the brake control power supply with the 2 nuts and bolt.

    Torque:
    5.0 N*m{ 51 kgf*cm , 44 in.*lbf }


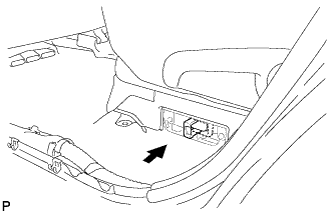
    C171427
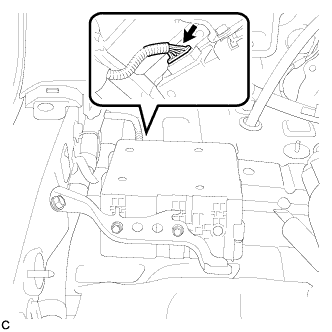
  1. Connect the connector.


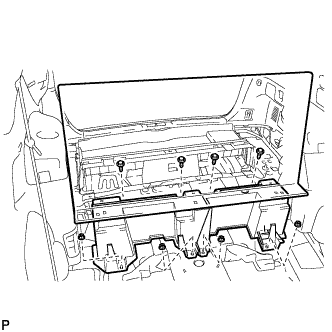
3. INSTALL REAR DECK FLOOR BOX (w/o Rear No. 2 Seat)


    B173679
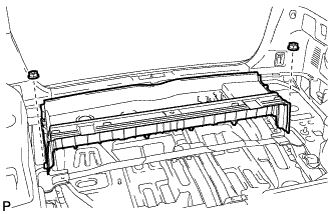
  1. Install the rear deck floor box with the 2 nuts.


4. INSTALL DECK FLOOR BOARD ASSEMBLY (w/o Rear No. 2 Seat)


    B178560
  1. Install the deck floor board assembly with the 4 nuts and 4 bolts.


5. INSTALL REAR MAT


    B173249
  1. Install the rear mat.


6. INSTALL DECK FLOOR BOARD ASSEMBLY (w/ Rear No. 2 Seat)


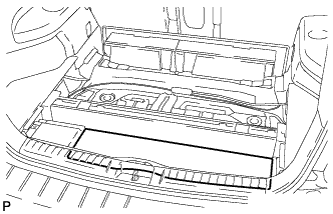
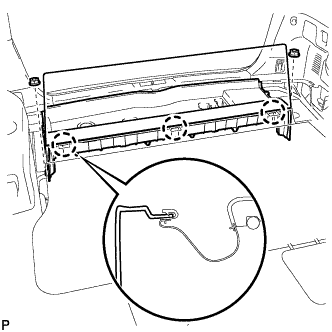
    B178561
  1. Install the 2 nuts and the deck floor board assembly.

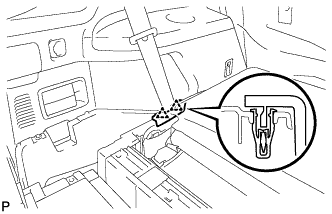
  1. Engage the 3 claws.


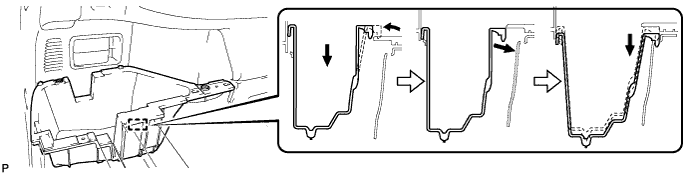
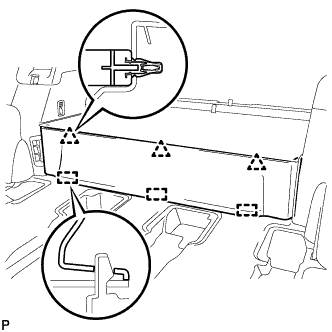
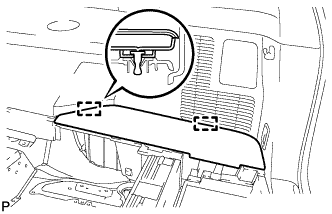
7. INSTALL DECK SIDE TRIM BOX LH


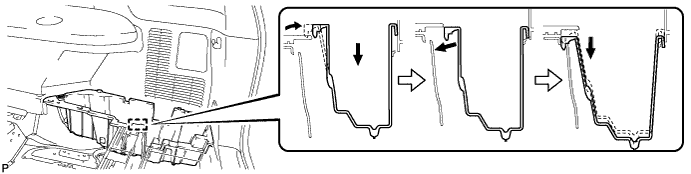
  1. Install the deck side trim box LH as shown in the illustration.


    B178555


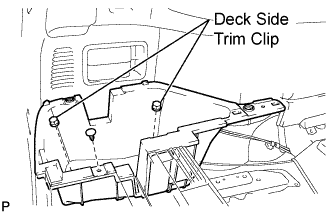
    B173243E01
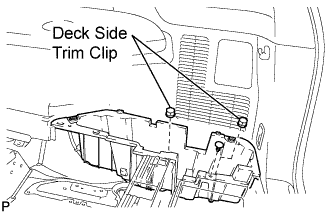
  1. Install the 2 deck side trim clip and the clips.


8. INSTALL REAR SEAT SIDE COVER LH (w/ Rear No. 2 Seat)


    B173607
  1. Engage the 2 clips and install the rear seat side cover LH.


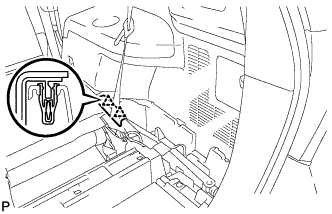
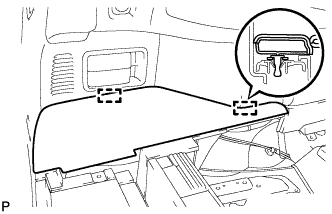
9. INSTALL DECK SIDE TRIM BOX RH


  1. Install the deck side trim box RH as shown in the illustration.


    B178553


    B173247E01
  1. Install the 2 deck side trim clip and the clips.


10. INSTALL JACK CARRIER ASSEMBLY


    B178549
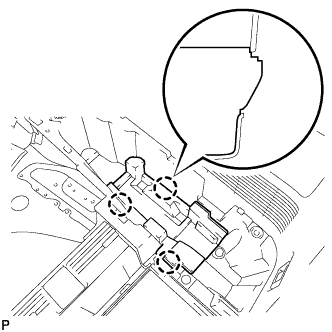
  1. Engage the 3 claws, and install the jack carrier assembly.


11. INSTALL JACK ASSEMBLY


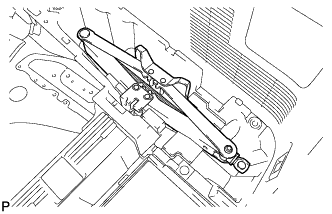
    B173245
  1. Install the jack assembly.


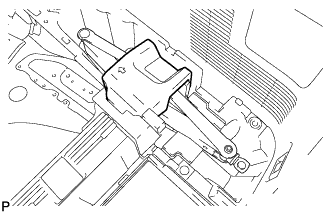
12. INSTALL JACK CARRIER CUSHION


    B178550
  1. Install the jack carrier cushion.


13. INSTALL JACK CARRIER SUPPORT


14. INSTALL REAR SEAT SIDE COVER RH (w/ Rear No. 2 Seat)


    B173608
  1. Engage the 2 clips and install the rear seat side cover RH.


15. INSTALL REAR NO. 1 FLOOR BOARD (w/o Rear No. 2 Seat)


    B175152
  1. Engage the 3 guides and 3 clips and install the rear No. 1 floor board.


16. INSTALL TONNEAU COVER ASSEMBLY (w/ Tonneau Cover)
  1. Install the tonneau cover assembly.


17. INSTALL NO. 2 DECK BOARD SUB-ASSEMBLY


    B173244
  1. Engage the 2 guides and install the No. 2 deck board sub-assembly.


18. INSTALL NO. 3 DECK BOARD SUB-ASSEMBLY


    B173242
  1. Engage the 2 guides and install the No. 3 deck board sub-assembly.


19. INSTALL SERVICE PLUG GRIP

NOTICE:
Before connecting the service plug, check that no parts and tools remain and that the high voltage terminals and connectors are connected securely.


    A176049
  1. Wear insulated gloves, then insert the service plug.

  1. Push down on the grip to lock.


    A175635
  1. Close the reclining hinge cover.

    NOTICE:
    Check that the 2 clips are securely connected to the battery carrier bracket (click sound).


    A175634
  1. Close the rear door scuff plate LH.

    NOTICE:
    Check that the 5 clips are securely connected to the battery carrier bracket (click sound).


20. CONNECT CABLE TO NEGATIVE BATTERY TERMINAL

NOTICE:
When disconnecting the cable, some systems need to be initialized after the cable is reconnected (Click here).


21. CHECK AND CLEAR DTC
  1. Check and clear the DTCs (Click here).