MIRROR (EXT) OUTER REAR VIEW MIRROR DISASSEMBLY
CAUTION / NOTICE / HINT
- HINT:
- ·
Use the same procedure for the RH side and LH side.
·The following procedure is for the LH side.
PROCEDURE

 87961
1.REMOVE OUTER MIRROR
87945
2.REMOVE OUTER MIRROR COVER
3.REMOVE VISOR HOUSING
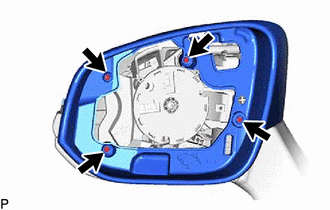
Using a T10 "TORX" driver, remove the 4 screws.
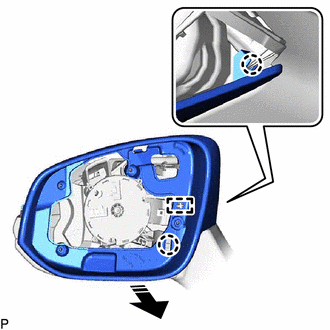

|
Remove in this Direction |
Disengage the 2 claws and guide as shown in the illustration to remove the visor housing.
4.REMOVE LOWER HOUSING
w/ Panoramic View Monitor System:
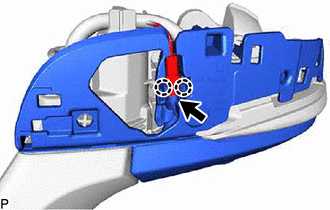
Disengage the 2 claws.
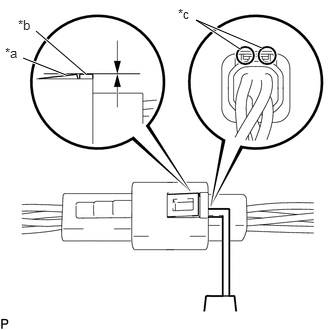
| *a | Claw |
| *b | Protrusion |
| *c | Insert Position |
Insert a 0.9 mm (0.0354 in.) spark plug gap gauge or similar tool into the connector as shown in the illustration.
- NOTICE:
- ·
Insert the spark plug gap gauge to the point that the claw becomes the same height as the protrusion of the connector housing. If the spark plug gap gauge is inserted too far, or if the claw is lifted directly using a screwdriver, the claw may be damaged.
·If the claw of the connector is damaged, replace the outer rear view mirror assembly.
Lift the claw and disconnect the connector.
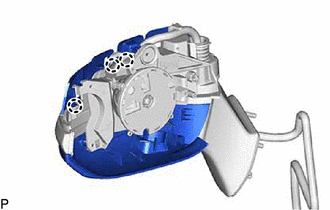
Disengage the 3 claws.
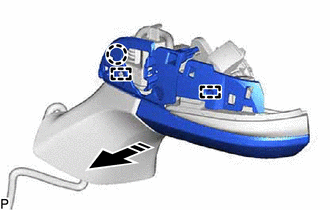
|
|
Remove in this Direction |
Disengage the claw and 2 guides as shown in the illustration to remove the lower housing.
81740
5.REMOVE SIDE TURN SIGNAL LIGHT ASSEMBLY
87909
6.REMOVE OUTER MIRROR ACTUATOR ASSEMBLY
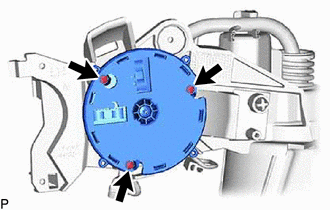
Using a T10 "TORX" driver, remove the 3 screws.
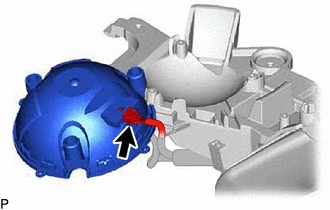
Disconnect the connector to remove the outer mirror actuator assembly.
86790F
7.REMOVE SIDE TELEVISION CAMERA ASSEMBLY (w/ Panoramic View Monitor System)
81890D
8.REMOVE OUTER MIRROR LIGHT ASSEMBLY (w/ Foot light)
87945B
9.REMOVE OUTER MIRROR BOTTOM COVER (w/ Foot light)
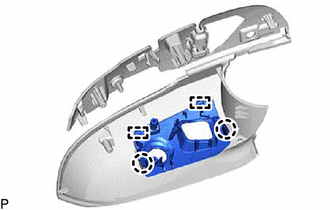
Disengage the 2 claws and 2 guides to remove the outer mirror bottom cover.