Hood Lock Support Assembly
Engine Hood / Door · Vehicles built Up to Oct 2008
Versions by build date: Up to Oct 2008 From Oct 2008
COMPONENTS
REMOVAL
1. DISCONNECT CABLE FROM NEGATIVE BATTERY TERMINAL
CAUTION:
Wait at least 90 seconds after disconnecting the cable from the negative (-) battery terminal to prevent airbag and seatbelt pretensioner activation.
HINT:
Obtain the audio system PIN from the vehicle owner, if applicable. Otherwise the audio system will be inoperable when the battery cable is reconnected.
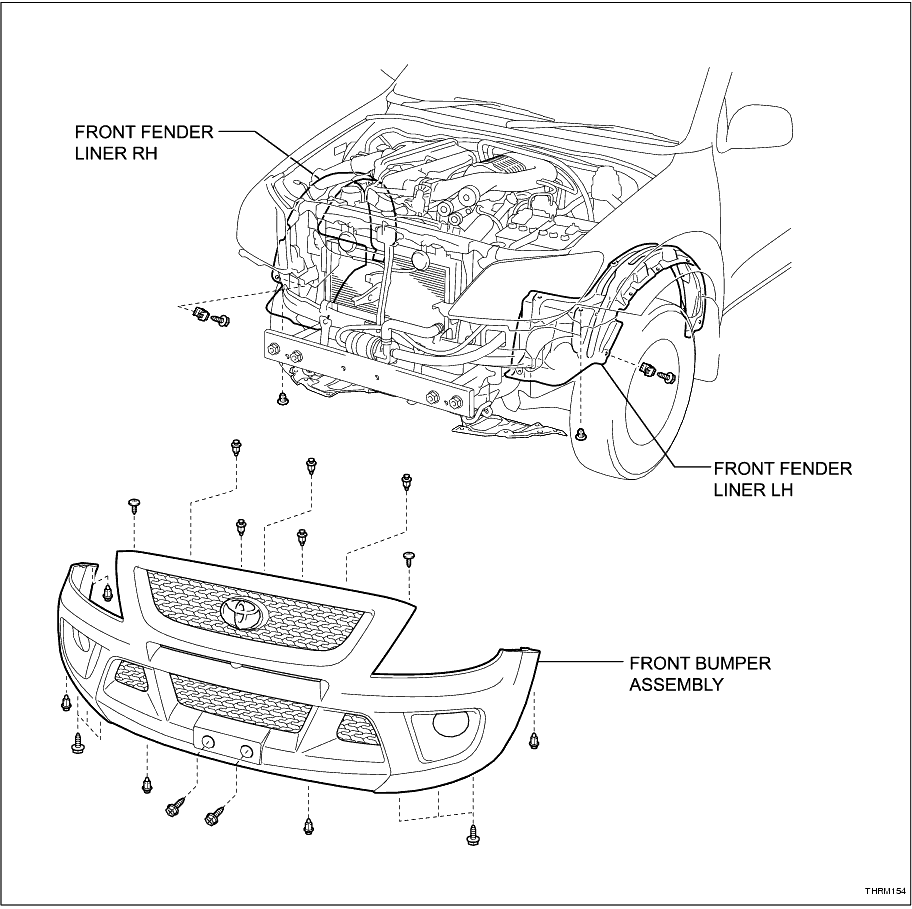
2. REMOVE FRONT FENDER LINER LH (
Click Here
)
3. REMOVE FRONT FENDER LINER RH
HINT:
Use the same procedures described for the LH side.
4. REMOVE FRONT BUMPER ASSEMBLY (
Click Here
)
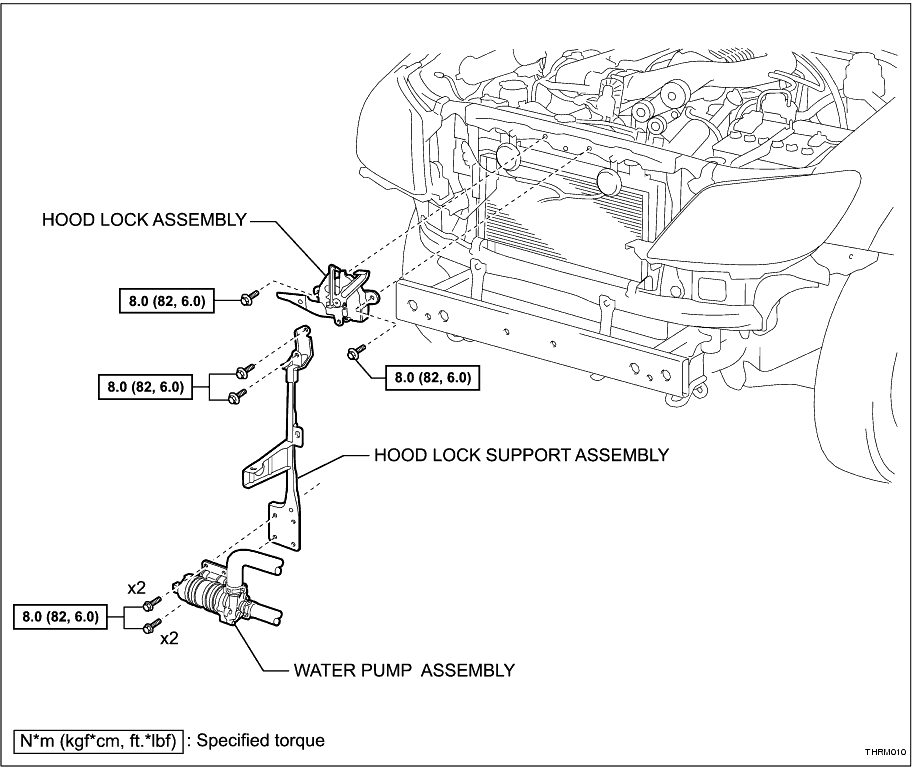
5. REMOVE WATER PUMP ASSEMBLY (
Click Here
)
HINT:
Do not disconnect the coolant hoses. Remove the pump and carefully place it to one side.
6. REMOVE HOOD LOCK ASSEMBLY
(a) Remove the 3 bolts.
-
(b) Move the lock to one side.
-
7. REMOVE HOOD LOCK SUPPORT ASSEMBLY
(a) Unattach the wiring harnesses from the hood lock support assembly.
-
(b) Remove the bolt and the support assembly.
-
INSTALLATION
1. INSTALL HOOD LOCK SUPPORT ASSEMBLY
(a) Install the hood lock support assembly with the bolt.
Torque:
8.0 N*m
(82 kgf*cm,
6.0 ft.*lbf)
-
(b) Attach the wiring harnesses to the support assembly.
-
2. INSTALL HOOD LOCK ASSEMBLY
(a) Install the lock with the 3 bolts.
Torque:
8.0 N*m
(82 kgf*cm,
6.0 ft.*lbf)
-
(b) Adjust the lock.
-
3. INSTALL WATER PUMP ASSEMBLY (
Click Here
)
4. INSTALL FRONT BUMPER ASSEMBLY (
Click Here
)
5. INSTALL FRONT FENDER LINER LH (
Click Here
)
6. INSTALL FRONT FENDER LINER RH
HINT:
Use the same procedures described for the LH side.
7. CONNECT CABLE TO NEGATIVE BATTERY TERMINAL
8. PERFORM INITIALISATION
(a) Enter the audio system PIN, if applicable. Refer to Section 1-8 "Audio System" in the TRD Hilux Driver's Manual for programming information.
-
(b) Calibrate the multi-information display compass. Refer to Section 1-10 "Other Equipment" in the TRD Hilux Driver's Manual for calibrating information.
-