Home › DRIVE LINE › DIFFERENTIAL › DIFFERENTIAL CARRIER ASSEMBLY (w/ Differential Lock)

DIFFERENTIAL CARRIER ASSEMBLY (w/ Differential Lock) > REMOVAL

for Preparation Click here


1. REMOVE REAR WHEEL


2. REMOVE REAR PROPELLER SHAFT ASSEMBLY
(Click here)


3. DRAIN DIFFERENTIAL OIL


  1. for front differential:

    1. Stop the vehicle on a level surface.


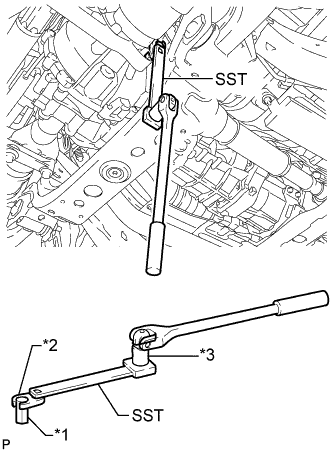
    2. A272242E01
    3. Using SST and the 10 mm straight hexagon wrench, 10 mm union nut wrench and socket adaptor, remove the differential filler plug and gasket.

      SST
      09961-00950  
      Text in Illustration 
      *1
      10 mm Straight Hexagon Wrench
      *2
      10 mm Union Nut Wrench
      *3
      Socket Adaptor

    4. Remove the drain plug and gasket, and drain the oil.

    5. Install a new gasket and the drain plug.

      Torque:
      65 N*m{ 660 kgf*cm , 48 ft.*lbf }

  1. for rear differential:

    1. Stop the vehicle on a level surface.

    2. Remove the differential filler plug and gasket.

    3. Remove the drain plug and gasket, and drain the oil.

    4. Install a new gasket and the drain plug.

      Torque:
      49 N*m{ 500 kgf*cm , 36 ft.*lbf }


4. REMOVE REAR AXLE SHAFT WITH BACKING PLATE LH
(Click here)


5. REMOVE REAR AXLE SHAFT WITH BACKING PLATE RH

HINT:
Use the same procedure described for the LH side.


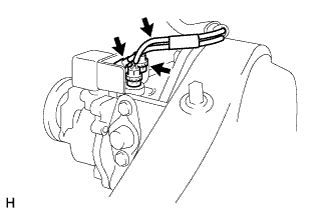
6. DISCONNECT REAR DIFFERENTIAL LOCK ACTUATOR BREATHER TUBE


    C237321
  1. Disconnect the rear differential lock actuator breather tube.

  1. Disconnect the 2 connectors.


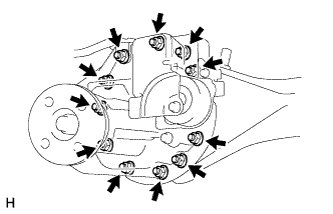
7. REMOVE REAR DIFFERENTIAL CARRIER ASSEMBLY


    C237322
  1. Remove the 11 nuts and differential carrier.

    NOTICE:
    Be careful not to damage the contact surface.


8. REMOVE REAR DIFFERENTIAL CARRIER GASKET