 |
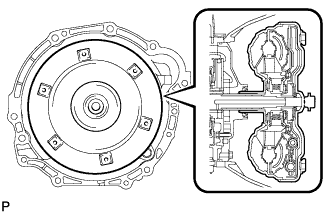
Engage the spline of the input shaft turbine runner.
AUTOMATIC TRANSMISSION ASSEMBLY > INSTALLATION |
| 1. INSTALL TRANSFER ASSEMBLY |
Install the transfer to the transmission.
Install the 2 clamps and 8 bolts.
| 2. INSTALL TRANSMISSION CONTROL CABLE BRACKET |
Install the transmission control cable bracket with the 2 bolts.
| 3. INSPECT TORQUE CONVERTER ASSEMBLY |
| 4. INSTALL TORQUE CONVERTER ASSEMBLY |
|
Engage the spline of the input shaft turbine runner.
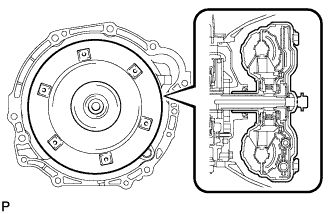 |
Engage the spline of the stator shaft and the stator while turning the torque converter assembly.
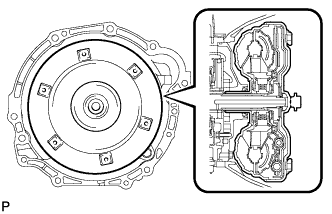 |
Turn the torque converter assembly to insert the key of the oil pump drive gear into the groove of the torque converter assembly.
Clean the torque converter set bolt holes.
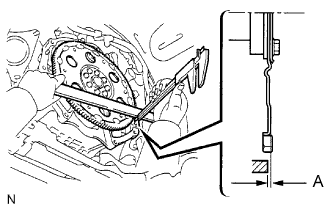 |
Using a vernier caliper and straightedge, measure dimension A between the transaxle contact surface of the engine and the torque converter contact surface of the drive plate.
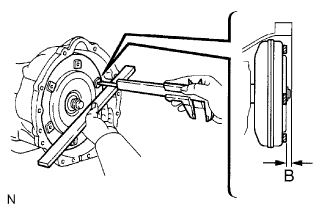 |
Using a vernier caliper and straightedge, measure dimension B shown in the illustration and check that dimension B is more than dimension A, which was measured in the previous step.
| 5. INSTALL AUTOMATIC TRANSMISSION ASSEMBLY |
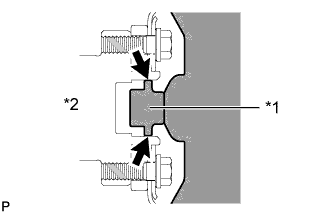 |
Apply clutch spline grease to the surface of the crankshaft that contacts the torque converter centerpiece.
| *1 | Torque Converter Centerpiece |
| *2 | Crankshaft |
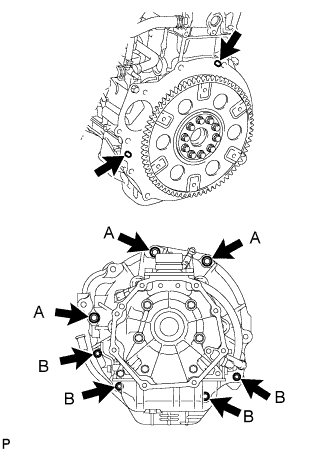 |
While keeping the engine and automatic transmission assembly horizontal, align the knock pins with the holes in the automatic transmission assembly and install the 7 bolts shown in the illustration.
| 6. INSTALL MANIFOLD STAY |
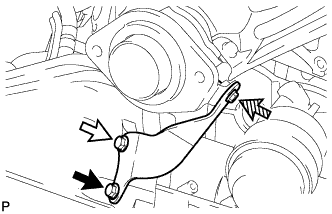 |
Install the manifold stay with the 3 bolts.
 | Bolt A |
 | Bolt B |
 | Bolt C |
| 7. INSTALL DRIVE PLATE AND TORQUE CONVERTER SETTING BOLT |
Turn the crankshaft to gain access to the installation locations of the 6 torque converter setting bolts and install each bolt while holding the crankshaft pulley bolt with a wrench.
Install the flywheel housing dust seal.
| 8. CONNECT WIRE HARNESS AND CONNECTOR |
Connect the park/neutral position switch connector, transmission wire connector, 2 speed sensor connectors and transfer control side connector.
Attach the 5 harness clamps.
Install the heat insulator with the 2 bolts to the park/neutral position switch.
Tilt up the transmission.
Connect the ground cable with the nut.
| 9. INSTALL REAR NO. 1 ENGINE MOUNTING INSULATOR |
Install the engine mounting insulator to the transmission with the 4 bolts.
| 10. INSTALL NO. 3 FRAME CROSSMEMBER SUB-ASSEMBLY |
Install the No. 3 frame crossmember to the rear engine mounting insulator with the 4 bolts.
Install the frame crossmember with the 4 bolts and 4 nuts.
Connect the wire harness clamp to the No. 3 frame crossmember.
| 11. INSTALL STARTER ASSEMBLY |
| 12. CONNECT TRANSMISSION CONTROL CABLE ASSEMBLY |
Connect the control cable with a new clip.
Connect the control cable with the nut.
| 13. CONNECT OIL COOLER TUBE |
Temporarily install the ends of the oil cooler tubes to the oil cooler tube unions by hand.
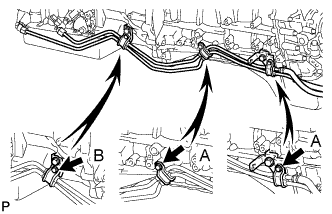 |
Close the 3 No. 2 oil cooler hose clamps and install the 3 bolts.
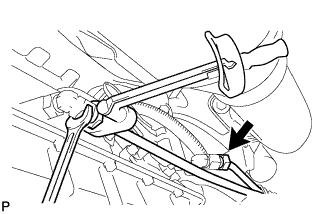 |
Using a union nut wrench, tighten the inlet and outlet tubes.
| 14. INSTALL TRANSMISSION OIL FILLER TUBE SUB-ASSEMBLY |
Coat a new O-ring with ATF and install it to the transmission oil filler tube.
Install the transmission oil filler tube with the 2 bolts.
Install the transmission oil level dipstick.
| 15. INSTALL PROPELLER SHAFT ASSEMBLY |
| 16. INSTALL FRONT PROPELLER SHAFT ASSEMBLY |
| 17. INSTALL FRONT EXHAUST PIPE ASSEMBLY |
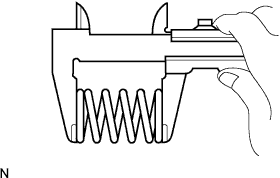 |
Using a vernier caliper, measure the free length of the compression spring.
Install the front pipe to the pipe support.
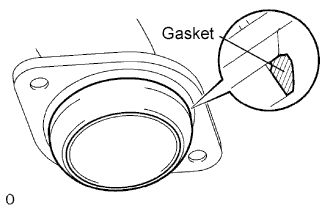 |
Install a new gasket to the exhaust manifold.
Install the front pipe with the 2 compression springs and 2 bolts. Alternately tighten the bolts in several passes.
| 18. INSTALL TRANSFER HIGH AND LOW SHIFT LEVER ASSEMBLY |
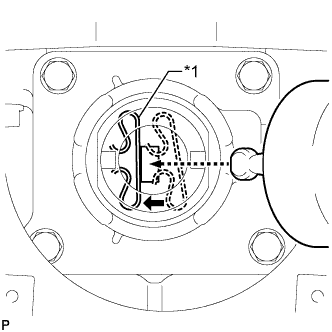 |
While pushing the select return spring to the left with the end of the transfer high and low shift lever, insert the end of the shift lever into the shift fork.
| *1 | Select Return Spring |
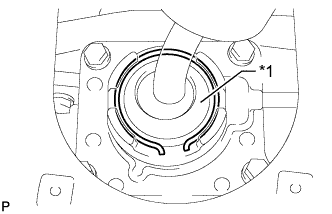 |
While holding down the shift lever cap, install the snap ring to install the transfer high and low shift lever.
| *1 | Shift Lever Cap |
Return the transfer front drive shift boot to its original position.
| 19. INSTALL SHIFT LEVER BOOT ASSEMBLY |
Install the shift lever boot with the 4 screws.
| 20. ADD AUTOMATIC TRANSMISSION FLUID |
| 21. CONNECT CABLE TO NEGATIVE BATTERY TERMINAL |
| 22. INSPECT SHIFT LEVER POSITION |
When moving the shift lever from P to R with the ignition switch ON and the brake pedal depressed, make sure that the shift lever moves smoothly and correctly into position.
Start the engine and make sure that the vehicle moves forward after moving the shift lever from N to D, and moves rearward after shifting to R.
If the results are not as specified, inspect the park/neutral position switch and adjust the shift lever position.
| 23. ADJUST SHIFT LEVER POSITION |
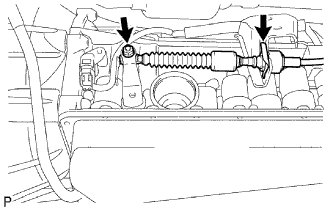 |
Move the shift lever to N.
Remove the nut and disconnect the control cable.
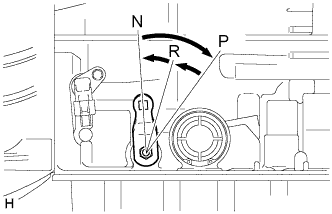 |
Turn the control shaft lever clockwise until it stops, and then turn it counterclockwise 2 notches to set it to the N position.
While holding the control shaft lever slightly toward the R position side, connect the cable with the nut.
| 24. CHECK FOR EXHAUST GAS LEAK |
| 25. INSPECT AUTOMATIC TRANSMISSION FLUID |
| 26. INSTALL NO. 3 ENGINE UNDER COVER |
| 27. INSTALL NO. 2 ENGINE UNDER COVER ASSEMBLY |
| 28. INSTALL NO. 1 ENGINE UNDER COVER |