Do not disconnect any part of the fuel system until you have discharged the fuel system pressure.
Even after discharging the fuel pressure, place a cloth or equivalent over fittings as you separate them to reduce risk of fuel spray on yourself or in the engine compartment.
Disconnect the cable from the negative (-) battery terminal.
CAUTION:
Wait at least 90 seconds after disconnecting the cable from the negative (-) battery terminal to prevent airbag and seat belt pretensioner activation.
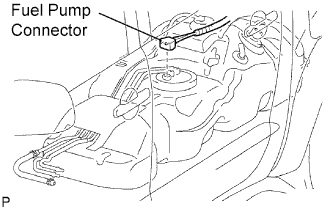
Disconnect the fuel pump connector.
Connect the cable to the negative (-) battery terminal.
Start the engine. After the engine has stopped on its own, turn the ignition switch OFF.
HINT:
DTC P0171/25 (system too lean) may be set.
Crank the engine again, then check that the engine does not start.
Loosen the fuel tank cap, then discharge the pressure in the fuel tank completely.
Connect the fuel pump connector.
2.
DISCONNECT CABLE FROM NEGATIVE BATTERY TERMINAL
CAUTION:
Wait at least 90 seconds after disconnecting the cable from the negative (-) battery terminal to prevent airbag and seat belt pretensioner activation.
NOTICE:
When disconnecting the cable, systems need to be initialized after the cable is reconnected (Click here).
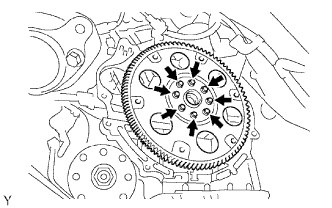
Remove the 8 bolts, rear spacer, drive plate and front spacer.
NOTICE:
Do not reuse the bolts.
5.
INSTALL ENGINE ASSEMBLY TO STAND
6.
REMOVE OIL DIPSTICK GUIDE
Remove the oil dipstick gauge.
Remove the bolt and oil dipstick guide.
Remove the O-ring from the oil dipstick guide.
7.
REMOVE WATER INLET
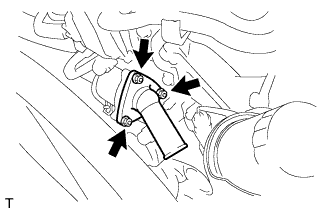
Remove the 3 nuts, water inlet with thermostat and gasket.
8.
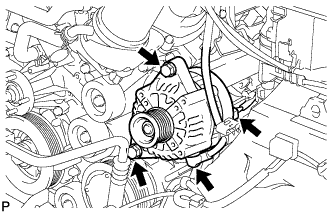
REMOVE GENERATOR
Remove the nut and generator wire.
Disconnect the generator connector.
Remove the 2 bolts and generator.
9.
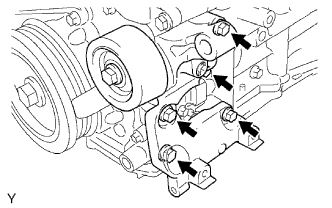
REMOVE V-RIBBED BELT TENSIONER
Remove the 5 bolts and V-ribbed belt tensioner.
10.
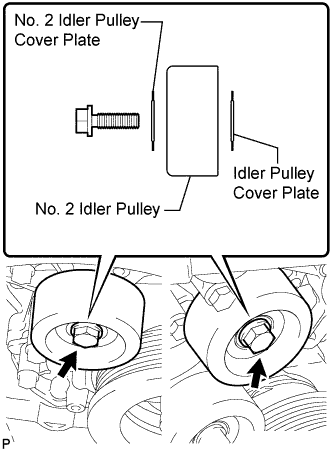
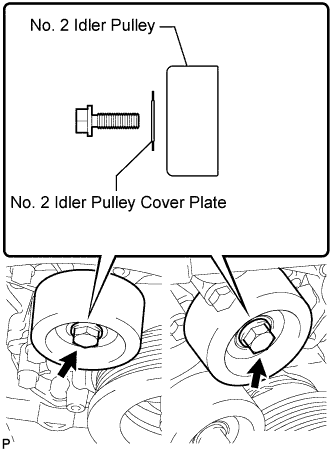
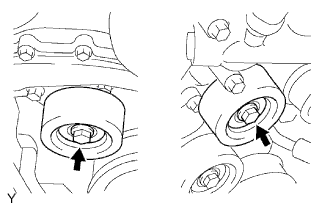
REMOVE NO. 2 IDLER PULLEY
NOTICE:
Use the same procedure for both No. 2 idler pulleys.
w/ Idler Pulley Cover Plate:
Remove the bolt, No. 2 idler pulley cover plate, idler pulley and idler pulley cover plate.
w/o Idler Pulley Cover Plate:
Remove the bolt, No. 2 idler pulley cover plate and idler pulley.
for Integrated Type: Remove the 2 bolts and 2 No. 2 idler pulleys.
11.
REMOVE NO. 1 IDLER PULLEY
Remove the bolt and idler pulley.
12.
REMOVE CRANKSHAFT PULLEY
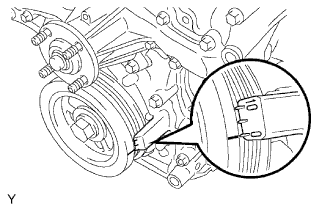
Turn the crankshaft pulley, and align its groove with the timing mark 0 of the timing chain cover.
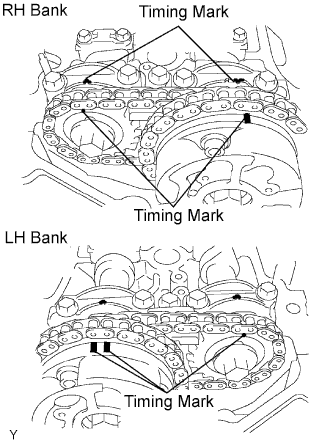
Check that the timing marks of the camshaft timing gears are aligned with the timing marks of the bearing cap as shown in the illustration. If not, turn the crankshaft 1 revolution (360°) and align the timing marks as above.
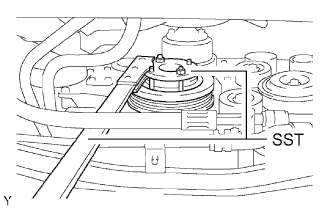
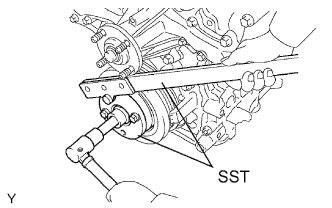
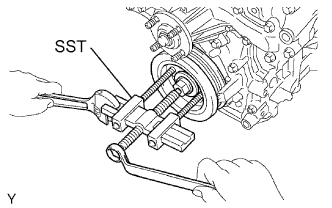
Using SST, hold the crankshaft pulley and loosen the pulley set bolt.
SST
09213-54015
(91651-60855)
09330-00021
Using the pulley set bolt and SST, remove the crankshaft pulley.