2014 Hilux · Service Manual ENGINE

INSTALLATION

Removal / installation · Vehicles built Aug 2012 – Jul 2013

Versions by build date: Jun 2011 – Jul 2012 Aug 2012 – Jul 2013 from Aug 2013


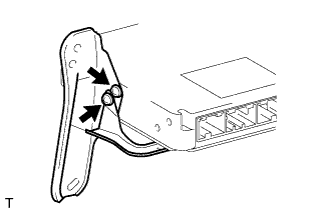
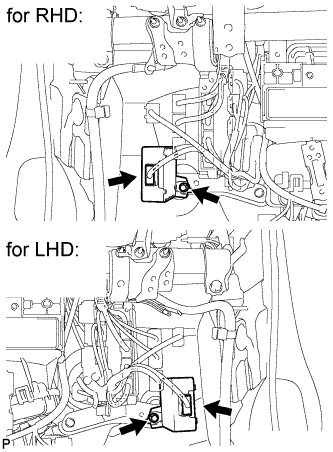
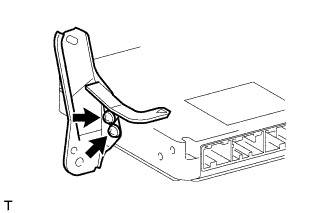
1. INSTALL NO. 2 ECM BRACKET

  1. A191417
    for LHD:
    Install the bracket with the 2 screws.

    Torque:
    3.0 N*m{ 31 kgf*cm , 27 in.*lbf }

  1. A224464
    for RHD:
    Install the bracket with the 2 screws.

    Torque:
    3.0 N*m{ 31 kgf*cm , 27 in.*lbf }


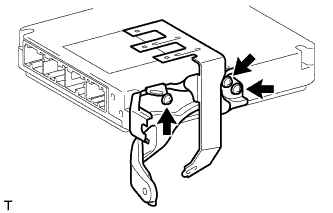
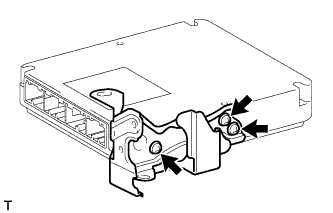
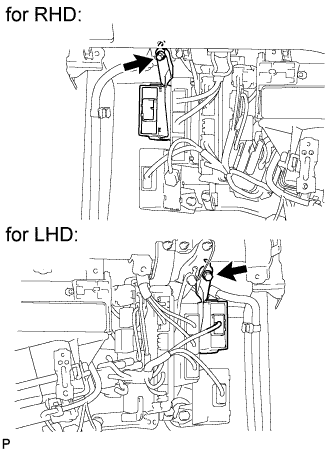
2. INSTALL NO. 1 ECM BRACKET

  1. A191416
    for LHD:
    Install the bracket with the 3 screws.

    Torque:
    3.0 N*m{ 31 kgf*cm , 27 in.*lbf }

  1. A224463
    for RHD:
    Install the bracket with the 3 screws.

    Torque:
    3.0 N*m{ 31 kgf*cm , 27 in.*lbf }


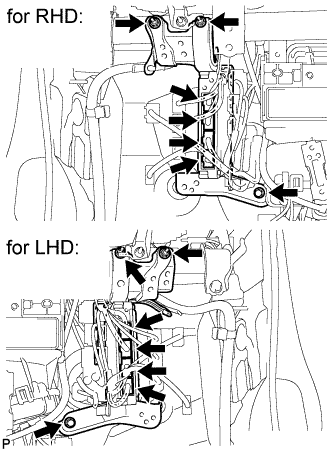
3. INSTALL ECM

  1. A191421E03
    Install the ECM with the bolt and 2 nuts.

    Torque:
    8.0 N*m{ 82 kgf*cm , 71 in.*lbf }

  1. Connect the 4 connectors.


4. INSTALL TRANSMISSION CONTROL ECU (for Automatic Transmission)
  1. Install the transmission control ECU with the 2 bolts.

    Torque:
    8.0 N*m{ 82 kgf*cm , 71 in.*lbf }

  1. Connect the 5 connectors.


5. INSTALL TURBO MOTOR DRIVER (for Motor Controlled Actuator)

  1. A191420E03
    Install the turbo motor driver with the bolt.

    Torque:
    8.0 N*m{ 82 kgf*cm , 71 in.*lbf }

  1. Connect the connector.


6. INSTALL 4WD CONTROL ECU (for 4WD)

  1. A211934E02
    Install the 4WD control ECU with the bolt.

    Torque:
    8.0 N*m{ 82 kgf*cm , 71 in.*lbf }

  1. Connect the connector.


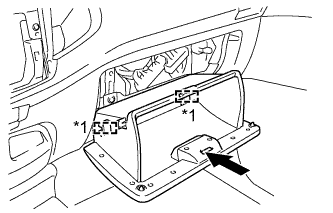
7. INSTALL GLOVE COMPARTMENT DOOR ASSEMBLY

B278068E01
  1. Attach the 2 hinges to install the glove compartment door.

    Text in Illustration 
    *1
    Hinge

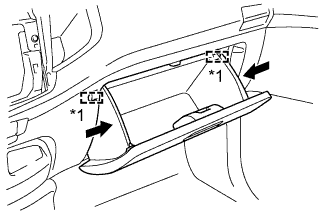
  1. B278069E01
    While pushing in the sides of the glove compartment door as indicated by the arrows in the illustration, close the door to engage it to the 2 stoppers.
    Text in Illustration 
    *1
    Stopper


8. CONNECT CABLE TO NEGATIVE BATTERY TERMINAL

NOTICE:
When disconnecting the cable, some systems need to be initialized after the cable is reconnected (Click here).

9. PERFORM REGISTRATION
  1. w/ EGR Cooler:
    (Click here)
  2. w/o EGR Cooler:
    (Click here)

10. START ENGINE

NOTICE:
After replacing the ECM, the new ECM needs to be initialized.

  1. w/ EGR Cooler:
    (Click here)
  2. w/o EGR Cooler:
    (Click here)
← INSTALLATION (Jun 2011 – Jul 2012)INSTALLATION (from Aug 2013) →