DISASSEMBLY
Removal / installation · Vehicles built from Jun 2011
| 1.
INSPECT GENERATOR WITH VACUUM PUMP ASSEMBLY |
 |
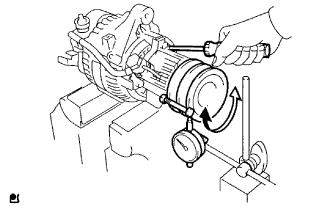
Mount the generator in a vise.
Insert a screwdriver to hold the generator rotor.
Hold the bolt and nut to the pulley.
- Set a dial indicator as shown in the illustration.
Turn the pulley and measure the backlash between the generator rotor and vacuum pump shaft.
- Maximum backlash:
- 1.6 mm (0.063 in.)
If the backlash is greater than the maximum, replace the generator rotor and vacuum pump shaft.
| 2.
REMOVE VACUUM PUMP ASSEMBLY |
|
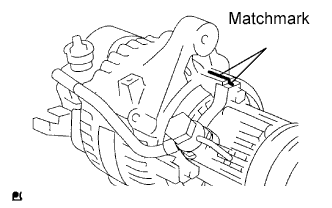
- Place the matchmarks as shown in the illustration.
Remove the 4 bolts and vacuum pump.
| 3.
REMOVE GENERATOR REAR END COVER |
|
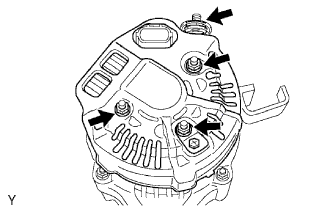
- Remove the nut and terminal insulator.
Remove the bolt, 3 nuts, plate terminal and rear end cover.
| 4.
REMOVE BRUSH HOLDER AND REGULATOR |
|
Remove the brush holder cover.
- Remove the 2 screws and brush holder.
Remove the seal plate.
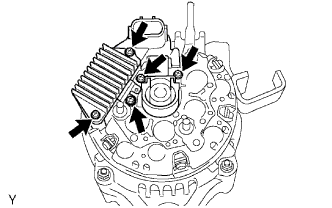
Remove the 3 screws and regulator.
| 5.
REMOVE GENERATOR HOLDER WITH RECTIFIER |
|
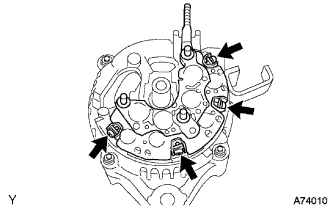
- Remove the 4 screws and generator holder with rectifier.
Remove the 4 rubber insulators.
| 6.
REMOVE GENERATOR RECTIFIER END FRAME |
|
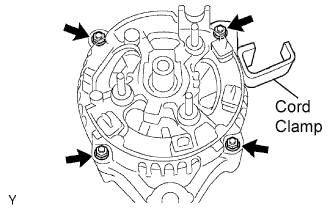
- Remove the 4 nuts and cord clamp.
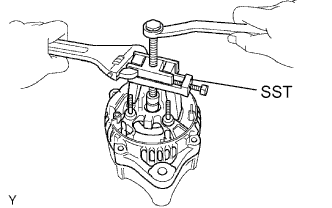
- Using SST, remove the rectifier end frame.
- SST
- 09286-46011
Remove the washer from the rotor.
| 7.
REMOVE GENERATOR ROTOR ASSEMBLY |
|
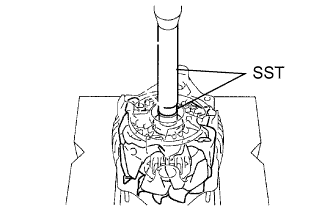
- Using SST and a press, press out the rotor.
- SST
- 09950-60010
(09951-00180)
09950-70010
(09951-07100)