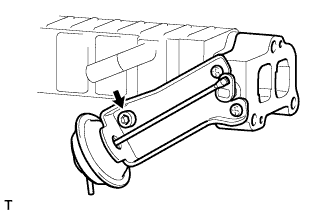
REMOVAL
Removal / installation · Vehicles built from Jun 2011
| 1. DISCONNECT CABLE FROM NEGATIVE BATTERY TERMINAL |

- CAUTION:
- Wait at least 90 seconds after disconnecting the cable from the negative (-) battery terminal to prevent airbag and seat belt pretensioner activation.
| 2. DRAIN ENGINE COOLANT |
- CAUTION:
- Do not remove the radiator reservoir cap while the engine and radiator are still hot. Pressurized, hot engine coolant and steam may be released and cause serious burns.
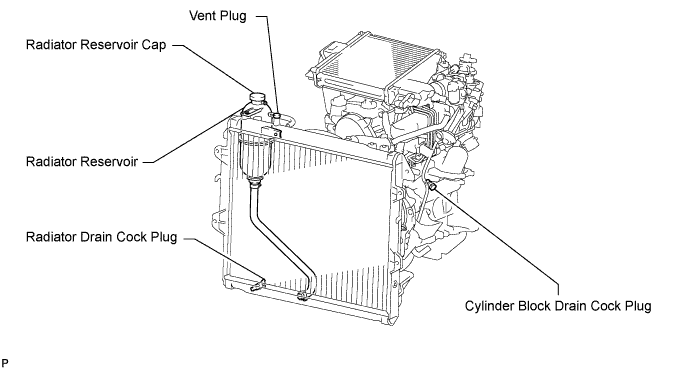
Loosen the radiator drain cock plug.
- HINT:
- Collect the coolant in a container and dispose of it according to the regulations in your area.
Drain the coolant by removing the reservoir cap and, using a wrench, remove the vent plug.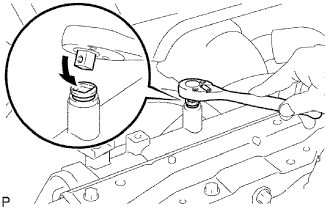

Loosen the cylinder block drain cock plug.
| 3. REMOVE DIESEL THROTTLE BODY ASSEMBLY |
Remove the diesel throttle body (Click here).
| 4. DISCONNECT NO. 3 WATER BY-PASS HOSE |
Remove the clamp.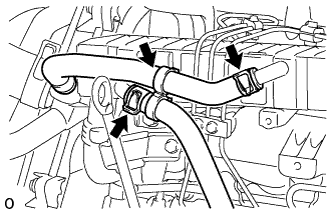
Disconnect the No. 3 water by-pass hose from the EGR cooler.
| 5. DISCONNECT NO. 4 WATER BY-PASS HOSE |
Disconnect the No. 4 water by-pass hose from the EGR cooler.
| 6. REMOVE INJECTION PIPE |
Remove the No. 1 to 3 injection pipe (Click here).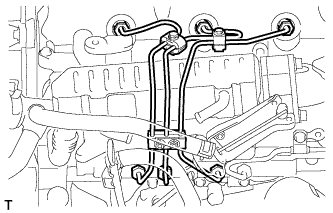
| 7. REMOVE VENTURI BRACKET |
Remove the 3 bolts and venturi bracket.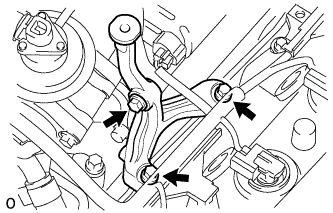
| 8. DISCONNECT NO. 3 WATER BY-PASS PIPE |
Remove the 2 bolts and disconnect the No. 3 water by-pass pipe with wire harness.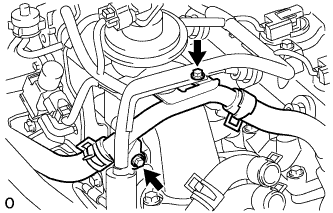
| 9. REMOVE ELECTRIC VACUUM REGULATING VALVE ASSEMBLY |
Disconnect the 2 connectors from the electric EGR control valve and E-VRV.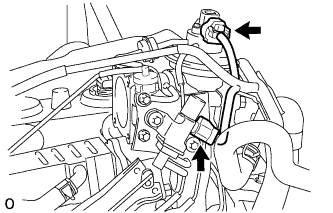
Disconnect the 5 vacuum hoses.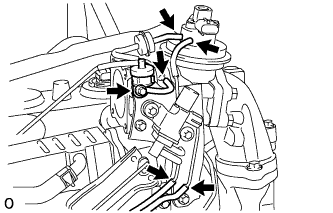
Remove the bolt and gas filter with the gas filter bracket.
Remove the 2 bolts and E-VRV's bracket with EGR vacuum damper.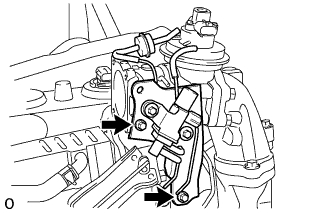
| 10. REMOVE NO. 2 INTAKE AIR CONNECTOR |
Remove the 3 nuts, No. 2 intake air connector and gasket.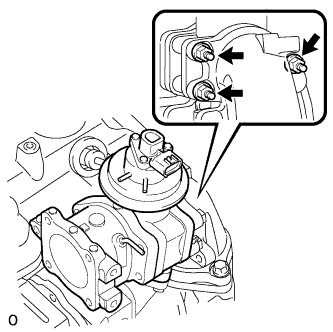
| 11. REMOVE INTAKE AIR CONNECTOR |
Remove the 3 bolts, intake air connector and 2 gaskets.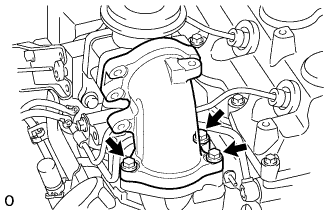
| 12. REMOVE ELECTRIC EGR CONTROL VALVE WITH NO. 2 EGR VALVE AND EGR COOLER |
Disconnect the vacuum hose from the No. 2 EGR valve.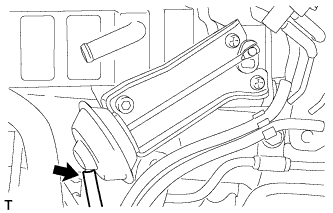
Remove the bolt, 2 nuts, electric EGR control valve with the No. 2 EGR valve and EGR cooler.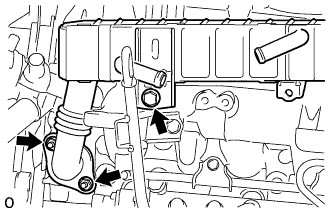
Remove the gasket from the cylinder block.
| 13. REMOVE ELECTRIC EGR CONTROL VALVE ASSEMBLY |
Remove the 2 bolts, electric EGR control valve and gasket.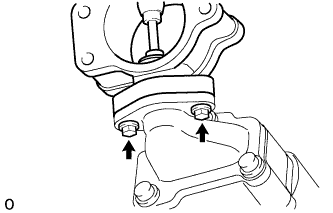
| 14. REMOVE EGR VALVE ADAPTER |
Using a 6 mm hexagon wrench, remove the 3 hexagon bolts, 3 plate washers, EGR valve adapter and gasket.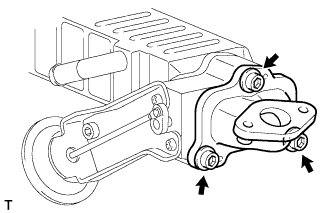
| 15. REMOVE NO. 2 EGR VALVE ASSEMBLY |
Using a 5 mm hexagon wrench, remove the hexagon bolt, No. 2 EGR valve and gasket.