After turning the ignition switch off, waiting time may be required before disconnecting the cable from the battery terminal. Therefore, make sure to read the disconnecting the cable from the battery terminal notice before proceeding with work (Click here).
2.
DISCONNECT CABLE FROM NEGATIVE BATTERY TERMINAL
NOTICE:
When disconnecting the cable, some systems need to be initialized after the cable is reconnected (Click here).
3.
REMOVE CENTER INSTRUMENT CLUSTER FINISH PANEL ASSEMBLY
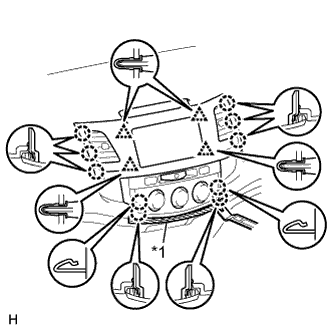
for Manual Air Conditioning System:
Put protective tape around the center instrument cluster finish panel.
Text in Illustration
*1
Protective Tape
Using a moulding remover, detach the 10 claws and 4 clips.
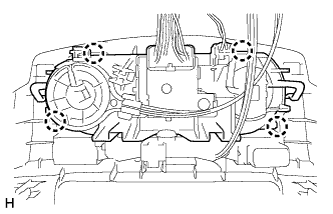
Detach the 4 claws and disconnect the air conditioner control.
Disconnect the connectors and remove the center instrument cluster finish panel.
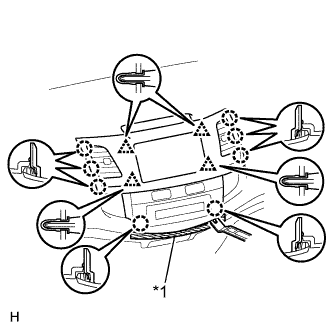
for Automatic Air Conditioning System:
Put protective tape around the center instrument cluster finish panel.
Text in Illustration
*1
Protective Tape
Using a moulding remover, detach the 8 claws and 4 clips.
Disconnect the connectors and remove the center instrument cluster finish panel.
4.
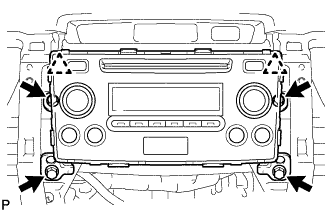
REMOVE RADIO RECEIVER ASSEMBLY WITH BRACKET (for Radio Receiver Type)
Remove the 4 screws.
Disconnect all the connectors and remove the radio receiver assembly with bracket.
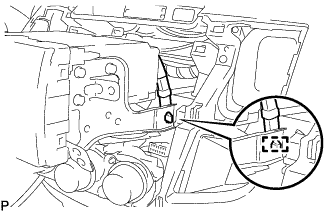
Detach the wire harness clamp.
Disconnect all the connectors and remove the radio receiver assembly with bracket.
5.
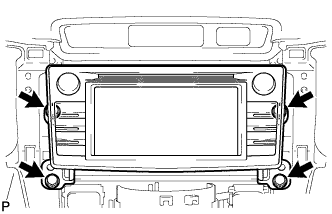
REMOVE RADIO AND DISPLAY RECEIVER ASSEMBLY (for Radio and Display Type)
Remove the 4 screws.
Disconnect all the connectors and remove the radio and display receiver assembly with bracket.
6.
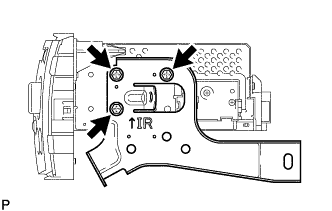
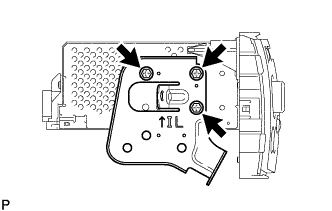
REMOVE NO. 1 RADIO BRACKET (for Radio Receiver Type)
Remove the 3 screws and No. 1 radio bracket from the radio receiver assembly.
7.
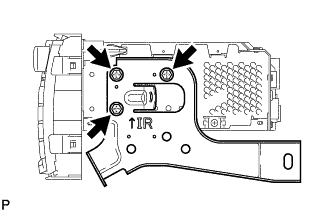
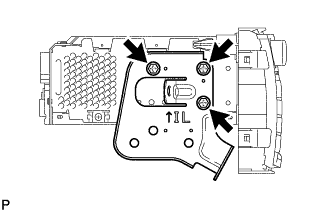
REMOVE NO. 1 RADIO RECEIVER BRACKET (for Radio and Display Type)
Remove the 3 screws and No. 1 radio bracket from the radio and display receiver assembly.
8.
REMOVE NO. 2 RADIO BRACKET (for Radio Receiver Type)
Remove the 3 screws and No. 2 radio bracket from the radio receiver assembly.
9.
REMOVE NO. 2 RADIO RECEIVER BRACKET (for Radio and Display Type)
Remove the 3 screws and No. 2 radio bracket from the radio and display receiver assembly.