DOOR / HATCH REAR DOOR DISASSEMBLY
CAUTION / NOTICE / HINT
- HINT:
- ·
Use the same procedure for the RH and LH sides.
·The procedure listed below is for the LH side.
PROCEDURE

 1. PRECAUTION (w/ Power Window)
- NOTICE:
-
After turning the ignition switch off, waiting time may be required before disconnecting the cable from the battery terminal. Therefore, make sure to read the disconnecting the cable from the battery terminal notice before proceeding with work (See page General>INTRODUCTION>REPAIR INSTRUCTION>PRECAUTION).
2.DISCONNECT CABLE FROM NEGATIVE BATTERY TERMINAL (w/ Power Window)
- NOTICE:
-
When disconnecting the cable, some systems need to be initialized after the cable is reconnected (See page General>INTRODUCTION>REPAIR INSTRUCTION>INITIALIZATION).
3.REMOVE REAR POWER WINDOW REGULATOR SWITCH ASSEMBLY WITH REAR DOOR ARMREST BASE PANEL (w/ Power Window)
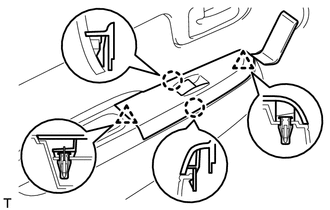
Using a moulding remover, detach the 2 clips and 2 claws.
Disconnect the connector and remove the rear power window regulator switch assembly with rear door armrest base panel.
4.REMOVE REAR DOOR WINDOW REGULATOR HANDLE ASSEMBLY (w/o Power Window)
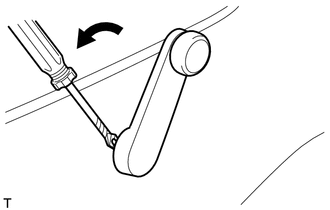
| *1 | Protective Tape |
Insert a clip remover between the plate and trim board.
- HINT:
-
Tape the clip remover tip before use.
Turn the handle clockwise to remove the snap ring, rear door window regulator handle and plate.
5.REMOVE DOOR PULL HANDLE
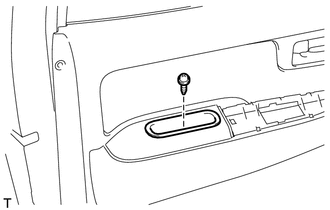
Remove the screw and door pull handle.
6.REMOVE REAR DOOR TRIM BOARD SUB-ASSEMBLY LH
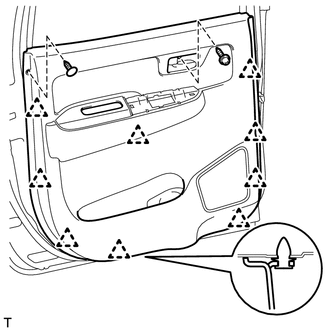
Remove the clip and screw.
Detach the 9 clips and remove the rear door trim board.
7.REMOVE REAR DOOR INNER GLASS WEATHERSTRIP LH
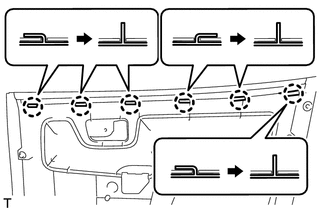
Raise the 6 claws of the rear door inner glass weatherstrip as shown in the illustration, and then remove the rear door inner glass weatherstrip from the rear door trim board.
8.REMOVE REAR DOOR OUTER GLASS WEATHERSTRIP LH
9.REMOVE REAR SPEAKER ASSEMBLY (w/ Rear Speaker)
10.REMOVE REAR DOOR INSIDE HANDLE SUB-ASSEMBLY LH
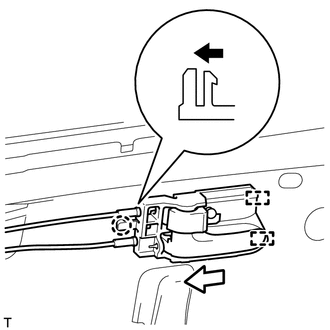
Detach the claw and 2 guides as indicated by the arrows in the order shown in the illustration.
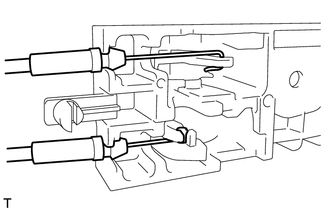
Disconnect the rear door inside locking cable and rear door lock remote control cable and remove the rear door inside handle.
11.REMOVE REAR DOOR NO. 2 TRIM BRACKET
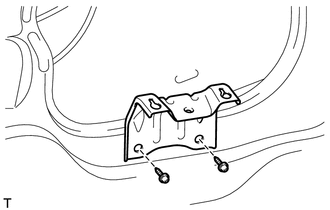
Remove the 2 screws and rear door No. 2 trim bracket.
12.REMOVE REAR DOOR SERVICE HOLE COVER LH
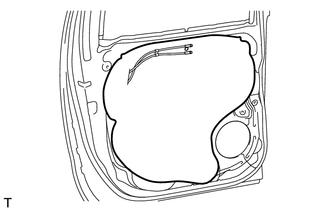
w/ Rear Speaker:
Pull out the rear door inside locking cable, rear door lock remote control cable and wire harness from the rear door service hole cover, and then remove the rear door service hole cover.
- HINT:
-
Remove any remaining butyl tape from the rear door panel.
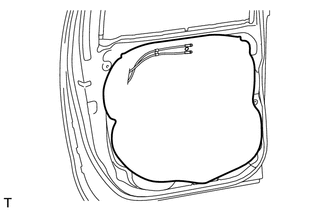
w/o Rear Speaker:
Pull out the rear door inside locking cable and rear door lock remote control cable from the rear door service hole cover, and then remove the rear door service hole cover.
- HINT:
-
Remove any remaining butyl tape from the rear door panel.
13.REMOVE REAR DOOR WINDOW DIVISION BAR SUB-ASSEMBLY LH
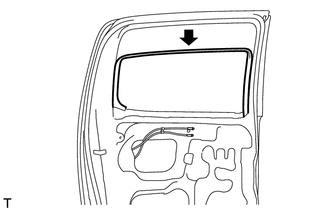
Partially remove the rear door glass run as shown in the illustration.
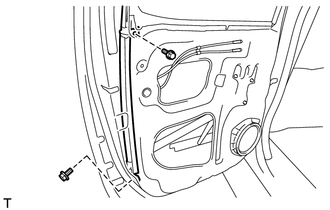
Remove the 2 bolts.
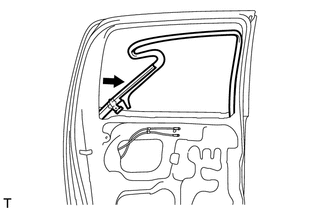
Remove the rear door window division bar together with the rear door glass run as shown in the illustration.
Remove the rear door window division bar from the rear door glass run.
14.REMOVE REAR DOOR GLASS SUB-ASSEMBLY LH
w/ Power Window:
Temporarily install the rear power window regulator switch assembly with rear door armrest base panel.
Connect the cable to the negative (-) battery terminal.
Move the rear door glass so that the rear door glass channel can be seen.
Disconnect the cable from the negative (-) battery terminal.
- NOTICE:
-
When disconnecting the cable, some systems need to be initialized after the cable is reconnected (See page General>INTRODUCTION>REPAIR INSTRUCTION>INITIALIZATION).
Remove the rear power window regulator switch assembly with rear door armrest base panel.
w/o Power Window:
Temporarily install the rear door window regulator handle.
Move the rear door glass so that the rear door glass channel can be seen.
Remove the rear door window regulator handle.
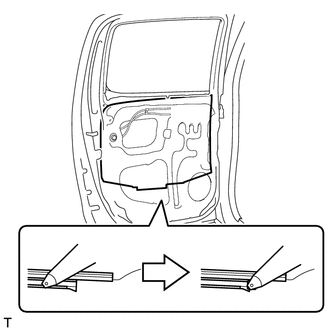
Remove the rear door glass from the rear door window regulator assembly as shown in the illustration.
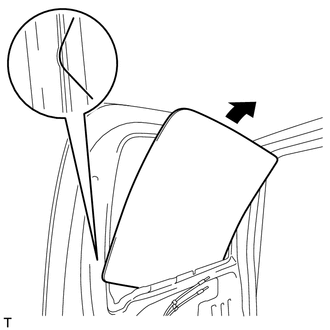
| *a | Rear Door Panel Cutout |
Remove the rear door glass by passing it through the cutout of the rear door panel in the direction indicated by the arrow in the illustration.
- NOTICE:
-
Do not damage the door glass.
15.REMOVE REAR DOOR GLASS RUN LH
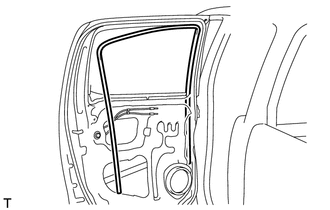
Remove the front side of the rear door glass run.
16.REMOVE REAR DOOR GLASS CHANNEL SUB-ASSEMBLY LH
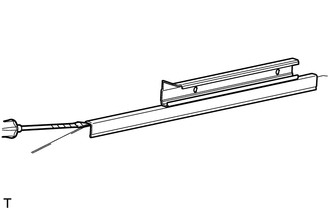
| *1 | Protective Tape |
Using a screwdriver, remove the rear door glass channel.
- HINT:
-
Tape the screwdriver tip before use.
17.REMOVE REAR DOOR GLASS CHANNEL FILLER
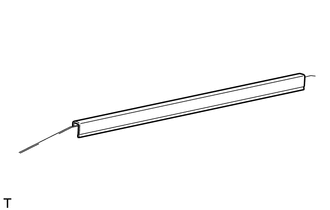
Remove the rear door glass channel filler.
18.REMOVE REAR DOOR WINDOW REGULATOR SUB-ASSEMBLY LH
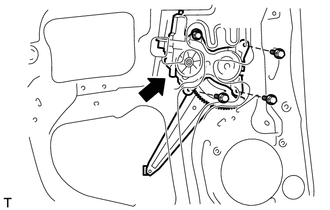
| *1 | Temporary Bolt |
w/ Power Window:
Disconnect the connector.
Loosen the temporary bolt.
- NOTICE:
-
Do not remove the temporary bolt. If the temporary bolt is removed, the rear door window regulator may fall and become damaged.
Remove the 3 bolts and rear door window regulator.
Remove the temporary bolt from the rear door window regulator.
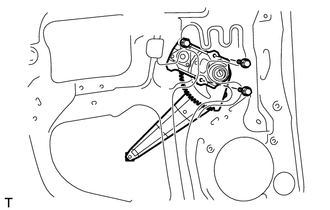
| *1 | Temporary Bolt |
w/o Power Window:
Loosen the temporary bolt.
- NOTICE:
-
Do not remove the temporary bolt. If the temporary bolt is removed, the rear door window regulator may fall and become damaged.
Remove the 2 bolts and rear door window regulator.
Remove the temporary bolt from the rear door window regulator.
19.REMOVE POWER WINDOW REGULATOR MOTOR ASSEMBLY LH (w/ Power Window)
20.REMOVE REAR DOOR LOCK ASSEMBLY LH
w/ Power Door Lock:
(See page Vehicle Interior>DOOR LOCK>REAR DOOR LOCK>REMOVAL)
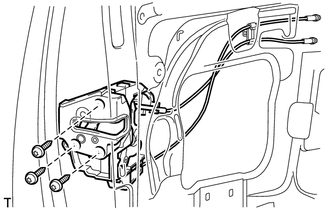
w/o Power Door Lock:
Disconnect the rear door inside locking cable and rear door lock remote control cable from the clamps.
Using a T30 "TORX" socket wrench, remove the 3 screws and rear door lock.
21.REMOVE REAR DOOR LOCK REMOTE CONTROL CABLE ASSEMBLY LH
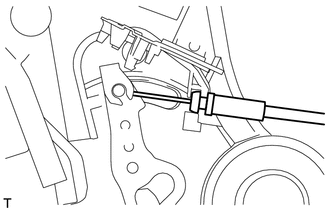
Remove the rear door lock remote control cable.
22.REMOVE REAR DOOR INSIDE LOCKING CABLE ASSEMBLY LH
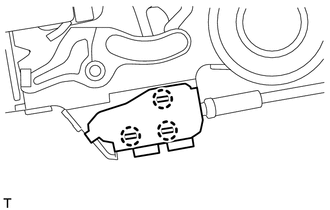
Detach the 3 claws and open the cover.
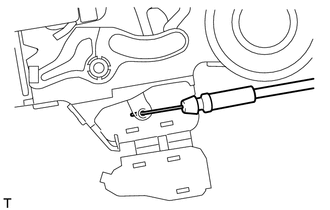
Remove the rear door inside locking cable.
23.REMOVE REAR DOOR OUTSIDE HANDLE COVER LH
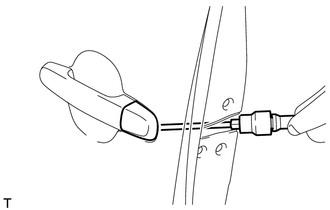
Using a T30 "TORX" socket wrench, loosen the screw and remove the rear door outside handle cover.
24.REMOVE REAR DOOR OUTSIDE HANDLE ASSEMBLY LH
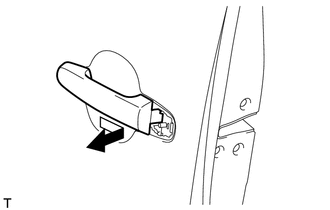
Remove the rear door outside handle by sliding and pulling it in the direction indicated by the arrow in the illustration.
25.REMOVE REAR DOOR OUTSIDE HANDLE FRAME SUB-ASSEMBLY LH
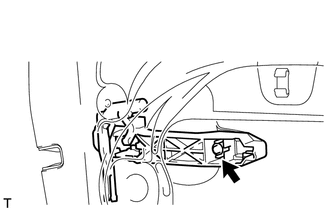
Using a T30 "TORX" socket wrench, loosen the screw and remove the rear door outside handle frame.
26.REMOVE REAR DOOR FRONT OUTSIDE HANDLE PAD
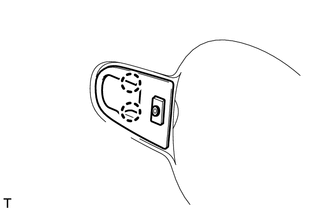
Detach the 2 claws and remove the rear door front outside handle pad.
27.REMOVE REAR DOOR REAR OUTSIDE HANDLE PAD
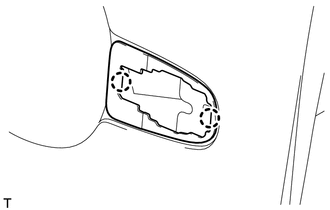
Detach the 2 claws and remove the rear door rear outside handle pad.
28.REMOVE REAR DOOR PANEL CUSHION
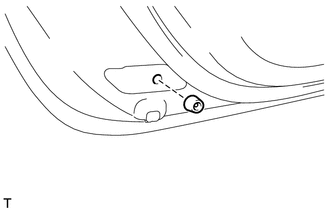
Remove the rear door panel cushion.
29.REMOVE REAR DOOR WEATHERSTRIP LH
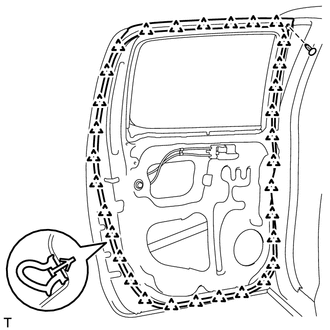
Remove the clip.
Detach the 32 clips and remove the rear door weatherstrip.
30.REMOVE REAR DOOR CHECK ASSEMBLY LH
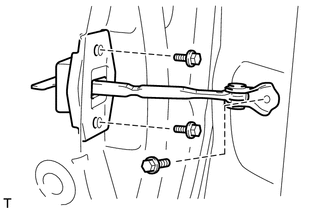
Remove the 3 bolts and rear door check.