LIGHTING (EXT) HEADLIGHT LEVELING ECU REMOVAL
CAUTION / NOTICE / HINT
The necessary procedures (adjustment, calibration, initialization or registration) that must be performed after parts are installed, removed or replaced during the headlight leveling ECU assembly installation/removal are shown below.
| Replacement Part or Procedure | Necessary Procedures | Effects / Inoperative when not Performed | Link |
|---|---|---|---|
| Disconnect cable from negative battery terminal | w/ Power Back Door System:
Reset back door close position |
Power back door system | ( ) |
| The headlight leveling ECU assembly is replaced with a new one | Headlight leveling ECU assembly vehicle information registration | Automatic headlight beam level control system | ()
|
| Headlight leveling ECU assembly initialization |
- HINT:
- ·
Use the same procedure for RHD and LHD vehicles.
·The procedure listed below is for LHD vehicles.
PROCEDURE

 1. PRECAUTION
- CAUTION:
-
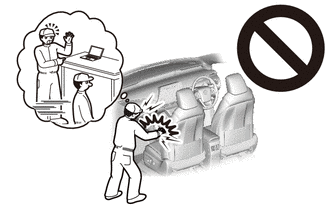
-
Be sure to read Precaution thoroughly before servicing.
-
for Type A:
-
Click hereVehicle Interior>SUPPLEMENTAL RESTRAINT SYSTEMS>AIRBAG SYSTEM(for Type A)>PRECAUTION
-
for Type B:
-
Click hereVehicle Interior>SUPPLEMENTAL RESTRAINT SYSTEMS>AIRBAG SYSTEM(for Type B)>PRECAUTION
- NOTICE:
-
After turning the engine switch off, waiting time may be required before disconnecting the cable from the negative (-) battery terminal. Therefore, make sure to read the disconnecting the cable from the negative (-) battery terminal notice before proceeding with work.
-
Click hereGeneral>INTRODUCTION>REPAIR INSTRUCTION>PRECAUTION
2.DISCONNECT CABLE FROM NEGATIVE BATTERY TERMINAL
- CAUTION:
-
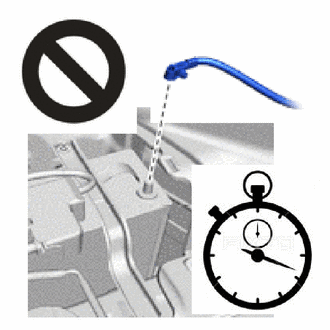
- ·
Wait at least 90 seconds after disconnecting the cable from the negative (-) battery terminal to disable the SRS system.
·If the airbag deploys for any reason, it may cause a serious accident.
- NOTICE:
-
When disconnecting the cable, some systems need to be initialized after the cable is reconnected.
-
Click hereGeneral>INTRODUCTION>REPAIR INSTRUCTION>INITIALIZATION
55667
3.REMOVE INSTRUMENT PANEL REGISTER BEZEL GARNISH
55012A
4.REMOVE NO. 2 INSTRUMENT PANEL GARNISH SUB-ASSEMBLY
55606
5.REMOVE NO. 1 INSTRUMENT PANEL UNDER COVER SUB-ASSEMBLY
45287
6.REMOVE LOWER STEERING COLUMN COVER
73900
7.REMOVE LOWER NO. 1 INSTRUMENT PANEL AIRBAG ASSEMBLY
89960
8.REMOVE HEADLIGHT LEVELING ECU ASSEMBLY
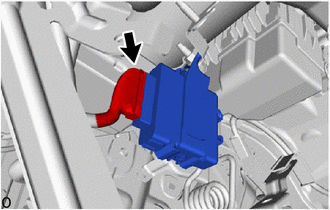
Disconnect the connector.
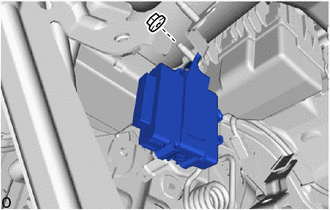
Remove the nut and headlight leveling ECU assembly.