DOOR / HATCH REAR DOOR(for Smart Cab) DISASSEMBLY
CAUTION / NOTICE / HINT
The necessary procedures (adjustment, calibration, initialization or registration) that must be performed after parts are removed, installed or replaced during the rear door disassembly/reassembly are shown below.
| Replacement Part or Procedure | Necessary Procedures | Effects / Inoperative when not Performed | Link |
|---|---|---|---|
| Disconnect cable from negative battery terminal | Drive the vehicle until stop and start control is permitted (approximately 5 to 60 minutes) | Stop and start system | ( ) |
| Memorize steering angle neutral point | Pre-crash safety system | ()
|
- HINT:
- ·
Use the same procedure for the RH and LH sides.
·The procedure listed below is for the LH side.
PROCEDURE

 1. PRECAUTION (w/ Airbag System)
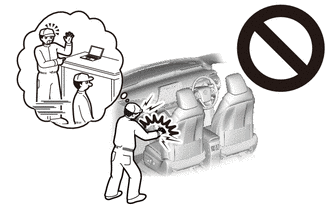
- CAUTION:
-
-
Be sure to read Precaution thoroughly before servicing.
-
for Type A:
-
Click hereVehicle Interior>SUPPLEMENTAL RESTRAINT SYSTEMS>AIRBAG SYSTEM(for Type A)>PRECAUTION
-
for Type B:
-
Click hereVehicle Interior>SUPPLEMENTAL RESTRAINT SYSTEMS>AIRBAG SYSTEM(for Type B)>PRECAUTION
-
for Type C:
-
Click hereVehicle Interior>SUPPLEMENTAL RESTRAINT SYSTEMS>AIRBAG SYSTEM(for Type C)>PRECAUTION
- NOTICE:
-
After turning the ignition switch off, waiting time may be required before disconnecting the cable from the negative (-) battery terminal. Therefore, make sure to read the disconnecting the cable from the negative (-) battery terminal notice before proceeding with work.
-
Click hereGeneral>INTRODUCTION>REPAIR INSTRUCTION>PRECAUTION
2.DISCONNECT CABLE FROM NEGATIVE BATTERY TERMINAL (w/ Airbag System)
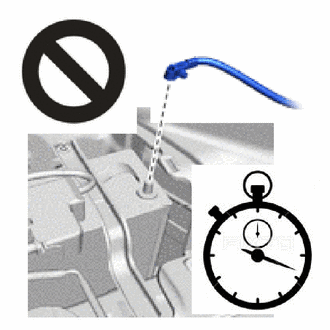
- CAUTION:
-
- ·
Wait at least 90 seconds after disconnecting the cable from the negative (-) battery terminal to disable the SRS system.
·If the airbag deploys for any reason, it may cause a serious accident.
- NOTICE:
-
When disconnecting the cable, some systems need to be initialized after the cable is reconnected.
-
Click hereGeneral>INTRODUCTION>REPAIR INSTRUCTION>INITIALIZATION
73233
3.REMOVE LAP BELT OUTER ANCHOR COVER
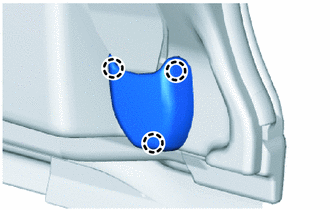
Detach the claw and remove the lap belt outer anchor cover.
67604
4.REMOVE REAR DOOR TRIM BOARD SUB-ASSEMBLY LH
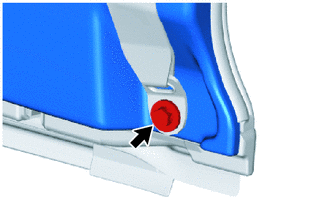
Remove the bolt and disconnect the front seat outer belt floor anchor.
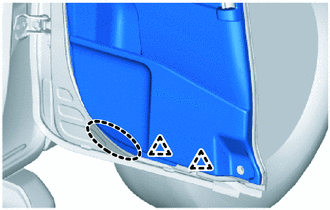

|
Place Hands Here |
Detach the clip as shown in the illustration.
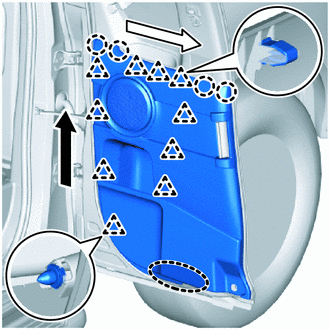
|
|
Place Hands Here |

|
Order of Removal (1) |

|
Order of Removal (2) |
Detach the clip and claw as shown in the illustration.
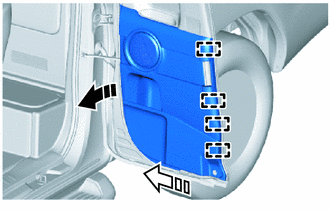

|
Remove in this Direction (1) |

|
Remove in this Direction (2) |
Detach the guide and remove the rear door trim board sub-assembly LH.
73178A
5.REMOVE SEAT BELT ANCHOR COVER CAP
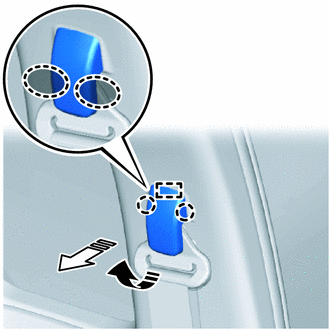
|
|
Place Hands Here |
|
|
Remove in this Direction (1) |
|
|
Remove in this Direction (2) |
Detach the claw and guide and remove the seat belt anchor cover cap as shown in the illustration.
73220
6.REMOVE FRONT SEAT OUTER BELT ASSEMBLY LH
67674A
7.REMOVE REAR DOOR FRAME GARNISH LH
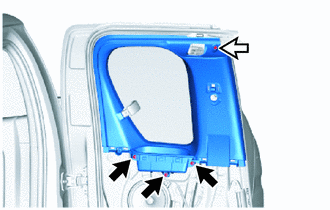
|
|
Screw |
|
|
Clip |
Remove the 3 screws and clip.
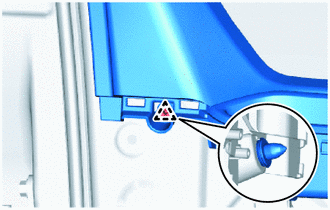
Using a clip remover, detach the clip.
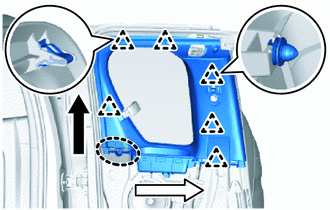
|
|
Place Hands Here |
|
|
Order of Removal (1) |
|
|
Order of Removal (2) |
Remove the clip and rear door frame garnish LH.
8.REMOVE SCREW GROMMET
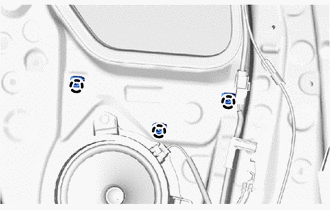
Using a clip remover, detach the claw and remove the 3 screw grommets.
86160B
9.REMOVE REAR SPEAKER ASSEMBLY
69208K
10.REMOVE ACCESS PANEL INSIDE HANDLE SUB-ASSEMBLY LH
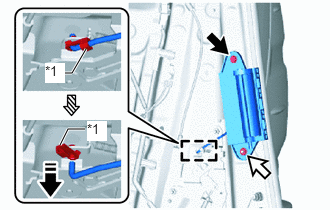
| *1 | Snap |
|
|
Bolt |
|
|
Nut |

|
Order of Removal |
|
|
Remove in this Direction |
Detach the snap as shown in the illustration.
Remove the nut, bolt and access panel inside handle sub-assembly LH.
69360L
11.REMOVE UPPER ACCESS PANEL LOCK ASSEMBLY LH
69390D
12.REMOVE LOWER ACCESS PANEL LOCK ASSEMBLY LH
69640D
13.REMOVE ACCESS PANEL LOCK REMOTE CONTROL ASSEMBLY LH
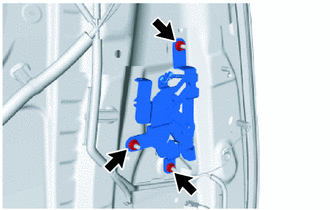
Remove the 3 nuts and access panel lock remote control assembly LH.
68114
14.REMOVE QUARTER WINDOW GLASS LH
62742
15.REMOVE QUARTER WINDOW WEATHERSTRIP LH
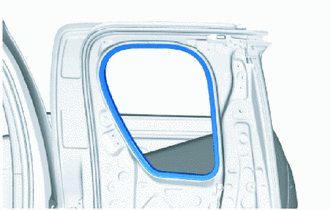
Remove the quarter window weatherstrip LH.
69780C
16.REMOVE ACCESS PANEL LOCK CANCEL LEVER ASSEMBLY LH
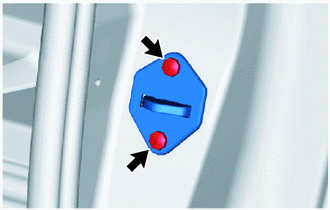
Remove the 2 screws and access panel lock cancel lever assembly LH.
84233
17.REMOVE FRONT DOOR COURTESY LIGHT SWITCH ASSEMBLY
69410D
18.REMOVE ACCESS PANEL LOCK STRIKER PLATE ASSEMBLY
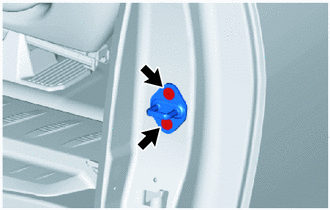
Using a T40 "TORX" socket wrench, remove the 2 screws and access panel lock striker plate assembly.
68640E
19.REMOVE ACCESS PANEL CHECK ASSEMBLY LH
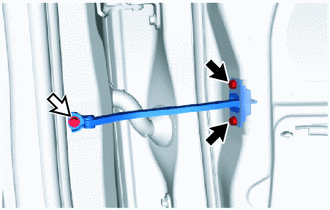
|
|
Bolt (A) |
|
|
Bolt (B) |
Remove the 2 bolts (A), bolt (B) and access panel check assembly LH.
67872F
20.REMOVE ACCESS PANEL WEATHERSTRIP LH
Detach the clip and remove the double-sided tape and access panel weatherstrip LH.
- NOTICE:
-
Remove any remaining double-sided tape from the slide door panel LH.
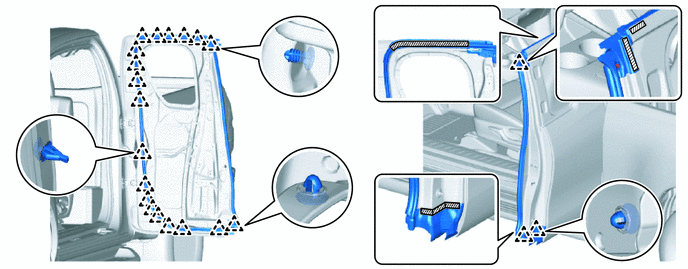

|
Double-sided Tape | - | - |
67837C
21.REMOVE REAR DOOR DUST PROOF SEAL
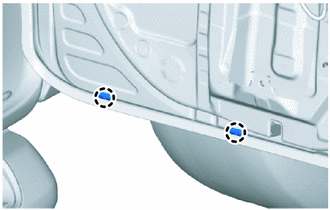
Detach the claw and remove the 2 rear door dust proof seals.
67897H
22.REMOVE REAR DOOR CUSHION
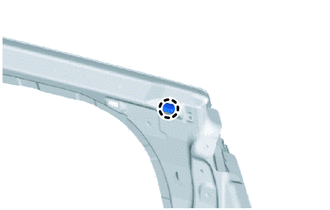
Detach the claw and remove the rear door cushion.
67003C
23.REMOVE REAR DOOR PANEL CUSHION
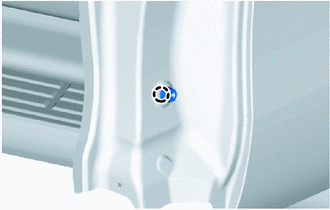
Detach the claw and remove the rear door panel cushion.