WINDOW / GLASS WINDSHIELD GLASS REMOVAL
PROCEDURE

 1. PRECAUTION
- CAUTION:
-
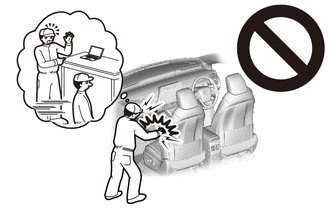
-
Be sure to read Precaution thoroughly before servicing.
-
for Type A:
-
Click hereVehicle Interior>SUPPLEMENTAL RESTRAINT SYSTEMS>AIRBAG SYSTEM(for Type A)>PRECAUTION
-
for Type B:
-
Click hereVehicle Interior>SUPPLEMENTAL RESTRAINT SYSTEMS>AIRBAG SYSTEM(for Type B)>PRECAUTION
- NOTICE:
-
After turning the ignition switch off, waiting time may be required before disconnecting the cable from the negative (-) battery terminal. Therefore, make sure to read the disconnecting the cable from the negative (-) battery terminal notice before proceeding with work.
-
Click hereGeneral>INTRODUCTION>REPAIR INSTRUCTION>INITIALIZATION
2.DISCONNECT CABLE FROM NEGATIVE BATTERY TERMINAL
- CAUTION:
-
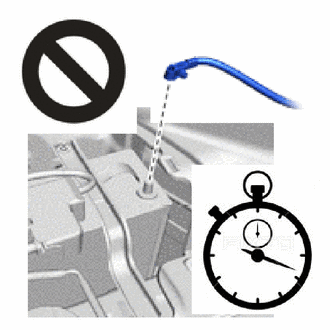
- ·
Wait at least 90 seconds after disconnecting the cable from the negative (-) battery terminal to disable the SRS system.
·If the airbag deploys for any reason, it may cause a serious accident.
- NOTICE:
-
When disconnecting the cable, some systems need to be initialized after the cable is reconnected.
-
Click hereGeneral>INTRODUCTION>REPAIR INSTRUCTION>INITIALIZATION
85292B
3.REMOVE FRONT WIPER ARM HEAD CAP
4.REMOVE FRONT WIPER ARM AND BLADE ASSEMBLY RH
5.REMOVE FRONT WIPER ARM AND BLADE ASSEMBLY LH
53885G
6.REMOVE FENDER APRON MUDGUARD SEAL SUB-ASSEMBLY RH
53886G
7.REMOVE FENDER APRON MUDGUARD SEAL SUB-ASSEMBLY LH
- HINT:
-
Use the same procedure described for the RH side.
53866J
8.REMOVE FRONT FENDER TO COWL SIDE SEAL RH
53867H
9.REMOVE FRONT FENDER TO COWL SIDE SEAL LH
- HINT:
-
Use the same procedure described for the RH side.
55781E
10.REMOVE COWL TOP VENTILATOR LOUVER SUB-ASSEMBLY
74610A
11.REMOVE ASSIST GRIP SUB-ASSEMBLY (w/ Assist Grip)
62212
12.REMOVE FRONT PILLAR GARNISH LH
62211
13.REMOVE FRONT PILLAR GARNISH RH
87810
14.REMOVE INNER REAR VIEW MIRROR ASSEMBLY
81260A
15.REMOVE MAP LIGHT ASSEMBLY
81240
16.REMOVE NO. 1 ROOM LIGHT ASSEMBLY
74325
17.REMOVE VISOR BRACKET COVER LH
74325
18.REMOVE VISOR BRACKET COVER RH
74320
19.REMOVE VISOR ASSEMBLY LH
74310
20.REMOVE VISOR ASSEMBLY RH
74348
21.REMOVE VISOR HOLDER
74610A
22.REMOVE ASSIST GRIP SUB-ASSEMBLY
63310
23.REMOVE ROOF HEADLINING ASSEMBLY
- HINT:
-
Remove a sufficient amount of the front portion of the roof headlining assembly so that windshield glass removal and installation procedures can be performed.
for Double Cab:
Partially remove the roof headlining assembly.
Click hereVehicle Interior>INTERIOR PANELS / TRIM>ROOF HEADLINING(for Double Cab)>REMOVAL
for Single Cab:
Partially remove the roof headlining assembly.
Click hereVehicle Interior>INTERIOR PANELS / TRIM>ROOF HEADLINING(for Single Cab)>REMOVAL
for Smart Cab:
Partially remove the roof headlining assembly.
Click hereVehicle Interior>INTERIOR PANELS / TRIM>ROOF HEADLINING(for Smart Cab)>REMOVAL
86101
24.DISCONNECT ANTENNA CORD SUB-ASSEMBLY (w/ Television Antenna)
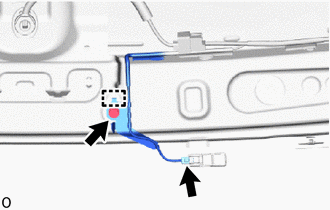
Disconnect the connector.
Remove the bolt and detach the clamp.
56111
25.REMOVE WINDSHIELD GLASS
- NOTICE:
- ·
The windshield glass may fall while performing this procedure. Therefore, use suction cups to hold the windshield glass from the outside of the vehicle.
·Be careful not to damage the windshield glass when cutting as the windshield glass stopper and No. 2 windshield glass stopper are installed to the windshield glass.
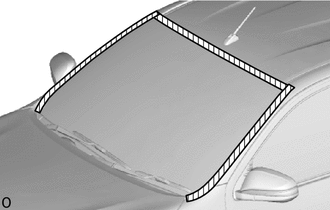

|
Protective Tape |
Put protective tape on the body surface around the windshield glass.
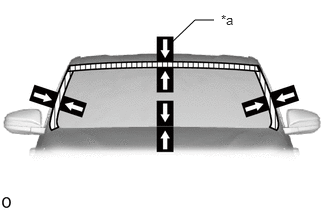
| *a | Matchmarks |
When reusing the windshield glass:
Place adhesive tape on the windshield glass and body panel and use a pen to place matchmarks for installation.
Install the suction cups to the windshield glass.
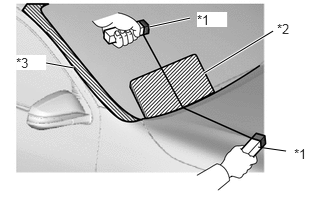
| *1 | Handles |
| *2 | Plastic Sheet |
| *3 | Protective Tape |
Tie objects that can serve as handles (for example, wooden blocks) to both wire ends.
- NOTICE:
- ·
When separating the glass from the vehicle, be careful not to damage the vehicle paint or interior/exterior ornaments.
·To prevent the instrument panel from being scratched when removing the glass, place a plastic sheet between the piano wire and instrument panel.
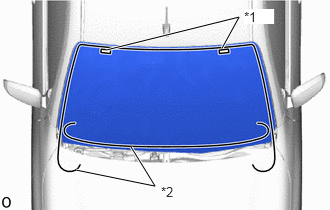
| *1 | Stopper |
| *2 | Piano Wire |
Insert a piano wire (approximately 0.6 mm) at the locations shown in the illustration.
Pull on the ends of the piano wire alternately and leave the stoppers when cutting through the adhesive.
- NOTICE:
- ·
Do not forcefully brush the piano wire against the windshield glass.
- ·
Be careful as the piano wire will break if it crosses itself.
Using suction cups, detach the 2 windshield glass stoppers to remove the windshield glass.
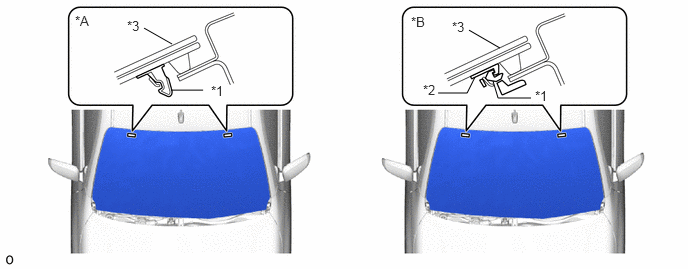
| *A | for 1-piece Type | *B | for 2-piece Type |
| *1 | Windshield Glass Stopper | *2 | No. 2 Windshield Glass Stopper |
| *3 | Windshield Glass | - | - |
- NOTICE:
- ·
The windshield glass stoppers and No. 2 windshield glass stoppers are installed on the windshield glass as shown in the illustration. Be careful not to damage the windshield glass when cutting off the adhesive.
- ·
To prevent the windshield glass from falling when performing this operation, be sure to hold the windshield glass using suction cups.
- HINT:
-
Depending on the vehicle, either 1-piece or 2-piece type stoppers may be present.