AUDIO / VIDEO AMPLIFIER ANTENNA INSTALLATION
PROCEDURE

 86077
1.INSTALL ANTENNA COVER KIT
When reusing the No. 1 amplifier antenna assembly:
- NOTICE:
-
New seals have specific front and rear ends. Make sure to install the seal in the correct direction, as incorrect installation may cause water leakage, etc.
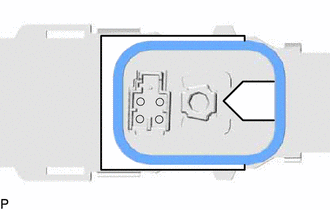
Before removing the peeling paper from the seal, place the seal on the antenna as shown in the illustration and check the front and rear ends.
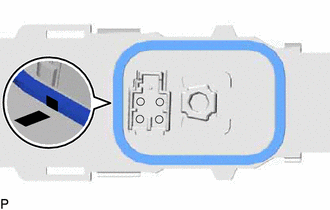
Remove the peeling paper, align the mark on the seal with the mark on the front of the antenna and install the seal to the antenna.
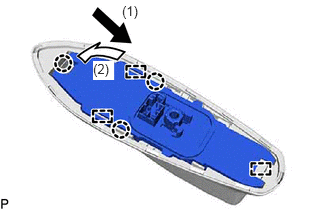
Attach the claws and guides to install the No. 1 amplifier antenna assembly as indicated by the arrows in the order shown in the illustration.
86300B
2.INSTALL NO. 1 AMPLIFIER ANTENNA ASSEMBLY
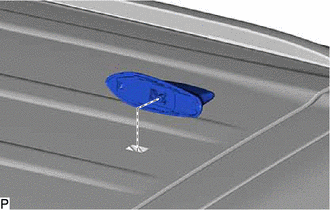
Temporarily install the No. 1 amplifier antenna assembly to the vehicle.
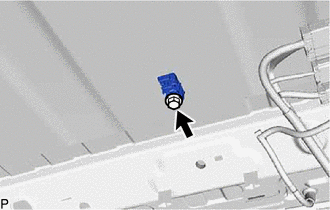
Insert the a new washer and holder to install the No. 1 amplifier antenna with the bolt.
- Torque:
- 9.5 N*m (97 kgf*cm, 84 in.*lbf)
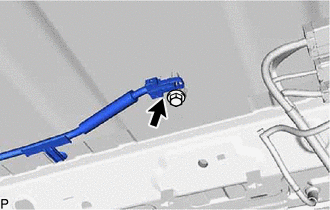
Connect the connector.
63310
3.INSTALL ROOF HEADLINING ASSEMBLY
4.CONNECT CABLE TO NEGATIVE BATTERY TERMINAL
- NOTICE:
-
When disconnecting the cable, some systems need to be initialized after the cable is reconnected (See page General>INTRODUCTION>REPAIR INSTRUCTION>INITIALIZATION).