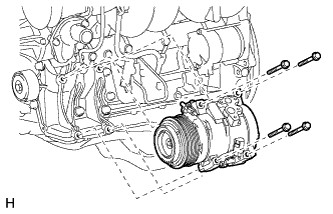
REMOVAL
Removal / installation · Vehicles built from Aug 2013
| 1. REMOVE UPPER RADIATOR SUPPORT SEAL |

Remove the 13 clips and upper radiator support seal.
| 2. RECOVER REFRIGERANT FROM REFRIGERATION SYSTEM |
Start the engine.
Operate the cooler compressor under the conditions shown below:
This causes most of the compressor oil from the various components of the A/C system to collect in the A/C compressor.Item
Condition
Engine Speed
Idling
Operating Time
3 minutes or more
A/C Switch Status
On
Blower Switch Status
HI
Set Temperature
MAX COOL
- NOTICE:
- It is not necessary to operate the cooler compressor if the A/C does not operate because of compressor lock, etc.
Stop the engine.
Recover the refrigerant from the A/C system using a refrigerant recovery unit.
- HINT:
- Use the refrigerant recovery unit in accordance with the manufacturer's instruction manual.
| 3. REMOVE FRONT BUMPER COVER LOWER |
Remove the clip, 5 bolts and front bumper cover lower.
| 4. REMOVE NO. 1 ENGINE UNDER COVER SUB-ASSEMBLY |
Remove the 4 bolts.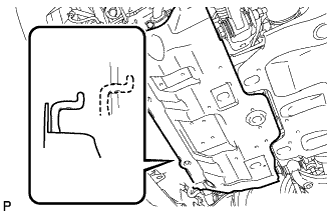

Unhook the engine under cover from the vehicle body as shown in the illustration.
| 5. DRAIN ENGINE COOLANT |
- CAUTION:
- Do not remove the radiator cap while the engine and radiator are still hot. Pressurized, hot engine coolant and steam may be released and cause serious burns.
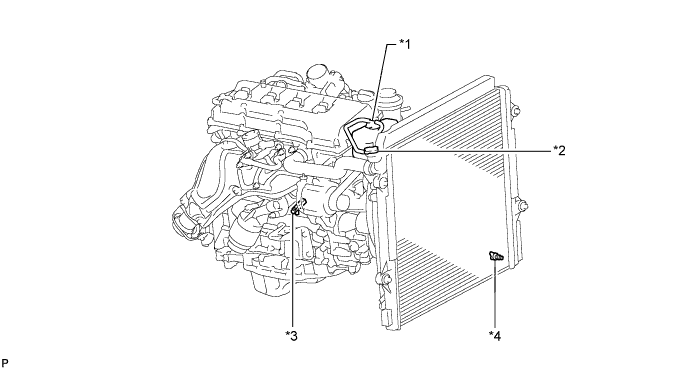
| *1 |
Reservoir Cap |
*2 |
Radiator Cap |
| *3 |
Cylinder Block Drain Cock Plug |
*4 |
Radiator Drain Cock Plug |
Install a vinyl hose to the radiator side.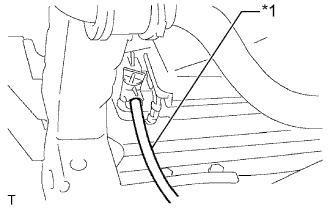
Text in Illustration *1
Vinyl Hose
Install a vinyl hose to the engine side.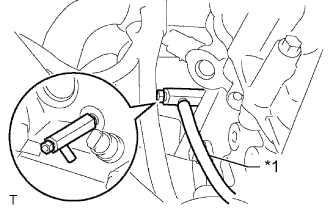
Text in Illustration *1
Vinyl Hose
Loosen the radiator drain cock plug.
Remove the radiator cap and drain the coolant.
- HINT:
- Collect the coolant in a container and dispose of it according to the regulations in your area.
Loosen the cylinder block drain cock plug and drain the coolant from the engine.
| 6. REMOVE RADIATOR RESERVOIR |
Disconnect the reservoir hose from the radiator.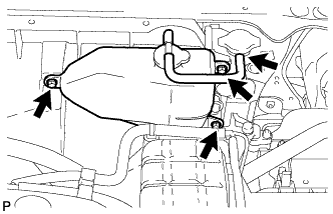
Remove the 3 bolts and radiator reservoir.
| 7. REMOVE NO. 1 RADIATOR HOSE |
Disconnect the No. 1 radiator hose from the radiator.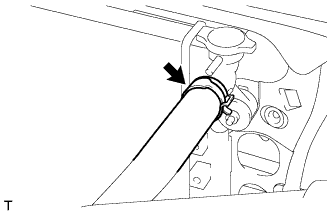
| 8. REMOVE NO. 2 RADIATOR HOSE |
Disconnect the No. 2 radiator hose from the radiator.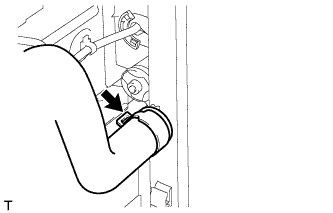
| 9. REMOVE FAN AND GENERATOR V BELT |
Use the hexagonal part indicated by the arrow in the illustration to move the tensioner pulley downward and decrease the tension in the V belt. Then remove the V belt.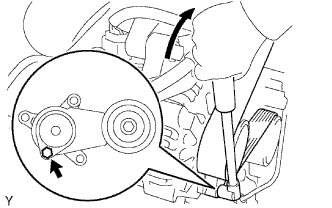
- NOTICE:
- When removing the V belt, do not use the bolt of the idle pulley.
- HINT:
- After removing the drive belt, move the tensioner upward to the maximum amount.
| 10. REMOVE FAN SHROUD |
Detach the claw to open the flexible hose clamp.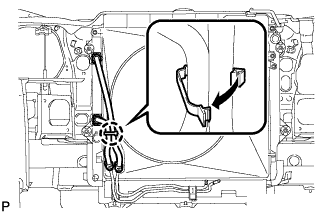
Loosen the 4 nuts holding the fluid coupling fan.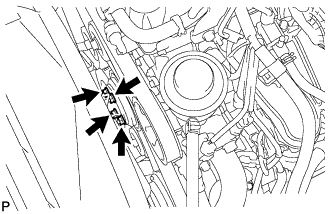
Remove the fan and generator V-belt (Click here).
Remove the 2 bolts holding the fan shroud.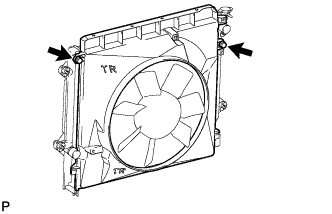
Remove the 4 nuts of the fluid coupling fan, and then remove the shroud together with the coupling fan.
- NOTICE:
- Be careful not to damage the radiator core.
| 11. DISCONNECT VANE PUMP ASSEMBLY |
Remove the bolt and disconnect the pressure feed tube.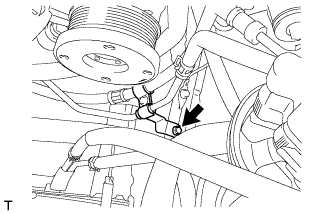
Disconnect the 2 connectors.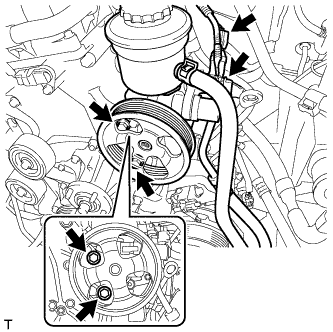
Remove the 2 bolts and disconnect the vane pump.
- HINT:
- It is not necessary to completely remove the vane pump. With the hoses connected to the vane pump, hang the vane pump on the vehicle body with a rope.
| 12. DISCONNECT DISCHARGE HOSE SUB-ASSEMBLY |
Remove the bolt and disconnect the discharge hose sub-assembly from the compressor.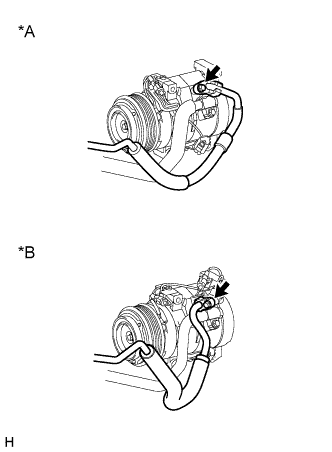
Text in Illustration *A
except Model Code TRJ150L-GKMEKV, TRJ150L-GKPEKV, TRJ155L-GJPEKV
*B
Model Code TRJ150L-GKMEKV, TRJ150L-GKPEKV, TRJ155L-GJPEKV
Remove the O-ring from the discharge hose.
- NOTICE:
- Seal the openings of the disconnected parts using vinyl tape to prevent moisture and foreign matter from entering.
| 13. DISCONNECT SUCTION HOSE SUB-ASSEMBLY |
Remove the bolt and disconnect the suction hose sub-assembly from the compressor.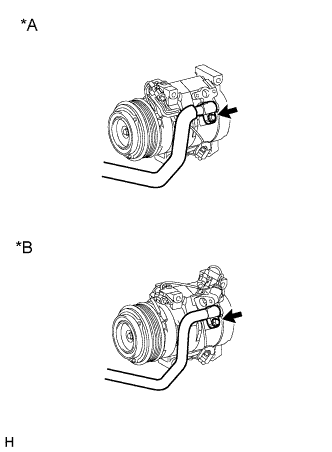
Text in Illustration *A
except Model Code TRJ150L-GKMEKV, TRJ150L-GKPEKV, TRJ155L-GJPEKV
*B
Model Code TRJ150L-GKMEKV, TRJ150L-GKPEKV, TRJ155L-GJPEKV
Remove the O-ring from the suction hose.
- NOTICE:
- Seal the openings of the disconnected parts using vinyl tape to prevent moisture and foreign matter from entering.
| 14. REMOVE COOLER COMPRESSOR ASSEMBLY |
Disconnect the connector.
Remove the 4 bolts and compressor.