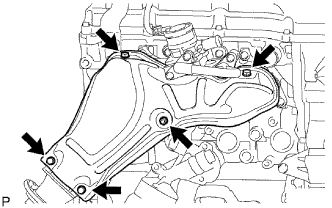
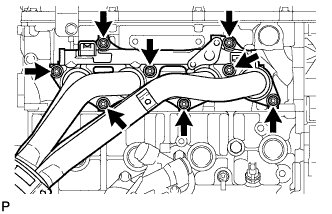
Remove the 5 bolts and No. 1 exhaust manifold heat insulator.
HINT:
It is only necessary to move the No. 1 exhaust manifold heat insulator so that the intake pipe can be removed in a later step.
It is not possible to fully remove the No. 1 exhaust manifold heat insulator in this step.
3.
REMOVE NO. 4 INTAKE PIPE
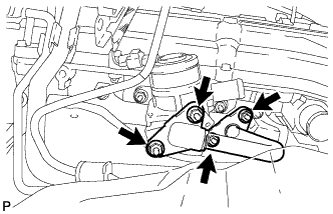
Remove the 4 nuts, No. 4 intake pipe and 2 gaskets.
NOTICE:
Be careful not to damage the installation surface of the gaskets.
4.
REMOVE AIR SWITCHING VALVE ASSEMBLY
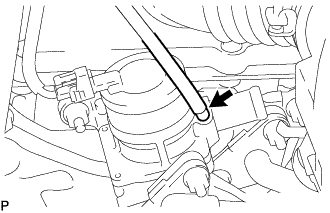
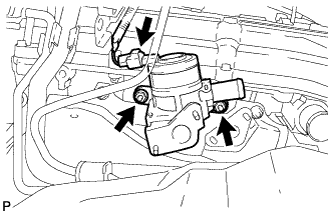
w/ Manifold Absolute Pressure Sensor: Disconnect the vacuum hose.
Disconnect the connector.
Remove the 2 nuts and air switching valve.
Remove the No. 1 exhaust manifold heat insulator.
5.
REMOVE EXHAUST MANIFOLD
Remove the 8 nuts and exhaust manifold.
Remove the gasket.
6.
REMOVE TIMING CHAIN COVER SUB-ASSEMBLY
Remove the timing chain cover sub-assembly (Click here).
7.
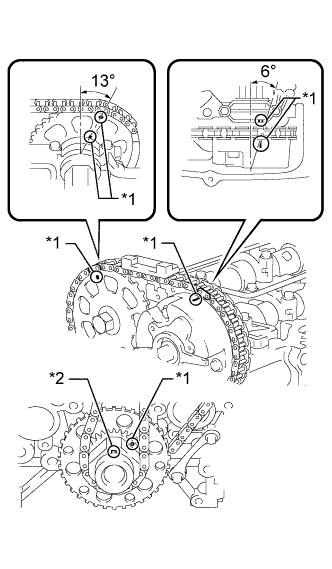
SET NO. 1 CYLINDER TO TDC/COMPRESSION
Temporarily install the crankshaft pulley bolt.
Rotate the crankshaft clockwise so that the timing marks on the crankshaft timing gear and camshaft timing gears are as shown in the illustration.
Text in Illustration
*1
Timing Mark
*2
Key
HINT:
If the timing marks do not align, rotate the crankshaft clockwise again and align the timing marks.
Remove the crankshaft pulley bolt.
8.
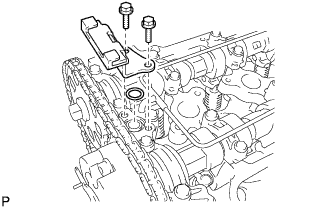
REMOVE TIMING CHAIN GUIDE
Remove the 2 bolts, chain guide and O-ring.
9.
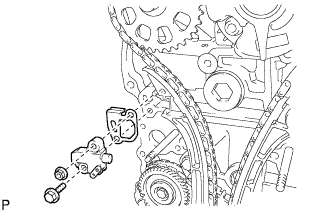
REMOVE NO. 1 CHAIN TENSIONER ASSEMBLY
NOTICE:
When the chain tensioner is removed, do not rotate the crankshaft.
When the chain is removed and the camshaft needs to be rotated, rotate the crankshaft 90° to the right.
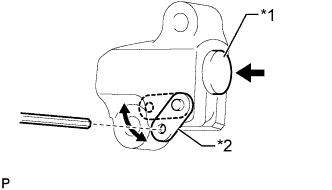
Move the stopper plate upward to release the lock and push the plunger deep into the tensioner.
Text in Illustration
*1
Plunger
*2
Stopper Plate
Move the stopper plate downward to set the lock and insert a 3.0 mm (0.118 in.) diameter bar into the stopper plate hole.
Remove the bolt, nut, chain tensioner and gasket.
10.
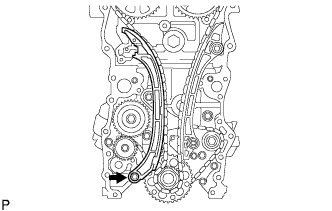
REMOVE CHAIN TENSIONER SLIPPER
Remove the bolt and tensioner slipper.
11.
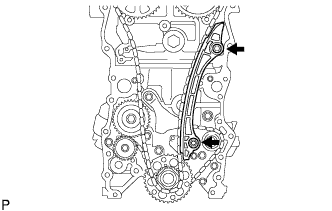
REMOVE NO. 1 CHAIN VIBRATION DAMPER
Remove the 2 bolts and vibration damper.
12.
REMOVE CHAIN SUB-ASSEMBLY
13.
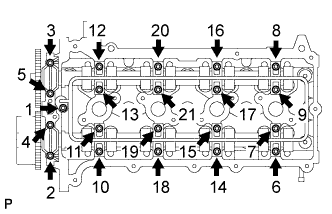
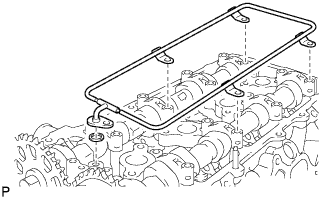
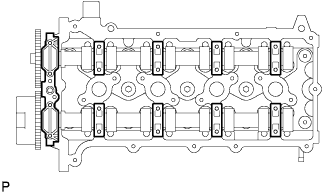
REMOVE CAMSHAFT BEARING CAP
Uniformly loosen and remove the 21 bearing cap bolts in the sequence shown in the illustration.
NOTICE:
Uniformly loosen the bolts while keeping the camshaft level.
Remove the oil delivery pipe and O-ring from the bearing caps.
Remove the 9 bearing caps.
HINT:
Arrange the removed parts in the correct order.
14.
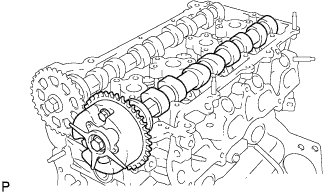
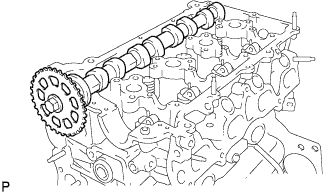
REMOVE CAMSHAFT
15.
REMOVE NO. 2 CAMSHAFT
16.
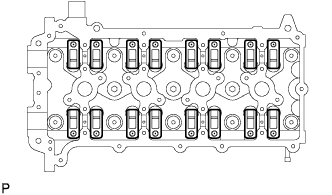
REMOVE NO. 1 VALVE ROCKER ARM SUB-ASSEMBLY
Remove the 16 valve rocker arms from the cylinder head.
HINT:
Arrange the removed parts in the correct order.
17.
REMOVE VALVE LASH ADJUSTER ASSEMBLY
Remove the 16 valve lash adjusters from the cylinder head.
HINT:
Arrange the removed parts in the correct order.
18.
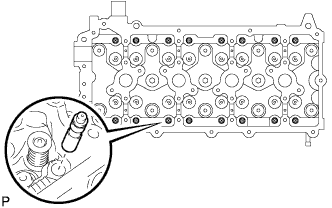
REMOVE VALVE STEM CAP
Remove the valve stem caps from the cylinder head.
HINT:
Arrange the removed parts in the correct order.
19.
REMOVE CYLINDER HEAD SUB-ASSEMBLY
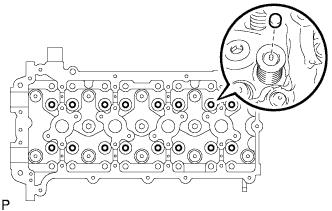
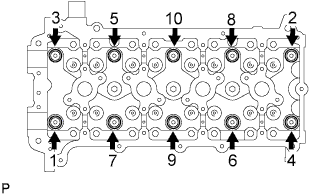
Uniformly loosen the 10 bolts in the sequence shown in the illustration. Remove the 10 cylinder head bolts and plate washers.
NOTICE:
Be careful not to drop the washers into the cylinder head.
Head warpage or cracking could result from removing the bolts in the wrong order.
20.
REMOVE CYLINDER HEAD GASKET
Remove the cylinder head gasket from the cylinder block.
21.
INSPECT CYLINDER HEAD SET BOLT
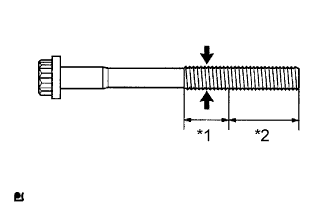
Using a vernier caliper, measure the diameter of the most elongated threads in the measuring area.
Standard outside diameter:
10.76 to 10.97 mm (0.424 to 0.432 in.)
Minimum outside diameter:
10.40 mm (0.409 in.)
Distance:
30 mm (1.18 in.)
Text in Illustration
*1
Measuring area
*2
Distance
If a visual check reveals no excessively thin areas, check the center of the measuring area (see illustration) and find the area that has the smallest diameter. If the diameter is less than the minimum, replace the cylinder head bolt.
22.
INSPECT CYLINDER HEAD SUB-ASSEMBLY
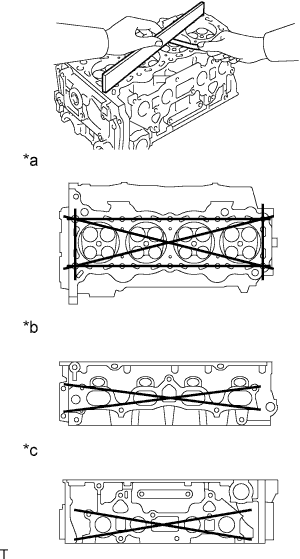
Using a precision straightedge and feeler gauge, measure the warpage of the surfaces that contact the cylinder block and manifolds.
Maximum warpage:
0.05 mm (0.00197 in.)
Text in Illustration
*a
Cylinder Head Lower Side
*b
Intake Manifold Side
*c
Exhaust Manifold Side
If the warpage is more than the maximum, replace the cylinder head.
Using a dye penetrant, check the intake ports, exhaust ports and cylinder head surface for cracks. If cracked, replace the cylinder head.