Taillight Relay Circuit
Circuit diagnosis · Vehicles built Aug 2013 – Jul 2014
Versions by build date: Aug 2013 – Jul 2014 from Aug 2014
DESCRIPTION
The main body ECU receives headlight dimmer switch information signals and illuminates the clearance lights, taillights and license plate lights.WIRING DIAGRAM
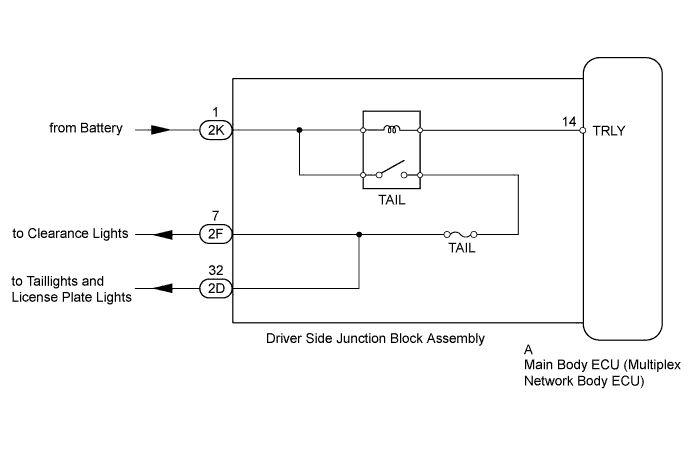

INSPECTION PROCEDURE
- NOTICE:
- Inspect the fuses and bulbs for circuits related to this system before performing the following inspection procedure.
| 1. PERFORM ACTIVE TEST USING INTELLIGENT TESTER (TAILLIGHT RELAY) |
 |
Using the intelligent tester, perform the Active Test (Click here).
Main Body
Tester Display
|
Test Part
|
Control Range
|
Diagnostic Note
|
Taillight Relay
|
Taillight relay
|
ON/OFF
|
-
|
- OK:
- Taillight relay operates (taillights illuminate).
|
NG |
 |
|
|
|
| OK |
|
 |
|
| REPLACE MAIN BODY ECU (MULTIPLEX NETWORK BODY ECU) (Click here)
|
|
| 2. CHECK HARNESS AND CONNECTOR (BATTERY - MAIN BODY ECU) |
|
- Remove the main body ECU (Click here).
Measure the voltage according to the value(s) in the table below.
- Standard Voltage:
Tester Connection
|
Condition
|
Specified Condition
|
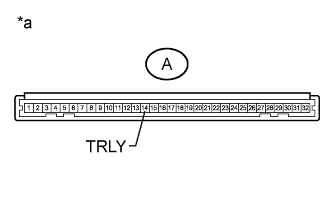
A-14(TRLY) - Body ground
|
Always
|
11 to 14 V
|
Text in Illustration
*a
|
Front view of wire harness connector
(to Main Body ECU)
|
|
NG |
 |
|
| REPAIR OR REPLACE HARNESS OR CONNECTOR |
|
|
| OK |
|
 |
|
| 3. INSPECT DRIVER SIDE JUNCTION BLOCK ASSEMBLY |
|
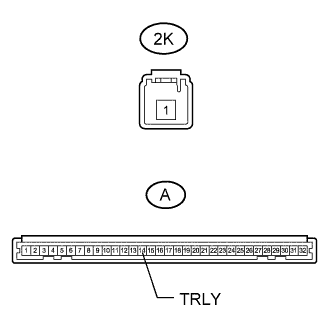
Remove the driver side junction block assembly (Click here).
Remove the main body ECU from the driver side junction block assembly (Click here).
Measure the resistance according to the value(s) in the table below.
- Standard Resistance:
Tester Connection
|
Condition
|
Specified Condition
|
A-14(TRLY) - 2K-1
|
Always
|
Below 1 Ω
|
|
NG |
|
|
| REPLACE DRIVER SIDE JUNCTION BLOCK ASSEMBLY |
|
|
| OK |
|
|
|
| PROCEED TO NEXT SUSPECTED AREA SHOWN IN PROBLEM SYMPTOMS TABLE (Click here)
|
|