2013-2015 Land Cruiser Prado · Service Manual Suspension

REMOVAL

Removal / installation · Vehicles built from Aug 2014

Versions by build date: Aug 2013 – Jul 2014 from Aug 2014

NOTICE:
Before removal, Be sure to disable vehicle height control by pressing the height control OFF switch and confirming that the height control OFF indication is displayed on the meter.


1. DISCONNECT CABLE FROM NEGATIVE BATTERY TERMINAL

CAUTION:
Wait at least 90 seconds after disconnecting the cable from the negative (-) battery terminal to disable the SRS system.

NOTICE:
  1. After turning the ignition switch off, waiting time may be required before disconnecting the cable from the battery terminal. Therefore, make sure to read the disconnecting the cable from the battery terminal notice before proceeding with work (Click here).
  2. When disconnecting the cable, some systems need to be initialized after the cable is reconnected (Click here).

2. REMOVE REAR WHEEL LH

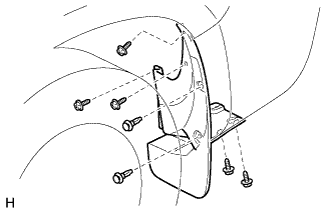
3. REMOVE REAR QUARTER PANEL MUDGUARD SUB-ASSEMBLY LH

B236299
  1. Remove the 2 clips and 5 screws.

  1. Remove the rear quarter panel mudguard.


4. REMOVE HEIGHT CONTROL COMPRESSOR COVER
  1. Remove the 3 clips and height control compressor cover.


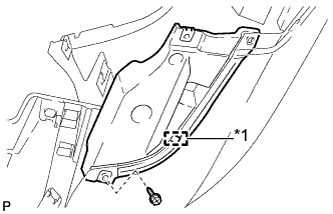
5. REMOVE REAR BUMPER PROTECTOR SUB-ASSEMBLY LH (for 5 Door)

B236418E01
  1. Remove the screw.

  1. Detach the guide and remove the rear bumper protector.

    Text in Illustration 
    *1
    Guide


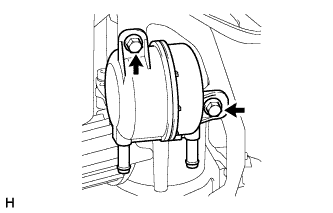
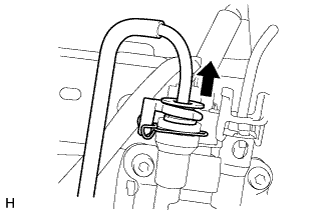
6. REMOVE HEIGHT CONTROL FILTER
  1. Slide the 2 clips and disconnect the 2 hoses.

  1. C213661
    Remove the 2 bolts and height control filter from the height control compressor bracket.


7. DISCONNECT NO. 2 HEIGHT CONTROL TUBE

  1. C214856
    Disconnect the No. 2 height control tube from the No. 2 height control valve (Click here).

    HINT:
    For the disconnection procedure of the tube (type 2), refer to Precaution of the Suspension Control System section.


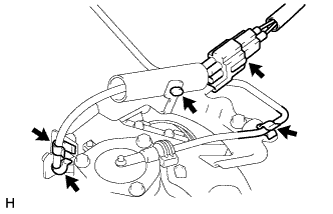
8. REMOVE HEIGHT CONTROL COMPRESSOR ASSEMBLY
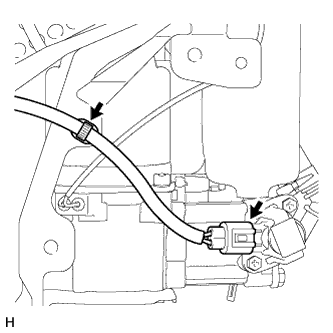
  1. Disconnect the connector.

  1. C213660
    Detach the 3 clamps.

  1. Detach the No. 2 height control tube.

  1. C214821
    Disconnect the connector.

  1. Detach the clamp.

  1. C213662
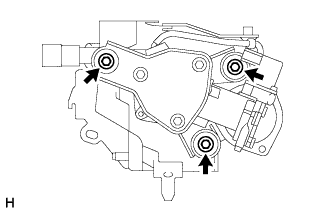
    Remove the 3 bolts and height control compressor.


9. REMOVE HEIGHT CONTROL DRYER ASSEMBLY

  1. C216435
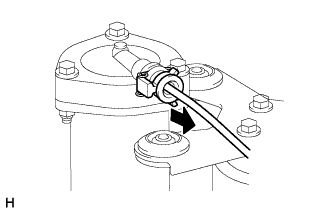
    Disconnect the No. 2 height control tube (Click here).

    HINT:
    For the disconnection procedure of the tube (type 2), refer to Precaution of the Suspension Control System section.

  1. C214816
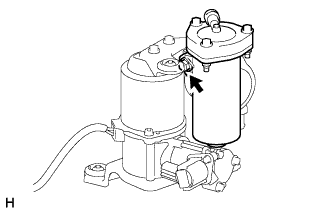
    Remove the bolt and height control dryer from the height control compressor.

  1. Remove the O-ring.

← REMOVAL (Aug 2013 – Jul 2014)INSTALLATION (Aug 2013 – Jul 2014) →