2013-2015 Land Cruiser Prado · Service Manual Engine / Hybrid System

REMOVAL

Removal / installation · Vehicles built Aug 2013 – Jul 2014

Versions by build date: Aug 2013 – Jul 2014 from Aug 2014


1. REMOVE ENGINE ASSEMBLY
  1. Remove the engine assembly (Click here).


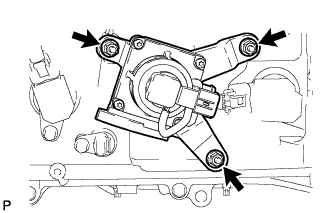
2. REMOVE EMISSION CONTROL VALVE SET (w/ Secondary Air Injection System)

  1. A225367
    Remove the 3 nuts and emission control valve set.


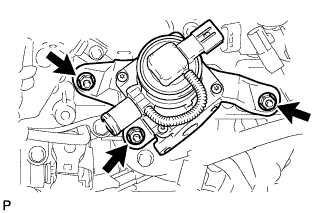
3. REMOVE NO. 2 EMISSION CONTROL VALVE SET (w/ Secondary Air Injection System)

  1. A225368
    Remove the 3 nuts and No. 2 emission control valve set.


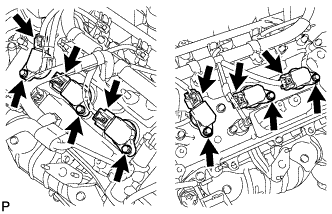
4. REMOVE IGNITION COIL ASSEMBLY

  1. A221430
    Disconnect the 6 ignition coil connectors.

  1. Remove the 6 bolts and 6 ignition coils.


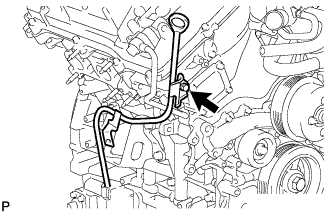
5. REMOVE ENGINE OIL LEVEL DIPSTICK GUIDE

  1. A222114
    Remove the dipstick.

  1. Remove the bolt and dipstick guide.

  1. Remove the O-ring from the dipstick guide.


6. REMOVE WATER BY-PASS PIPE SUB-ASSEMBLY (w/ Oil Cooler)

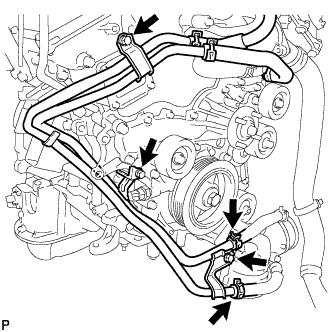
  1. A223013
    Disconnect the 2 hoses.

  1. Remove the 3 bolts and water by-pass pipe.


7. REMOVE WATER INLET HOUSING

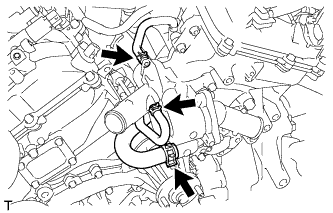
  1. A225380
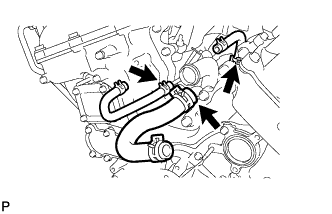
    Disconnect the 3 water by-pass hoses.

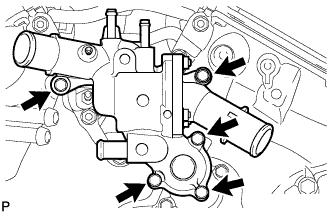
  1. A223012
    Remove the 5 bolts and water inlet housing.

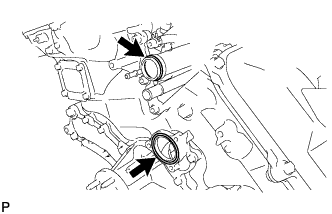
  1. A224736
    Remove the O-ring and gasket from the water outlet pipe and water pump.

  1. A225379
    Remove the 3 water by-pass hoses.


8. REMOVE NO. 1 IDLER PULLEY SUB-ASSEMBLY

  1. A158544
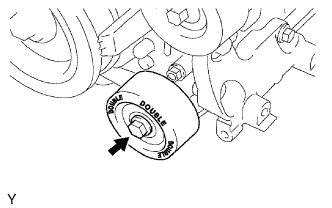
    Remove the bolt and No. 1 idler pulley.


9. REMOVE NO. 2 IDLER PULLEY SUB-ASSEMBLY

  1. A223006
    for Cover Separate Type:
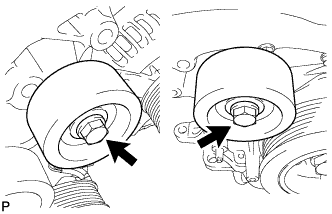
    Remove the 2 bolts, 2 idler pulley cover plates, 2 No. 2 idler pulleys and 2 No. 2 idler pulley cover plates.

  1. for Cover Integrated Type:
    Remove the 2 bolts and 2 No. 2 idler pulleys.


10. REMOVE V-RIBBED BELT TENSIONER ASSEMBLY

  1. A222180
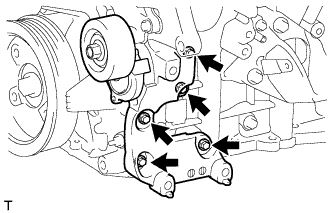
    Remove the 5 bolts and V-ribbed belt tensioner.


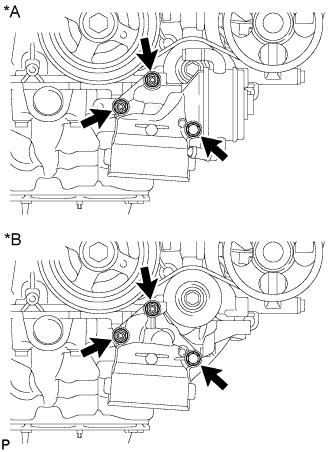
11. REMOVE OIL FILTER BRACKET

  1. A223672E01
    Remove the 2 nuts, bolt, oil filter bracket and gasket.
    Text in Illustration 
    *A
    w/ Oil Cooler
    *B
    w/o Oil Cooler


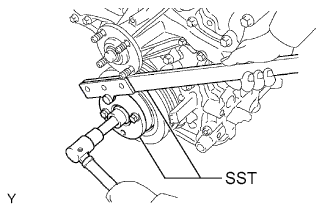
12. REMOVE CRANKSHAFT PULLEY

  1. A072947E04
    Using SST, hold the crankshaft pulley and loosen the pulley bolt. Continue to loosen the bolt until only 2 or 3 threads are screwed into the crankshaft.
    SST
    09213-54015   (91651-60855)
    09330-00021  

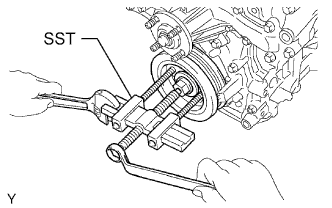
  1. A072948E02
    Using the pulley set bolt and SST, remove the crankshaft pulley and pulley bolt.
    SST
    09950-50013   (09951-05010, 09952-05010, 09953-05020, 09954-05031)


13. REMOVE NO. 1 OIL PIPE

  1. A223691
    Remove the 2 oil pipe unions, oil control valve filter LH, 3 gaskets and No. 1 oil pipe.

    NOTICE:
    Do not touch the mesh when removing the oil control valve filter.


14. REMOVE NO. 2 OIL PIPE

  1. A223692
    Remove the 2 oil pipe unions, oil control valve filter RH, 3 gaskets and No. 2 oil pipe.

    NOTICE:
    Do not touch the mesh when removing the oil control valve filter.


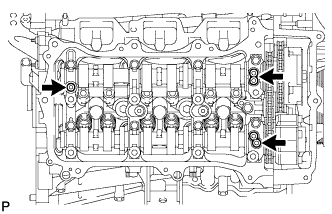
15. REMOVE REAR CYLINDER HEAD COVER

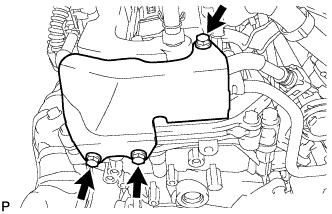
  1. A224695
    Remove the 3 bolts and cover.


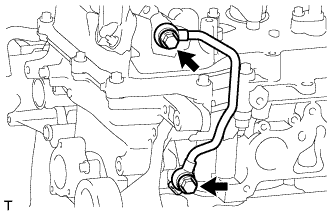
16. DISCONNECT FUEL PIPE SUB-ASSEMBLY
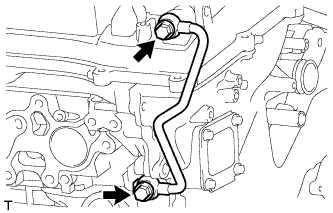
  1. Remove the 2 bolts and disconnect the fuel pipe.


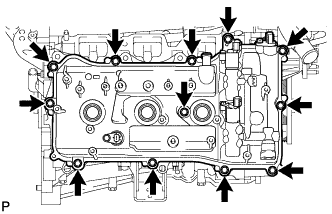
17. REMOVE CYLINDER HEAD COVER SUB-ASSEMBLY LH

  1. A223666
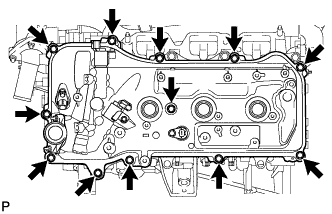
    Remove the 12 bolts, seal washer, cylinder head cover and gasket.

    HINT:
    Make sure the removed parts are returned to the same places they were removed from.

  1. A223665
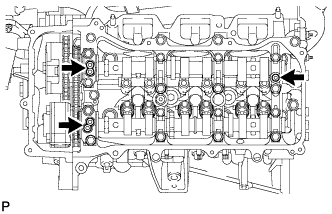
    Remove the 3 gaskets.


18. REMOVE CYLINDER HEAD COVER SUB-ASSEMBLY

  1. A223669
    Remove the 12 bolts, seal washer, cylinder head cover and gasket.

    HINT:
    Make sure the removed parts are returned to the same places they were removed from.

  1. A223668
    Remove the 3 gaskets.


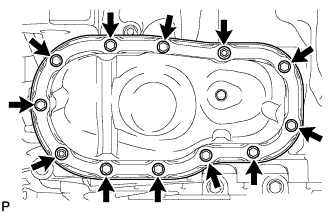
19. REMOVE NO. 2 OIL PAN SUB-ASSEMBLY

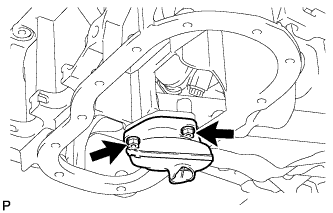
  1. A174340
    Remove the 10 bolts and 2 nuts.

    HINT:
    Make sure the removed parts are returned to the same places they were removed from.

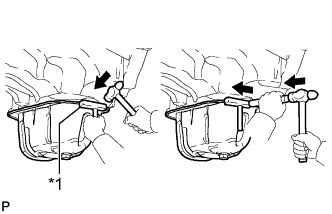
  1. A174341E02
    Insert the blade of an oil pan seal cutter between the oil pans. Cut through the applied sealer and remove the No. 2 oil pan.
    Text in Illustration 
    *1
    Oil Pan Seal Cutter

    NOTICE:
    Be careful not to damage the contact surfaces of the oil pans.


20. REMOVE OIL STRAINER SUB-ASSEMBLY

  1. A239204
    Remove the 2 nuts, oil strainer and gasket.


21. REMOVE OIL PAN SUB-ASSEMBLY

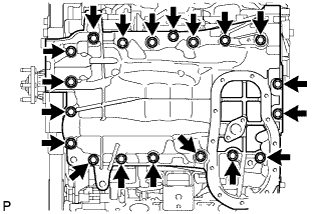
  1. A222173
    Remove the 17 bolts and 2 nuts.

    HINT:
    Make sure the removed parts are returned to the same places they were removed from.

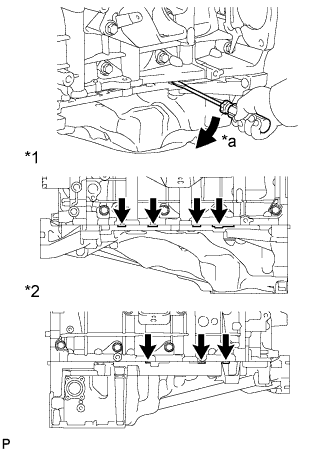
  1. A221168E01
    Using a screwdriver, remove the oil pan by prying between the oil pan and cylinder block as shown in the illustration.
    Text in Illustration 
    *1
    LH Side
    *2
    RH Side
    *a
    Pry

    HINT:
    Tape the screwdriver tip before use.

    NOTICE:
    Be careful not to damage the contact surfaces of the cylinder block and oil pan.

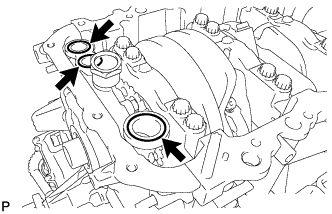
  1. A222122
    Remove the 3 O-rings from the timing chain cover.


22. REMOVE TIMING CHAIN COVER SUB-ASSEMBLY

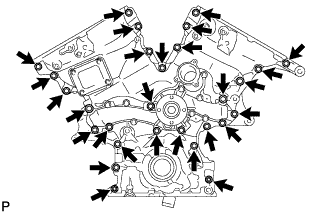
  1. A221169
    Remove the 26 bolts and the 2 nuts.

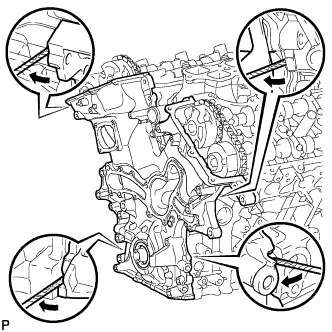
  1. A221170
    Remove the timing chain cover by prying between the timing chain cover and cylinder head or cylinder block with a screwdriver.

    HINT:
    Tape the screwdriver tip before use.

    NOTICE:
    Be careful not to damage the contact surfaces of the timing chain cover, cylinder block and cylinder head.

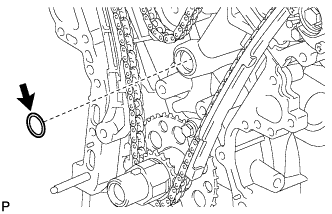
  1. A221404
    Remove the oil pump gasket from the cylinder block.


23. REMOVE FRONT CRANKSHAFT OIL SEAL
  1. Using a screwdriver and wooden block, pry out the oil seal.

    HINT:
    Tape the screwdriver tip before use.

    NOTICE:
    Do not damage the surface of the oil seal press fit hole.

← COMPONENTS (from Aug 2013)REMOVAL (from Aug 2014) →