Home › Audio / Visual / Telematics › AUDIO / VIDEO › STEREO JACK ADAPTER ASSEMBLYREMOVAL
Removal / installation · Vehicles built from Aug 2014
Versions by build date: Aug 2013 – Jul 2014 from Aug 2014
1.
PRECAUTION
NOTICE:
After turning the ignition switch off, waiting time may be required before disconnecting the cable from the battery terminal. Therefore, make sure to read the disconnecting the cable from the battery terminal notice before proceeding with work (Click here ).
2.
DISCONNECT CABLE FROM NEGATIVE BATTERY TERMINAL
NOTICE:
When disconnecting the cable, some systems need to be initialized after the cable is reconnected (Click here ).
3.
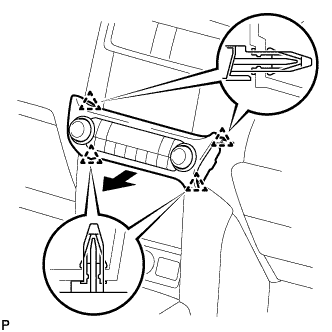
REMOVE INTEGRATION CONTROL AND PANEL ASSEMBLY
Detach the 4 clips. Disconnect the connector and remove the integration control and panel assembly.
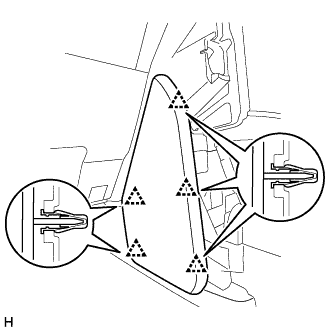
4.
REMOVE NO. 2 INSTRUMENT PANEL FINISH PANEL CUSHION
Detach the 5 clips and remove the No. 2 instrument panel finish panel cushion.
5.
REMOVE NO. 1 INSTRUMENT PANEL FINISH PANEL CUSHION
HINT:
Use the same procedure described for the No. 2 instrument panel finish panel cushion.
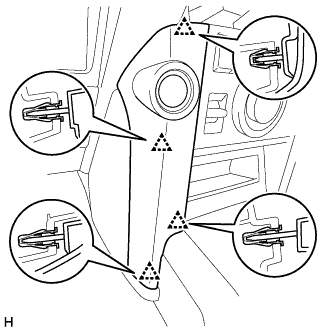
6.
REMOVE INSTRUMENT PANEL FINISH PANEL END LH
Detach the 4 clips and remove the instrument panel finish panel end LH.
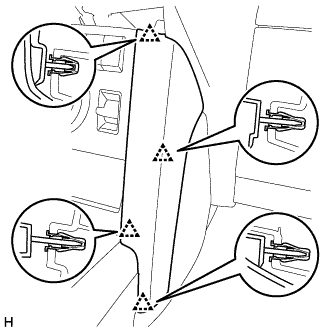
7.
REMOVE INSTRUMENT PANEL FINISH PANEL END RH
Detach the 4 clips and remove the instrument panel finish panel end RH.
8.
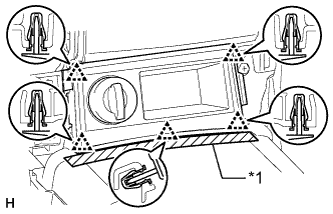
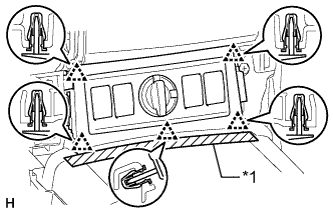
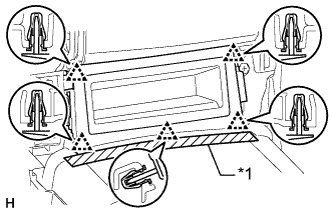
REMOVE FRONT CONSOLE UPPER PANEL GARNISH
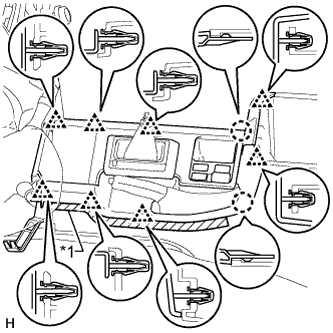
w/o Seat Heater System:
Put protective tape around the front console upper panel garnish.
Text in Illustration
*1
Protective Tape
Detach the 5 clips and remove the front console upper panel garnish.
Disconnect the connector.
w/o CRAWL:
Put protective tape around the front console upper panel garnish.
Text in Illustration
*1
Protective Tape
Detach the 5 clips and remove the front console upper panel garnish.
Disconnect each connector.
w/ CRAWL:
Put protective tape around the front console upper panel garnish.
Text in Illustration
*1
Protective Tape
Detach the 5 clips and remove the front console upper panel garnish.
9.
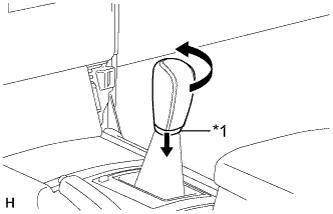
REMOVE SHIFT LEVER KNOB SUB-ASSEMBLY
Move the shifting hole cover downward.
Text in Illustration
*1
Shifting Hole Cover
Twist the shift lever knob in the direction indicated by the arrow and remove it.
10.
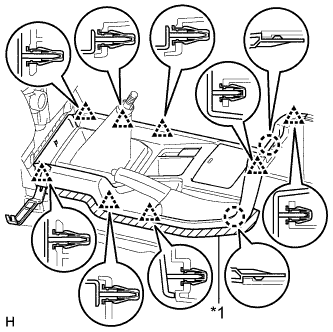
REMOVE CONSOLE PANEL SUB-ASSEMBLY (for Automatic Transmission)
Put protective tape around the console panel.
Text in Illustration
*1
Protective Tape
Using a moulding remover, detach the 8 clips and 2 claws.
Disconnect each connector and remove the console panel.
11.
REMOVE CONSOLE PANEL SUB-ASSEMBLY (for Manual Transmission)
Put protective tape around the console panel.
Text in Illustration
*1
Protective Tape
Using a moulding remover, detach the 8 clips and 2 claws.
Disconnect each connector and remove the console panel.
12.
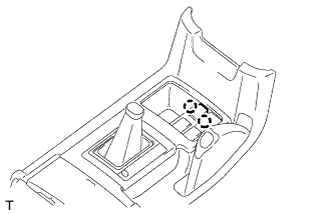
REMOVE NO. 1 STEREO JACK ADAPTER ASSEMBLY (for Automatic Transmission)
Detach the 2 claws and remove the stereo jack adapter.
13.
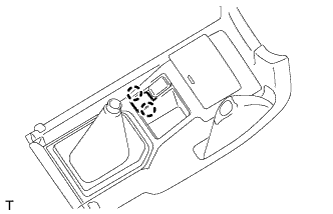
REMOVE NO. 1 STEREO JACK ADAPTER ASSEMBLY (for Manual Transmission)
Detach the 2 claws and remove the stereo jack adapter.
14.
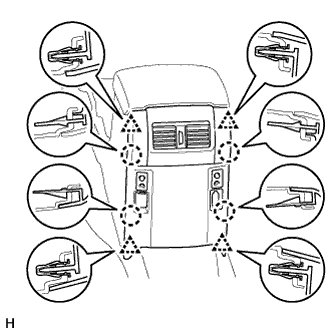
REMOVE REAR CONSOLE END PANEL SUB-ASSEMBLY
Detach the 4 clips and 4 claws.
Disconnect each connector and remove the rear console end panel.
15.
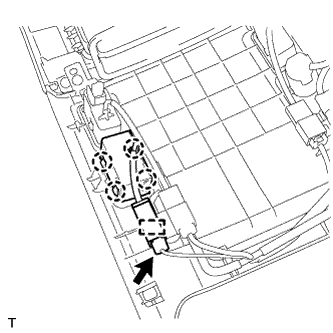
REMOVE VIDEO (VIDEO ADAPTER) TERMINAL
Disconnect the connector. Detach the clamp and 4 claws and remove the video terminal.
16.
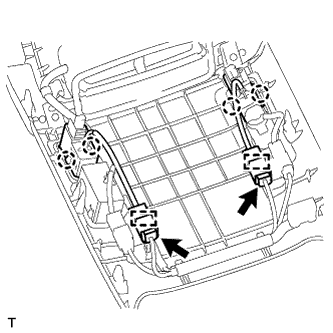
REMOVE HEADPHONE TERMINAL
Disconnect the 2 connectors. Detach the 4 claws and 2 clamps and remove the 2 headphone terminals.