REMOVAL
Removal / installation · Vehicles built from Aug 2013
| 1. REMOVE UPPER RADIATOR SUPPORT SEAL |

Remove the 13 clips and upper radiator support seal.
| 2. REMOVE V-BANK COVER |
Raise the front of the V-bank cover to detach the 2 pins. Then remove the 2 V-bank cover hooks from the bracket, and remove the V-bank cover.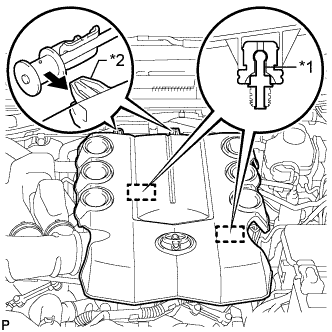

Text in Illustration *1
Pin
*2
Hook
| 3. REMOVE AIR CLEANER CAP AND HOSE |
Remove the air cleaner cap and hose.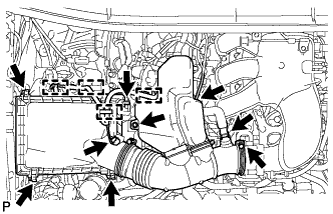
Disconnect the mass air flow meter connector, vacuum hose and ventilation hose and detach the 4 clamps.
Loosen the clamp.
Unfasten the 4 hook clamps, and then remove the bolt and air cleaner cap and hose.
| 4. REMOVE AIR CLEANER CASE SUB-ASSEMBLY |
Remove the air cleaner filter element.
Detach the wire harness clamp.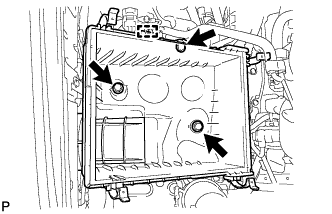
Remove the 3 bolts and air cleaner case.
| 5. REMOVE FRONT FENDER APRON SEAL LH |
w/ KDSS: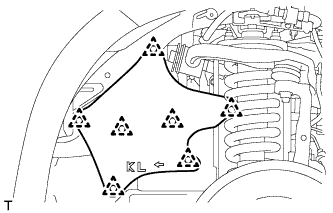
Remove the 7 clips and fender apron seal.
w/o KDSS: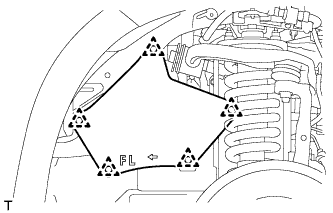
Remove the 5 clips and fender apron seal.
| 6. REMOVE FRONT FENDER APRON SEAL RH |
Remove the 4 clips and fender apron seal.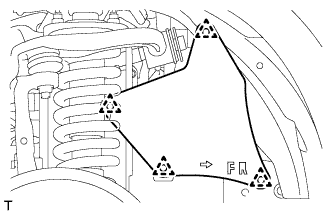
| 7. REMOVE FRONT NO. 1 FENDER APRON TO FRAME SEAL LH |
Remove the 5 clips and frame seal.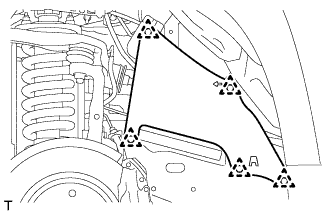
| 8. REMOVE FRONT NO. 1 FENDER APRON TO FRAME SEAL RH |
Remove the 5 clips and fender apron seal.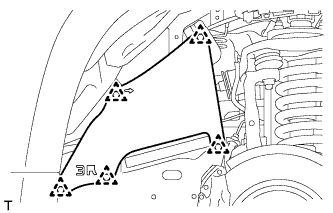
| 9. REMOVE FRONT EXHAUST PIPE ASSEMBLY |
Remove the front exhaust pipe (Click here).
| 10. REMOVE MANIFOLD STAY |
Remove the 3 bolts and manifold stay.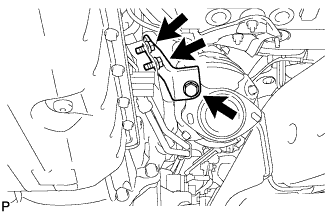
| 11. REMOVE AIR TUBE (w/ Secondary Air Injection System) |
Remove the 2 bolts, 2 nuts and air tube.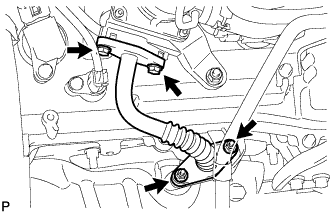
Remove the 2 gaskets from the air tube.
- NOTICE:
- Be careful not to damage the installation surface of the gaskets.
| 12. DISCONNECT NO. 2 STEERING INTERMEDIATE SHAFT SUB-ASSEMBLY (for RHD) |
for Manual Tilt and Manual Telescopic Steering Column:
Disconnect the No. 2 steering intermediate shaft (Click here).
for Power Tilt and Power Telescopic Steering Column:
Disconnect the No. 2 steering intermediate shaft (Click here).
| 13. REMOVE NO. 1 EXHAUST MANIFOLD HEAT INSULATOR |
Remove the 3 bolts and heat insulator.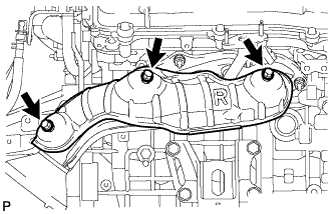
| 14. REMOVE EXHAUST MANIFOLD SUB-ASSEMBLY RH |
w/ Secondary Air Injection System: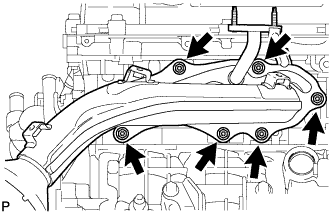
Disconnect the air fuel ratio sensor connector.
Remove the 6 nuts, manifold and gasket.
w/o Secondary Air Injection System: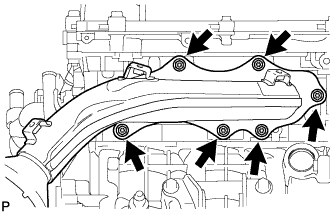
Disconnect the air fuel ratio sensor connector.
Remove the 6 nuts, manifold and gasket.
| 15. REMOVE AIR FUEL RATIO SENSOR (for Bank 1 Sensor 1) |
Using SST, remove the sensor.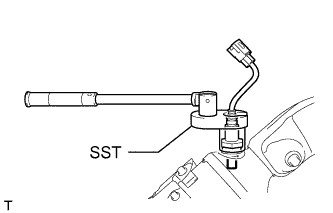
- SST
- 09224-00010
| 16. REMOVE NO. 2 MANIFOLD STAY |
Remove the 3 bolts and No. 2 manifold stay.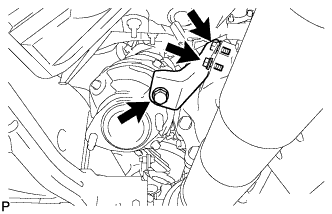
| 17. REMOVE NO. 2 AIR TUBE (w/ Secondary Air Injection System) |
Remove the 2 bolts, 2 nuts and No. 2 air tube.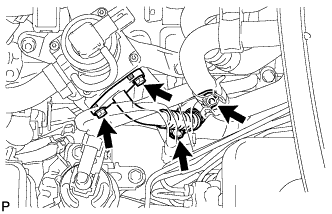
Remove the 2 gaskets from the No. 2 air tube.
- NOTICE:
- Be careful not to damage the installation surface of the gaskets.
| 18. REMOVE NO. 2 EXHAUST MANIFOLD HEAT INSULATOR |
Remove the 3 bolts and heat insulator.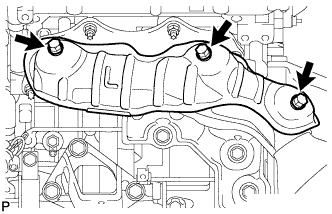
| 19. REMOVE EXHAUST MANIFOLD SUB-ASSEMBLY LH |
w/ Secondary Air Injection System: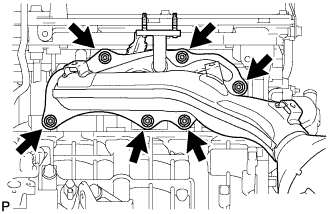
Disconnect the air fuel ratio sensor connector.
Remove the 6 nuts, manifold and gasket.
w/o Secondary Air Injection System: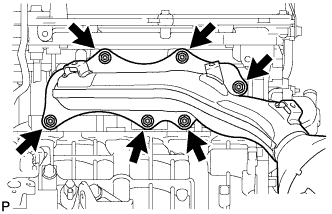
Disconnect the air fuel ratio sensor connector.
Remove the 6 nuts, manifold and gasket.
| 20. REMOVE AIR FUEL RATIO SENSOR (for Bank 2 Sensor 1) |
Using SST, remove the sensor.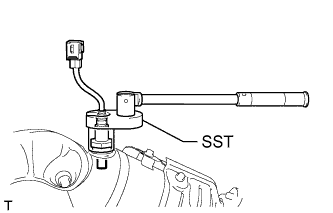
- SST
- 09224-00010